Here are some easy camping meals perfect for family trips, offering a variety of options for breakfast, lunch, dinner, and snacks. These meals are designed to be simple, requiring minimal prep and cooking time, making them ideal for outdoor cooking.
Camping Breakfast Ideas
- No-Weigh Cinnamon & Yogurt Pancakes: Quick and easy pancakes that don’t require measuring scales, perfect for a hearty breakfast
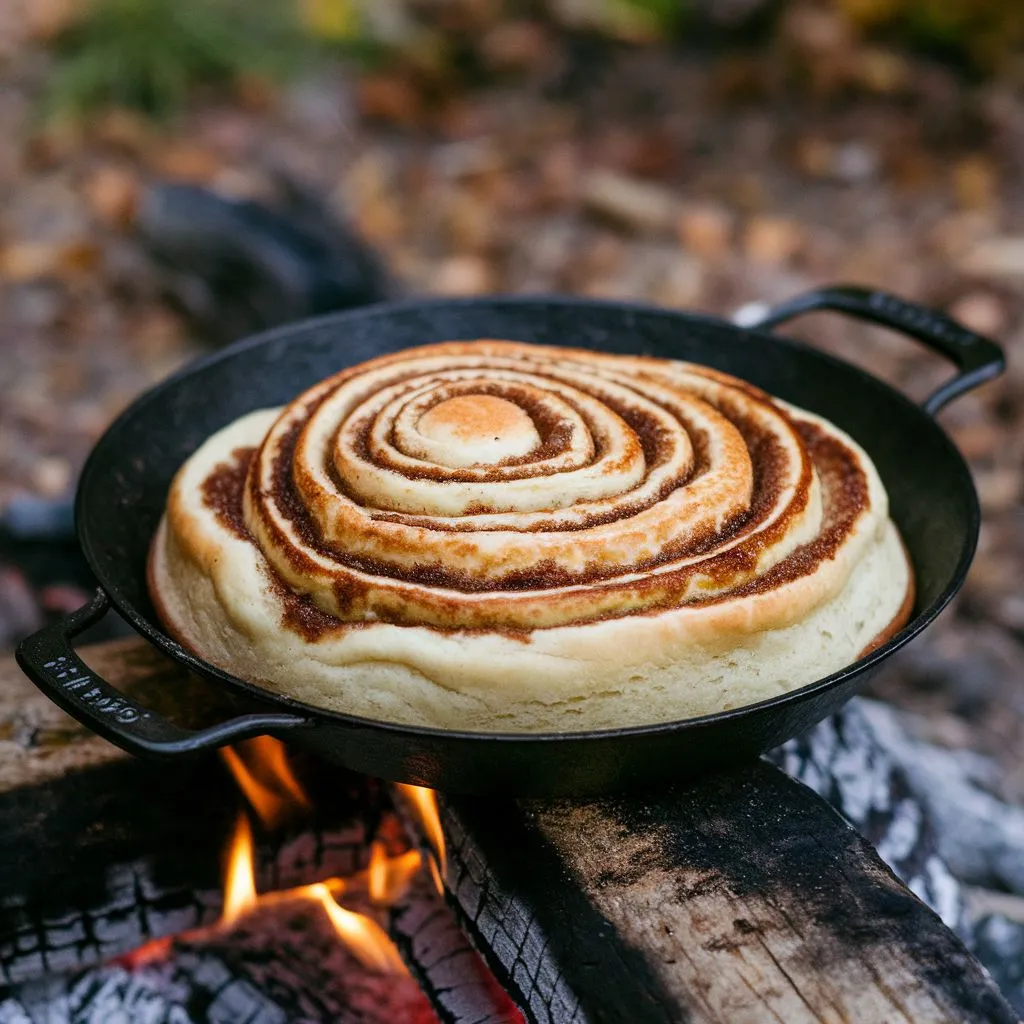
- Pie Iron Cinnamon Buns: Use refrigerated cinnamon rolls in a pie iron for a delightful breakfast treat cooked over the campfire
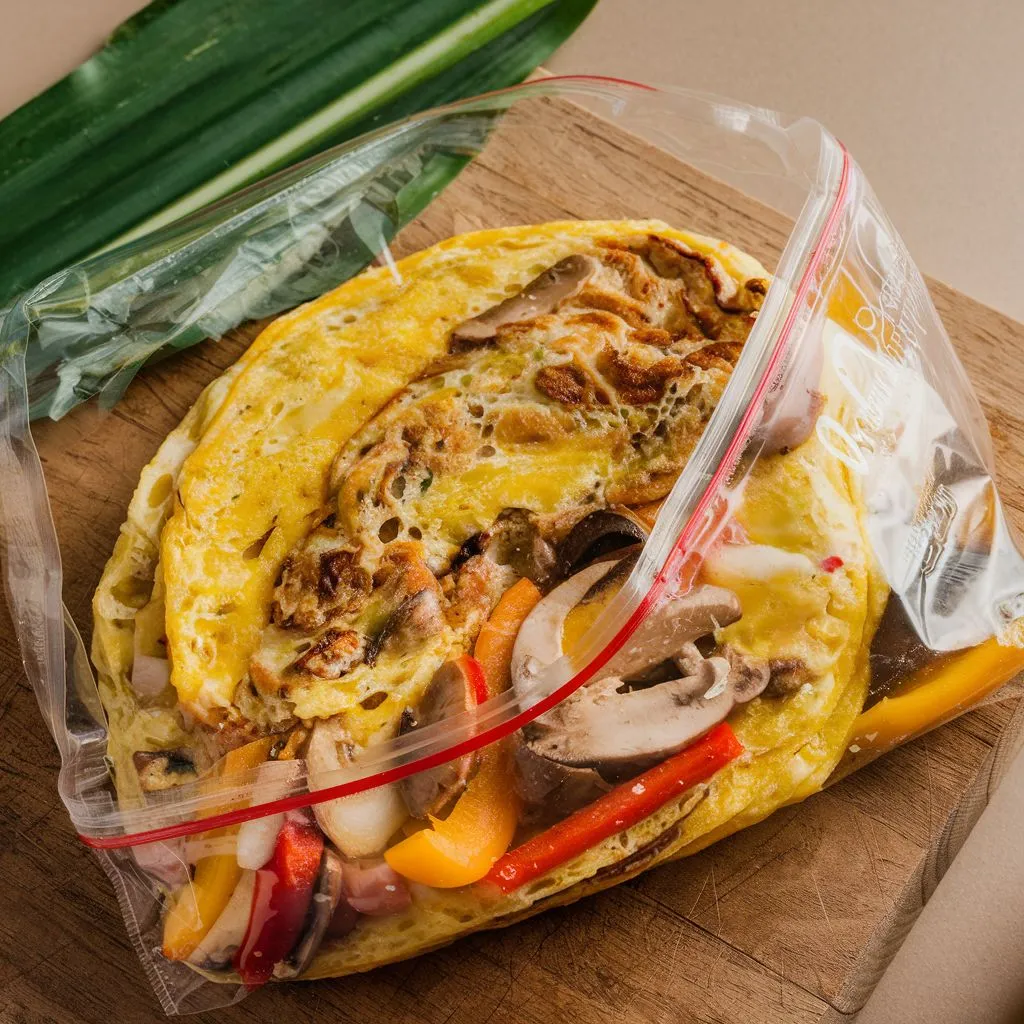
- Omelet in a Bag: Combine eggs and your choice of fillings in a ziplock bag, then cook in boiling water for a customizable breakfast
- Breakfast Burritos: Tortillas filled with scrambled eggs, chorizo (or other meats), cheese, and toppings like salsa or avocado
1. No-Weigh Cinnamon & Yogurt Pancakes, which are easy to prepare and perfect for a camping breakfast.

Ingredients
- Flour: 100 g (approximately ¾ cup)
- Baking Powder: 5 g (1 teaspoon)
- Sugar: 30 g (approximately 2 tablespoons)
- Cinnamon: 1 teaspoon
- Eggs: 2 large
- Plain Yogurt: 120 g (approximately ½ cup)
Equipment
- Large mixing bowl
- Non-stick pan or grill
- Ladle or measuring cup
Instructions
- Mix Dry Ingredients: In a large mixing bowl, combine the flour, baking powder, sugar, and cinnamon. Stir well to ensure all dry ingredients are evenly mixed.
- Add Wet Ingredients: Crack the eggs into the bowl with the dry ingredients. Add the plain yogurt and mix everything until you have a smooth batter.
- Rest the Batter: Allow the batter to rest for about 15 minutes. This helps improve the texture of the pancakes.
- Preheat Cooking Surface: While the batter is resting, preheat your non-stick pan or grill over medium heat. Make sure it’s hot enough to prevent sticking.
- Cook the Pancakes: Using a ladle, pour about ¼ cup of batter onto the hot cooking surface for each pancake. Cook for about 2 minutes on one side until bubbles form on the surface, then flip and cook for another 2 minutes until golden brown.
- Serve: Serve the pancakes warm with maple syrup and fresh or frozen berries on top.
Tips
- You can prepare the batter in advance and store it in a sealed container in the refrigerator overnight.
- These pancakes can also be frozen for later use but are best enjoyed fresh.
Enjoy your delicious, healthy pancakes while camping!
2. Pie Iron Cinnamon Buns, a fun and easy treat to make while camping.
Ingredients
- Pillsbury Cinnamon Rolls: 1 can (8 rolls)
- Non-stick Cooking Spray
Equipment
- Pie iron
- Campfire or grill
Instructions
- Prepare the Pie Iron: Spray the interior of the pie iron with non-stick cooking spray to prevent the cinnamon rolls from sticking.
- Open the Cinnamon Rolls: Carefully open the can of Pillsbury cinnamon rolls. You may want to do this away from the fire to avoid any accidents.
- Place the Roll in the Iron: Take one cinnamon roll and place it in one side of the prepped pie iron. Close and latch the iron securely.
- Cook Over Campfire: Place the pie iron over a small campfire or grill. Cook for about 15 minutes, turning it periodically to ensure even cooking. A low flame works best, allowing the dough to cook thoroughly without burning.
- Check for Doneness: After about 10 minutes, unlatch and flip the pie iron occasionally to check if the bun is cooked through. The outside should be golden brown.
- Remove and Frost: Once cooked, carefully remove the cinnamon bun from the pie iron using tongs or a fork. Drizzle with the icing that comes with the cinnamon rolls.
- Serve and Enjoy: Serve warm and enjoy your delicious pie iron cinnamon bun!
Tips
- If cooking for a crowd, you can use multiple pie irons or cook several batches.
- Consider using parchment paper in the pie iron for easier cleanup.
- Experiment with different toppings like nuts or chocolate chips for added flavor.
This recipe is perfect for a quick breakfast or a sweet treat while enjoying your camping trip!
3. Omelet in a Bag, a convenient and fun way to make breakfast while camping.
Ingredients
- Eggs: 2-3 per person
- Salt and pepper: to taste
- Fillings of your choice (e.g., diced vegetables, cheese, cooked meat)
- Cooking spray or oil: for greasing the bag
- Ziplock plastic bag: ensure it’s heat-resistant
Equipment
- Large pot for boiling water
- Ziplock bags (quart size)
- Tongs for handling hot bags
Instructions
- Prepare Ingredients: Crack the eggs into a mixing bowl. Add salt and pepper to taste, then whisk them until well combined. If you prefer, you can skip this step and mix directly in the bag.
- Spray the Bag: Lightly spray the inside of a quart-sized Ziplock bag with cooking spray or add a small amount of oil to prevent sticking.
- Add Ingredients to Bag:
- Pour the beaten eggs into the bag.
- Add your chosen fillings (e.g., diced bell peppers, onions, cheese, cooked ham, or bacon).
- Seal and Mix: Seal the bag tightly, ensuring there’s minimal air inside. Gently squish and mix the ingredients in the bag until everything is well combined.
- Boil Water: Bring a large pot of water to a boil over your campfire or portable stove.
- Cook the Bag: Carefully place the sealed bag into the boiling water. Ensure it is fully submerged. Cook for about 10-15 minutes or until the eggs are set.
- Remove and Serve: Using tongs, carefully remove the bag from the boiling water. Open the bag, and the omelet should slide out easily onto a plate. Be cautious as it will be hot.
- Customize Your Omelet: Add any additional toppings like salsa, hot sauce, or fresh herbs before serving.
Tips
- You can prepare bags ahead of time and store them in an ice-filled cooler until you’re ready to cook.
- Each person can customize their omelet with their favorite ingredients, making it a versatile meal option.
- Make sure to use heat-resistant bags to avoid melting during cooking.
Enjoy your delicious and easy campfire omelet!
4. Camping Breakfast Burritos, a delicious and hearty meal perfect for fueling your outdoor adventures.

Ingredients
- 1 lb ground breakfast sausage (pork or turkey)
- 12 large eggs
- 1 can (4 oz) Old El Paso Chopped Green Chiles, drained
- 2 cups shredded cheddar cheese (or your preferred cheese)
- Salt and pepper to taste
- 8 large flour tortillas (12-inch size)
- Optional toppings: salsa, avocado, hot sauce
Equipment
- Large skillet
- Mixing bowl
- Whisk
- Aluminum foil (for wrapping)
- Campfire or grill
Instructions
- Cook the Sausage: In a large skillet over medium heat, cook the ground sausage until it is browned and no longer pink. Use a spatula to break it up as it cooks.
- Prepare the Eggs: While the sausage is cooking, crack the eggs into a mixing bowl. Whisk them until well blended. Season with salt and pepper.
- Combine Ingredients: Once the sausage is fully cooked, pour the beaten eggs into the skillet. Stir frequently as the eggs begin to set. When they are mostly cooked but still slightly runny, add the drained green chiles and shredded cheese. Stir until the cheese is melted and everything is well combined.
- Warm the Tortillas: If desired, you can warm the tortillas in a microwave or over the campfire for a few seconds to make them more pliable.
- Assemble the Burritos: Lay out each tortilla on a flat surface. Spoon about 1/8 of the egg and sausage mixture onto the center of each tortilla. Fold in the sides and roll up tightly to form a burrito.
- Wrap in Foil: Wrap each burrito tightly in aluminum foil to keep them warm and prevent them from falling apart.
- Cook Over Campfire: Place the foil-wrapped burritos in hot coals or on a grill over medium heat. Cook for about 10-15 minutes, turning occasionally until heated through.
- Serve: Carefully unwrap the burritos from the foil and serve with optional toppings like salsa, avocado, or hot sauce.
Tips
- You can prepare these burritos ahead of time and store them in a cooler until you’re ready to cook.
- Feel free to customize your burritos with additional ingredients such as diced bell peppers, onions, or other favorite toppings.
- These burritos are great for breakfast but can also be enjoyed as a quick lunch or dinner while camping.
Enjoy your delicious camping breakfast burritos!
Camping Lunch Options
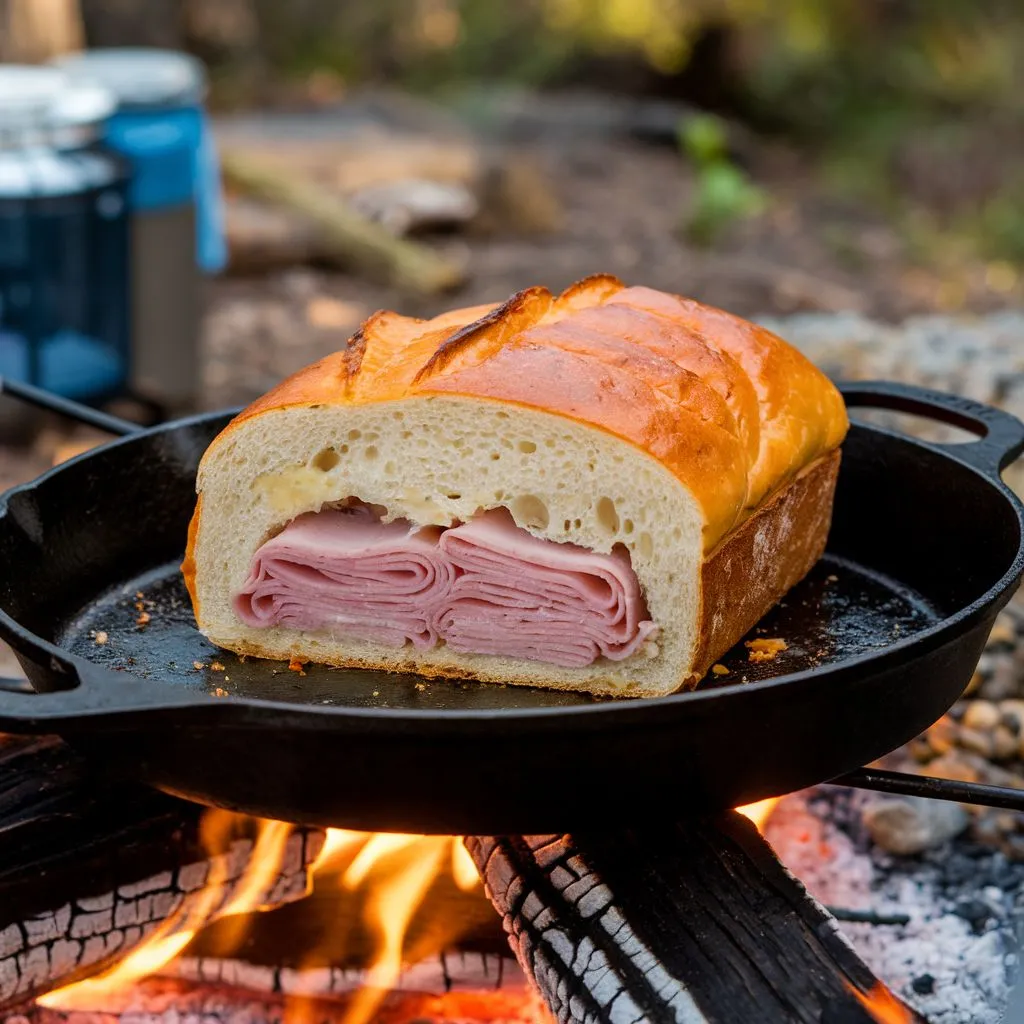
- Campfire Ham & Cheese Bread: A delicious bread stuffed with ham and cheese, cooked over the fire
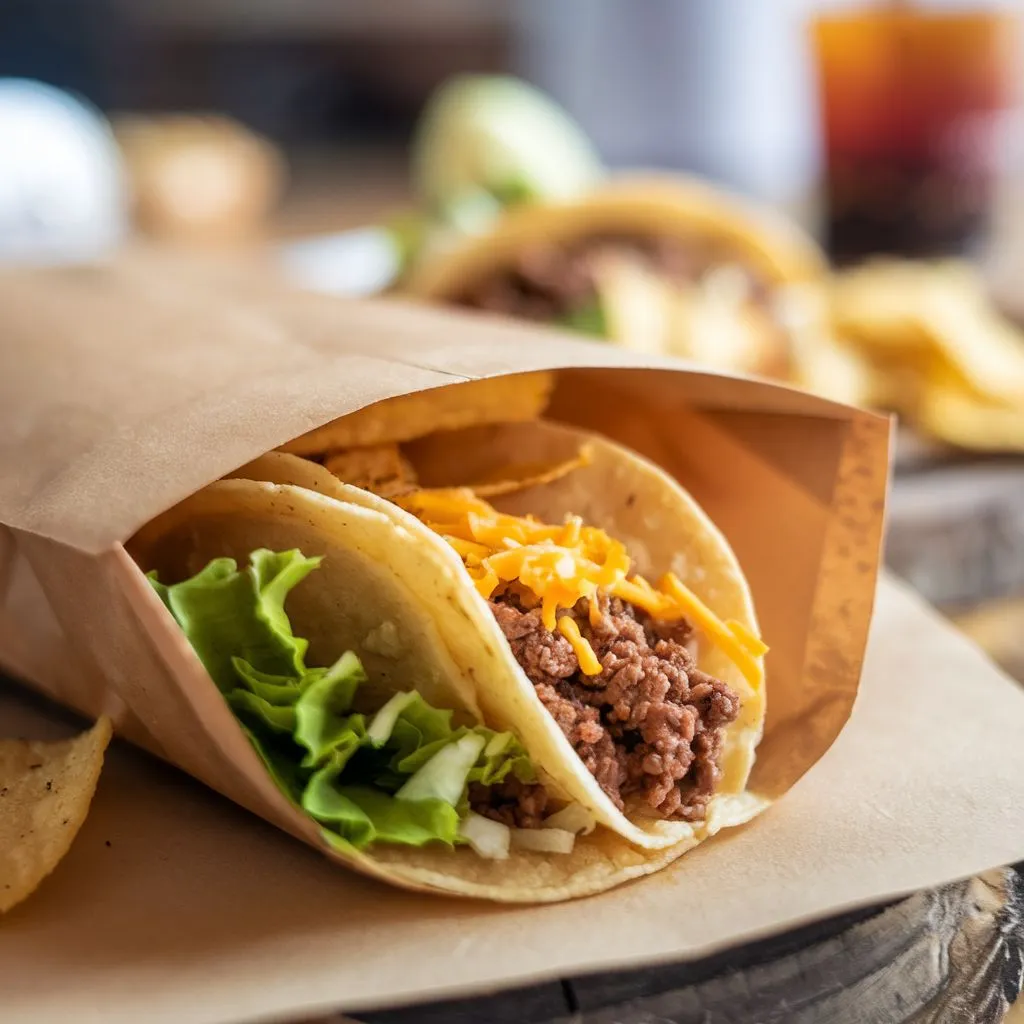
- Taco in a Bag: Open a bag of Doritos and fill it with taco meat and toppings for an easy, portable meal
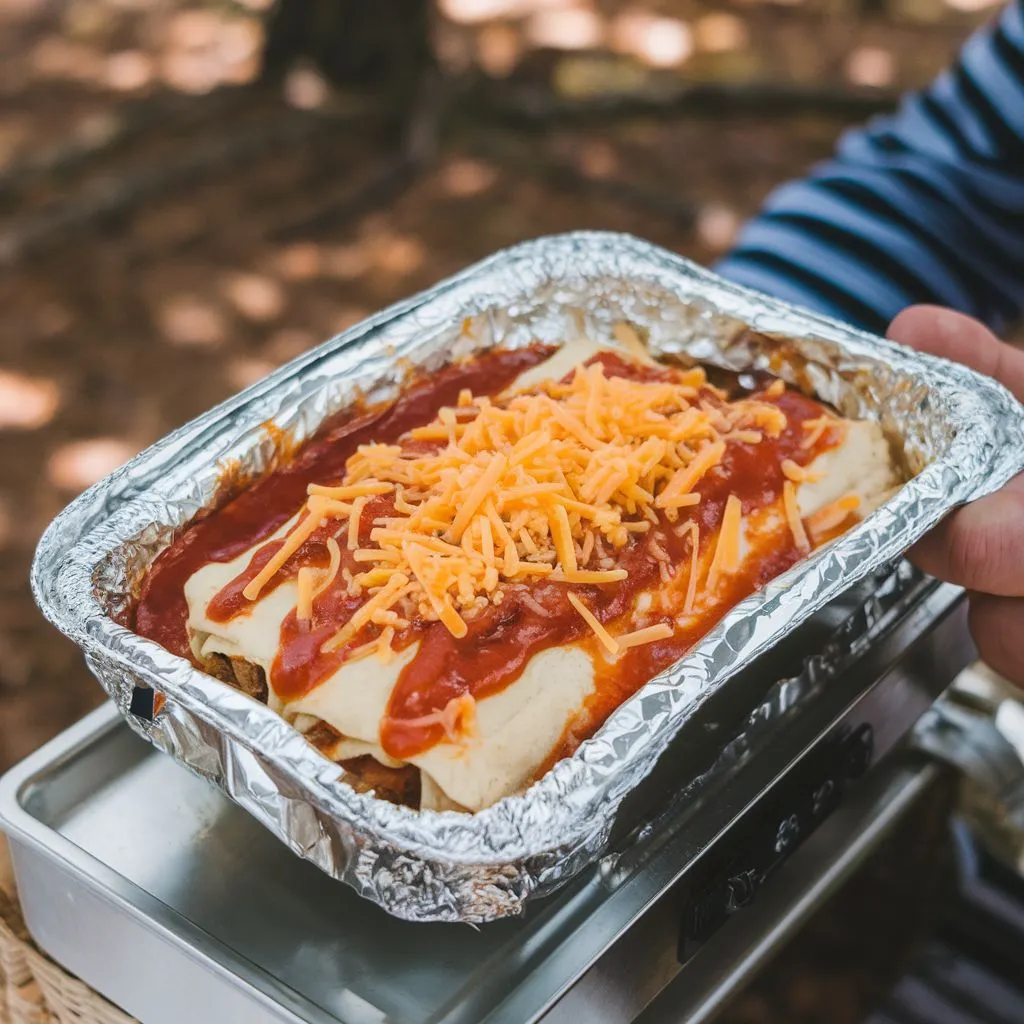
- Foil-Pack Chicken Enchiladas: Prepare these enchiladas at home and cook them on the grill or campfire when ready to eat
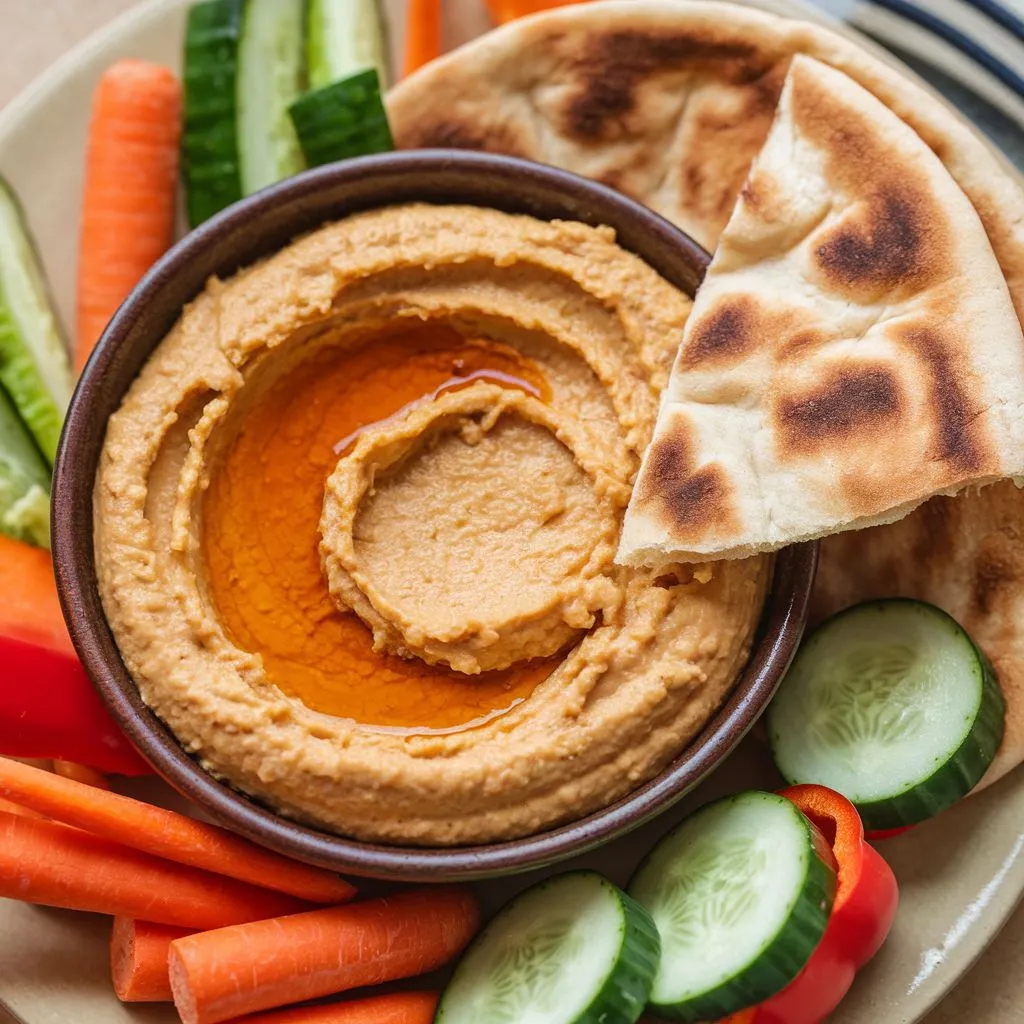
- Hummus with Pita and Veggies: A healthy option that requires no cooking; serve with fresh veggies for dipping
1. Campfire Ham & Cheese Bread, a delicious and easy meal perfect for lunch while camping.
Ingredients
- 1 loaf of French or Italian bread
- 1/4 cup butter, softened
- 1 tablespoon mustard (yellow or Dijon)
- 6 slices Swiss cheese
- 6 slices deli ham
Equipment
- Heavy-duty aluminum foil
- Campfire or grill
Instructions
- Prepare the Bread: Start by cutting the loaf of bread into 12 slices, but do not cut all the way through—stop about 1/4 inch from the bottom. This will keep the loaf intact while allowing you to pull apart the sandwiches later.
- Mix Butter and Mustard: In a small bowl, mix together the softened butter and mustard until well combined.
- Spread the Mixture: Spread the butter and mustard mixture on every other cut in the loaf. This will help flavor each sandwich.
- Stuff the Sandwiches: Insert one slice of Swiss cheese and one slice of ham into each of the buttered cuts to create six individual sandwiches.
- Wrap in Foil: Wrap the entire loaf in a large sheet of greased aluminum foil to create a foil packet. Make sure to seal it tightly to keep the heat in.
- Cook Over Campfire: Place the wrapped loaf on the grill or campfire coals over medium heat. Cook for about 20 minutes, turning the loaf every 5 to 10 minutes to ensure even cooking.
- Serve: Carefully open the foil packet (watch out for steam) and pull apart the sandwiches to serve.
Tips
- You can customize this recipe by using your favorite deli meats or cheeses.
- Consider adding thinly sliced vegetables like bell peppers or onions for extra flavor.
- This dish can be prepared ahead of time; just keep it wrapped in foil until you’re ready to cook.
Enjoy your delicious Campfire Ham & Cheese Bread during your next camping trip!
2. Taco in a Bag, also known as “Walking Tacos,” which are perfect for camping, parties, or a quick meal.
Ingredients
- 6 individual bags of tortilla chips (Doritos or your favorite brand)
- 1 lb ground beef (or ground turkey/chicken)
- 1 package taco seasoning mix (about 1 oz)
- 1 head of lettuce, chopped
- 3 tomatoes, diced
- 1 ½ cups shredded cheddar cheese
- 1 cup green onions, sliced
- Optional toppings: salsa, sour cream, guacamole, cilantro, lime
Equipment
- Large skillet
- Scissors (for opening bags)
- Serving utensils
Instructions
- Cook the Ground Beef: In a large skillet over medium heat, cook the ground beef until it is browned and no longer pink. Drain any excess fat. Add the taco seasoning mix and water according to the package instructions. Stir and let it simmer for a few minutes until thickened.
- Prepare the Bags: While the meat is cooking, prepare the individual bags of chips. You can choose to crush the chips slightly for easier eating or leave them whole.
- Assemble the Tacos:
- Carefully cut open the top of each bag of chips with scissors.
- Open the bag and layer in about 1/3 cup of the cooked taco meat.
- Add chopped lettuce, diced tomatoes, sliced green onions, and shredded cheese on top.
- Add Optional Toppings: Drizzle salsa and sour cream over the top if desired. You can also add guacamole or any other toppings you like.
- Mix and Enjoy: Close the bag and gently shake it to mix all the ingredients. Use a fork to eat directly from the bag—no plates needed!
Tips
- Customize your Taco in a Bag with different proteins (like shredded chicken or beans) or toppings based on your preference.
- This meal is portable and mess-free, making it great for kids and outdoor activities.
- Prepare all ingredients ahead of time to make assembly quick and easy while camping.
Enjoy your delicious Taco in a Bag!
3. Foil-Pack Chicken Enchiladas, a convenient and flavorful meal perfect for camping or grilling.
Ingredients
- 3 boneless skinless chicken breasts
- 1 can (10 oz) diced tomatoes with green chilies, drained
- 1 can (10 oz) green enchilada sauce
- 1 can (15 oz) black beans, drained and rinsed
- 1 teaspoon minced garlic
- 1 teaspoon cumin
- 1/2 teaspoon salt
- 1/2 teaspoon pepper
- 2 cups cooked rice
- 1 cup shredded cheddar cheese
Equipment
- Heavy-duty aluminum foil (12×12 inch sheets)
- Mixing bowl
- Grill or oven
Instructions
- Prepare the Chicken: Cut the chicken breasts into 1-inch pieces and pat them dry with a paper towel.
- Mix Ingredients: In a mixing bowl, combine the diced tomatoes, green enchilada sauce, black beans, minced garlic, cumin, salt, pepper, and cooked rice. Stir until well mixed.
- Assemble Foil Packs: Divide the chicken mixture evenly among four sheets of heavy-duty aluminum foil. Wrap the foil tightly around the contents to form secure packets.
- Grill Instructions:
- Preheat your grill over medium-high heat.
- Place the foil packets on the grill and close the lid.
- Cook for about 8 minutes on each side, or until the chicken is cooked through and reaches an internal temperature of 165°F.
- Add Cheese: Carefully unwrap each foil packet and top with shredded cheddar cheese. Rewrap the packets loosely and allow the residual heat to melt the cheese.
- Serve: Open the packets carefully (watch out for steam) and serve warm. Enjoy your delicious chicken enchiladas!
Oven Instructions
If you prefer to bake these in the oven:
- Preheat your oven to 425°F.
- Place the foil packets on a baking sheet.
- Bake for approximately 20-25 minutes until the chicken is cooked through.
Tips
- Customize your enchiladas by adding other ingredients like corn, bell peppers, or spices according to your taste.
- Serve with toppings such as sour cream, avocado, or fresh cilantro for added flavor.
This recipe provides a tasty and easy way to enjoy enchiladas without much fuss—perfect for your next camping trip!
4. Hummus with Pita and Veggies, perfect for a healthy snack or appetizer while camping.
Hummus Recipe
Ingredients
- 1 can (15 ounces) chickpeas, rinsed and drained (or 1½ cups cooked chickpeas)
- ¼ cup lemon juice (from about 1½ to 2 lemons)
- 1 medium garlic clove, roughly chopped
- ½ teaspoon fine sea salt, to taste
- ½ cup tahini
- 2 to 4 tablespoons ice water (more as needed)
- ½ teaspoon ground cumin
- 1 tablespoon extra-virgin olive oil
- Optional garnishes: drizzle of olive oil, paprika, chopped fresh parsley
Instructions
- Prepare the Chickpeas: If using canned chickpeas, drain and rinse them. If using dried chickpeas, soak and cook them until very soft.
- Blend the Ingredients: In a food processor, combine the chickpeas, lemon juice, garlic, and salt. Blend until smooth.
- Add Tahini and Water: Add tahini and 2 tablespoons of ice water to the mixture. Blend again until creamy. If the hummus is too thick, gradually add more ice water until you reach your desired consistency.
- Season: Add cumin and blend until fully incorporated. Taste and adjust seasoning as needed, adding more salt or lemon juice if desired.
- Serve: Transfer the hummus to a serving bowl. Drizzle with olive oil and sprinkle with paprika or fresh parsley for garnish.
Pita and Veggies
Ingredients
- Pita bread (store-bought or homemade)
- Fresh vegetables: carrots, cucumbers, bell peppers, cherry tomatoes, etc., cut into sticks or bite-sized pieces
Instructions for Serving
- Warm the Pita: Warm the pita bread over the campfire or grill for a few minutes until soft.
- Prepare Veggies: Wash and cut your choice of fresh vegetables into sticks or bite-sized pieces for easy dipping.
- Enjoy: Serve the hummus alongside warm pita bread and an assortment of fresh veggies for dipping.
Tips
- You can prepare the hummus in advance and store it in an airtight container in the refrigerator for up to a week.
- Customize your hummus by adding ingredients like roasted red peppers, sun-dried tomatoes, or spices to enhance flavor.
- This dish is not only nutritious but also portable, making it ideal for camping trips or picnics.
Enjoy your delicious Hummus with Pita and Veggies!
Camping Dinner Recipes
- Campfire Tacos: Layer tortilla chips with canned chili, cheese, and your favorite toppings for a quick meal
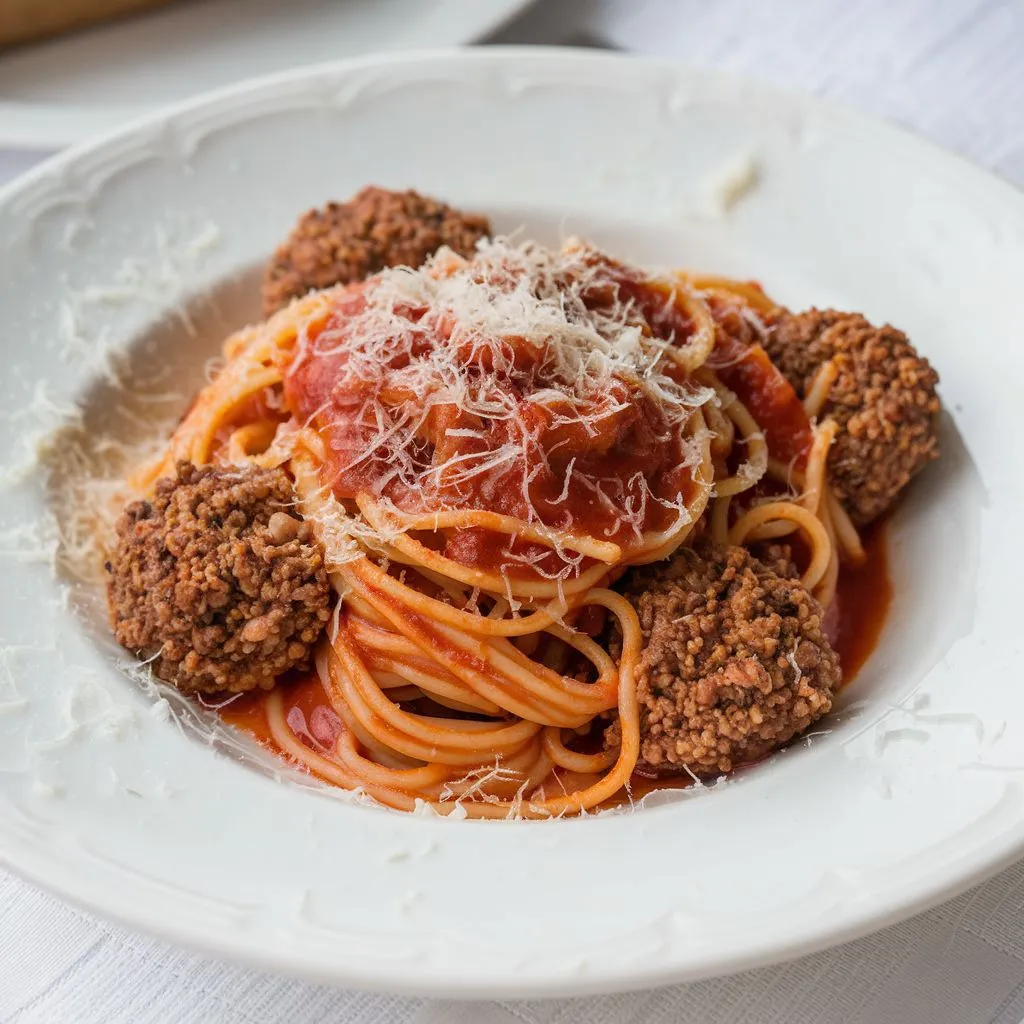
- Spaghetti with Jarred Sauce: A classic camping meal that’s easy to prepare; just boil noodles and heat the sauce
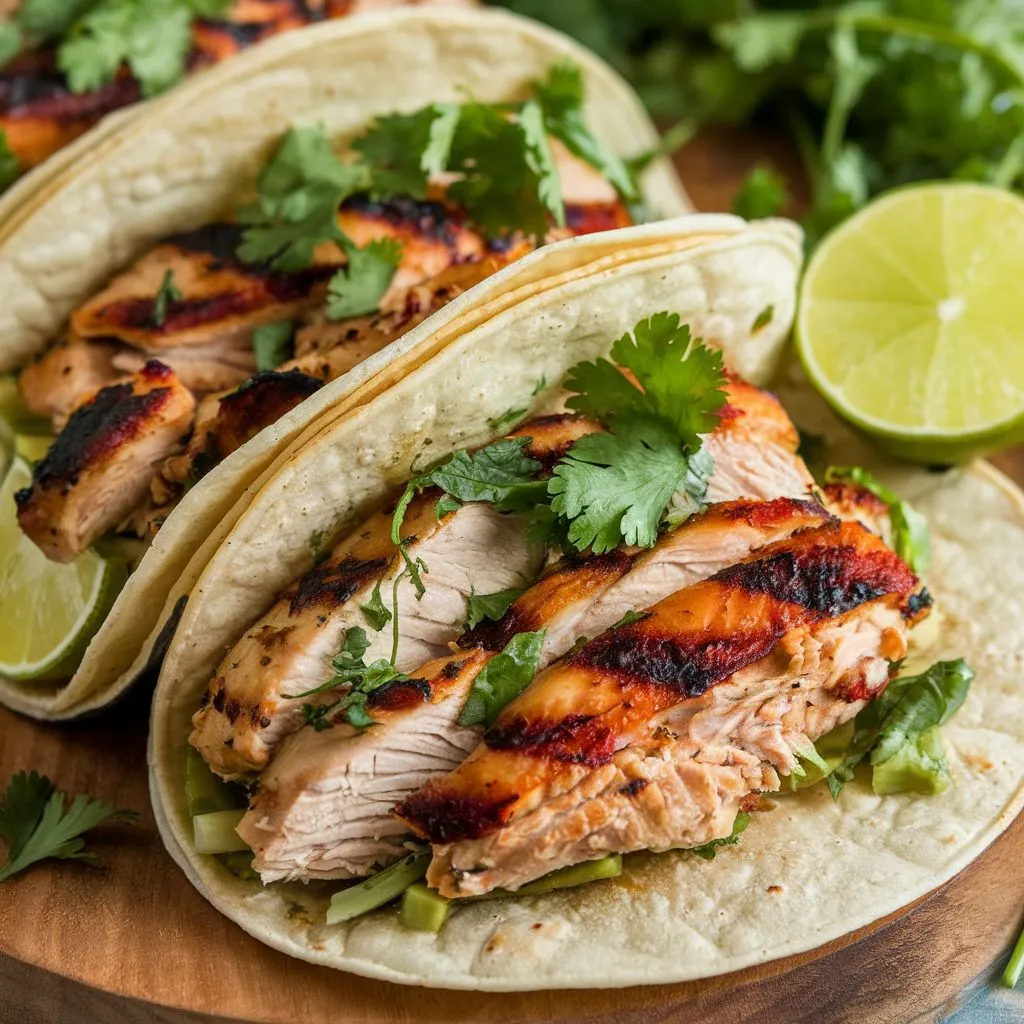
- Lime & Cilantro Grilled Chicken Tacos: Marinate chicken before your trip for flavorful tacos grilled over the fire
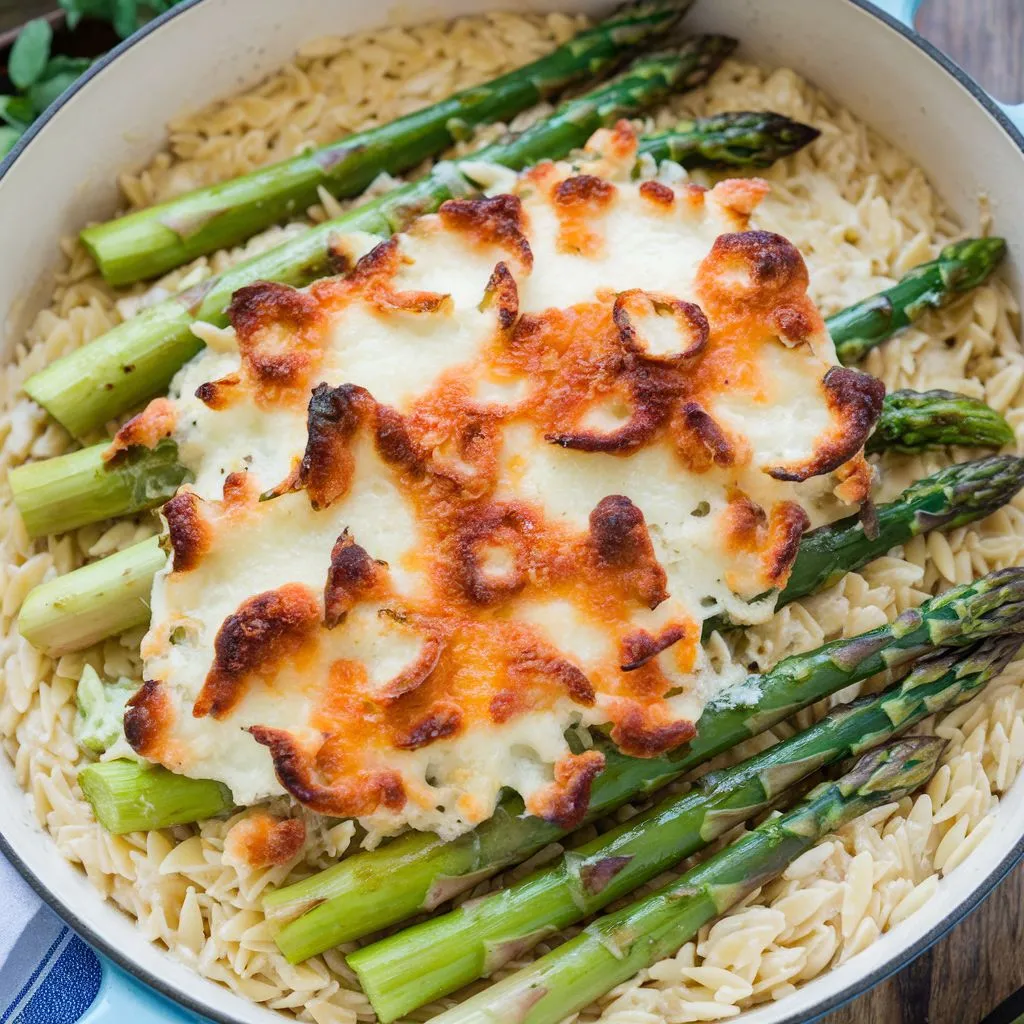
- Cheesy Asparagus One Pot Orzo: Cook orzo pasta with asparagus and cheese in one pot for minimal cleanup
1. Campfire Tacos, a fun and easy meal to prepare while camping.

Ingredients
- 1 lb ground beef (or turkey/chicken)
- 1 white onion, diced
- 1 packet taco seasoning mix
- 1 can (8 oz) tomato sauce
- 1 tablespoon ghee or cooking oil
- Flour or corn tortillas
- Toppings:
- Shredded cheddar cheese
- Lettuce, chopped
- Tomatoes, diced
- Avocado, sliced
- Cilantro, chopped
- Sour cream
- Salsa
Equipment
- Cast iron skillet or non-stick pan
- Campfire or portable grill
- Spatula
Instructions
- Cook the Taco Meat:
- Heat the ghee or cooking oil in a cast iron skillet over medium heat.
- Add the diced onion and ground beef (or turkey/chicken) to the skillet. Cook until the meat is browned and the onions are softened, breaking the meat apart with a spatula.
- Once browned, add the taco seasoning and tomato sauce to the meat mixture. Stir well to combine.
- Reduce the heat to low and let the mixture simmer for about 15 minutes, stirring occasionally. Add a little water if it starts to dry out.
- Prepare Toppings:
- While the meat is simmering, chop and prepare your desired toppings such as lettuce, tomatoes, avocado, and cilantro.
- Warm Tortillas:
- If using flour or corn tortillas, warm them over the campfire or on a grill for a few seconds on each side until they are soft and pliable.
- Assemble Tacos:
- Once the taco meat is ready, place a tortilla on a plate or flat surface.
- Spoon some of the taco meat mixtures onto the tortilla.
- Add your choice of toppings such as shredded cheese, lettuce, tomatoes, avocado, cilantro, sour cream, and salsa.
- Serve:
- Fold the tortilla over the filling and enjoy your delicious campfire tacos!
Tips
- You can customize your tacos with additional toppings like jalapeños, black olives, or hot sauce based on your preferences.
- This meal is great for sharing; set up a taco bar with all the toppings for everyone to build their own tacos.
- For a fun twist, try using individual bags of Doritos or Fritos instead of tortillas for “Walking Tacos.”
Enjoy your tasty Campfire Tacos!
2. Spaghetti with Jarred Sauce, perfect for a quick and easy meal while camping.
Ingredients
- 1 lb ground beef (or turkey/chicken)
- 1 tablespoon olive oil
- 1/2 onion, diced
- 3 garlic cloves, minced
- 24 oz jarred marinara sauce (your favorite brand)
- 16 oz dried spaghetti
- Salt and pepper to taste
- Optional toppings: grated Parmesan cheese, fresh basil
Equipment
- Large pot for boiling pasta
- Large skillet for the sauce
- Stirring spoon
Instructions
- Cook the Pasta:
- In a large pot, bring water to a boil. Add salt to the water.
- Add the spaghetti and cook according to package instructions until al dente. Drain and set aside.
- Prepare the Sauce:
- In a large skillet, heat olive oil over medium heat.
- Add the diced onion and sauté until translucent, about 3-5 minutes.
- Stir in the minced garlic and cook for an additional minute until fragrant.
- Brown the Meat:
- Add the ground beef (or turkey/chicken) to the skillet with onions and garlic. Cook until browned, breaking it apart with a spatula. Drain any excess fat if necessary.
- Add the Sauce:
- Pour in the jarred marinara sauce, stirring to combine with the meat mixture. Let it simmer for about 10 minutes, allowing the flavors to meld together. Season with salt and pepper to taste.
- Combine Pasta and Sauce:
- Add the drained spaghetti to the skillet with the sauce. Toss gently to coat the pasta evenly.
- Serve:
- Serve hot, topped with grated Parmesan cheese and fresh basil if desired.
Tips
- You can customize this recipe by adding vegetables like bell peppers or mushrooms to the sauce.
- For extra flavor, consider adding Italian seasoning or red pepper flakes.
- This meal is quick to prepare, making it ideal for camping or busy weeknights.
Enjoy your delicious Spaghetti with Jarred Sauce!
3. Lime & Cilantro Grilled Chicken Tacos, a flavorful and vibrant dish perfect for camping or any outdoor gathering.
Ingredients
For the Chicken Marinade
- 4 boneless skinless chicken thighs (about 1 lb) or chicken breasts
- 2 limes, juiced and zested
- 2 tablespoons olive oil
- 2 tablespoons chopped fresh cilantro
- 1 teaspoon salt
- 1 teaspoon chili powder (mild or spicy, depending on preference)
- 1 teaspoon ground cumin
- ½ teaspoon garlic powder
- ½ teaspoon ground coriander
Taco Assembly
- Tortillas: flour or corn, warmed
- Pico de gallo: diced tomatoes, onion, cilantro, jalapeño, and lime juice
- Shredded cheese: cheddar or Cotija
- Additional toppings: avocado slices, sour cream, lime wedges, and extra cilantro
Equipment
- Grill or campfire setup
- Mixing bowl
- Ziplock bag or airtight container for marinating
Instructions
- Prepare the Marinade:
- In a mixing bowl, combine the lime juice, lime zest, olive oil, chopped cilantro, salt, chili powder, cumin, garlic powder, and ground coriander. Whisk until well mixed.
- Marinate the Chicken:
- Place the chicken in a Ziplock bag or airtight container. Pour the marinade over the chicken, ensuring it is well coated. Seal the bag and refrigerate for at least 30 minutes (up to 2 hours for more flavor).
- Preheat the Grill:
- Preheat your grill to medium-high heat (about 400°F).
- Grill the Chicken:
- Remove the chicken from the marinade and place it on the grill. Cook for about 5-8 minutes on each side or until the internal temperature reaches 165°F. The chicken should have nice grill marks and be cooked through.
- Once done, remove the chicken from the grill and let it rest for about 5 minutes before slicing.
- Prepare Toppings:
- While the chicken is resting, prepare your toppings such as pico de gallo, shredded cheese, and sliced avocado.
- Assemble the Tacos:
- Slice or chop the grilled chicken into bite-sized pieces.
- Warm your tortillas on the grill for a few seconds on each side.
- To assemble each taco, place some grilled chicken in a tortilla and top with pico de gallo, shredded cheese, avocado slices, and any other desired toppings.
- Serve:
- Serve immediately with lime wedges on the side for an extra burst of flavor.
Tips
- You can make the marinade ahead of time and store it in your cooler for easy preparation at the campsite.
- Feel free to customize your tacos with other toppings like jalapeños or hot sauce based on your taste preferences.
- These tacos are great served with a side of chips and salsa or a fresh salad.
Enjoy your delicious Lime & Cilantro Grilled Chicken Tacos!
4. Cheesy Asparagus One Pot Orzo, a simple and delicious dish perfect for camping or a quick weeknight meal.
Ingredients
- ½ lb asparagus, trimmed and cut into 1-inch pieces
- 2 cups water
- 1 cup orzo pasta
- ½ tablespoon olive oil
- ½ teaspoon dried thyme
- ½ teaspoon dried basil
- ½ teaspoon garlic powder
- ½ teaspoon salt
- ¼ teaspoon red pepper flakes (optional, for heat)
- ½ cup shredded cheese (such as a four-cheese blend, Parmesan, or Asiago)
- ¼ cup sun-dried tomatoes, chopped
- 2 tablespoons pine nuts (optional, for added crunch)
Equipment
- Large pot or skillet
- Stirring spoon
Instructions
- Prepare the Asparagus: Cut off the tough ends of the asparagus and chop it into 1-inch pieces.
- Combine Ingredients: In a large pot, add the chopped asparagus, water, orzo, olive oil, dried thyme, dried basil, garlic powder, salt, and red pepper flakes. Stir to combine.
- Cook the Mixture: Bring the mixture to a low boil over medium-high heat. Once boiling, reduce the heat to medium-low and cover the pot. Cook for about 9 minutes, stirring occasionally, until the orzo is tender and most of the water is absorbed.
- Add Cheese and Extras: Remove the pot from heat and stir in the shredded cheese until melted. Then add the chopped sun-dried tomatoes and pine nuts (if using). Stir until everything is well combined.
- Season and Serve: Taste and adjust seasoning with additional salt and pepper if needed. Serve warm.
Tips
- This dish can easily be scaled up to feed a larger group by increasing the ingredients proportionally.
- Feel free to customize by adding other vegetables like spinach or peas for added nutrition.
- You can prepare this meal ahead of time and simply heat it when ready to serve.
Enjoy your delicious Cheesy Asparagus One Pot Orzo!
Camping Snacks and Desserts
- Trail Mix: Pre-make trail mix with nuts, dried fruits, and chocolate for a quick snack on the go
- Campfire Banana Boats: Slice bananas lengthwise, fill with chocolate or marshmallows, wrap in foil, and heat over the fire
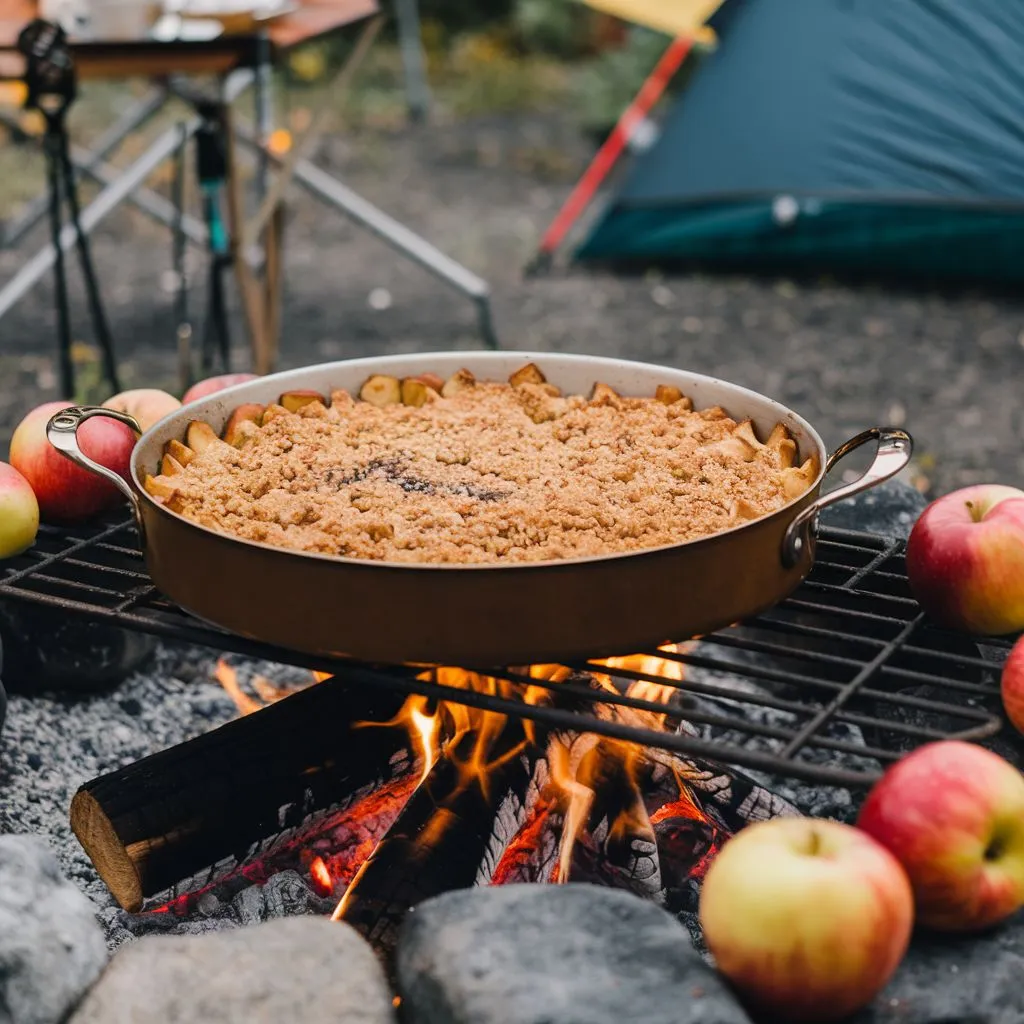
- Campfire Apple Crisp: Sauté apples with butter and brown sugar, then top with granola for an easy dessert
1. Here’s a detailed guide on how to make your own Trail Mix, a versatile and nutritious snack perfect for camping, hiking, or everyday munching.
Basic Trail Mix Ingredients

- Nuts: Choose raw or lightly salted nuts. Options include:
- Seeds: Add some crunch with seeds like:
- Sunflower seeds
- Pumpkin seeds (pepitas)
- Dried Fruit: For sweetness, consider:
- Chocolate or Sweets (optional): For a treat, add:
- Dark chocolate chips
- M&Ms or other candy-coated chocolates
- Yogurt-covered raisins
- Extras (optional): Enhance texture and flavor with:
- Granola or cereal pieces
- Pretzels
- Coconut flakes
Suggested Ratios for Trail Mix
- 1 ½ cups nuts
- 1 cup seeds
- 1 cup dried fruit
- ½ cup chocolate or sweets (optional)
- Spices: A pinch of sea salt or cinnamon can add flavor.
Instructions to Make Trail Mix
- Combine Ingredients: In a large mixing bowl, combine all your chosen ingredients. Adjust the ratios based on your preferences.
- Mix Well: Stir the mixture thoroughly to ensure an even distribution of all components.
- Store: Transfer the trail mix to an airtight container or resealable bag for easy storage and portability. It can be kept at room temperature for several weeks.
Tips for Customization
- Healthy Options: Opt for unsweetened dried fruits and raw nuts to keep it healthier.
- Flavor Variations: Experiment with different spices like nutmeg or chili powder for a unique twist.
- Themed Mixes: Create themed mixes by focusing on specific ingredients, such as a tropical mix with coconut and dried pineapple, or a chocolate lover’s mix with various types of chocolate and nuts.
Example Trail Mix Recipes
Classic Trail Mix
- 3/4 cup raw almonds
- 3/4 cup raw cashews
- 1/2 cup sunflower seeds
- 1/2 cup dried cranberries
- 1/2 cup dark chocolate chips
Energy Boost Mix
- 1 cup peanuts
- 1/2 cup pumpkin seeds
- 1/2 cup dried apricots, chopped
- 1/4 cup dark chocolate chunks
Sweet & Salty Mix
- 1 cup mixed nuts (almonds, cashews, walnuts)
- 1/2 cup pretzels
- 1/2 cup M&Ms
- 1/2 cup raisins
With these guidelines, you can easily create a delicious and personalized trail mix that suits your taste and nutritional needs! Enjoy your homemade snack on your next adventure!
2. Campfire Banana Boats, a fun and easy dessert perfect for camping or outdoor gatherings.

Ingredients
- Ripe bananas: 1 per person
- Chocolate chips: semi-sweet or milk chocolate
- Mini marshmallows
- Optional toppings:
- Peanut butter
- Chopped nuts
- Crushed graham crackers (for a s’mores twist)
- Candy bars (like Snickers or Reese’s)
- Shredded coconut
Equipment
- Aluminum foil (12-inch squares)
- Campfire or grill
- Tongs
Instructions
- Prepare the Bananas:
- Take a ripe banana and leave it in its peel. Make a deep lengthwise cut along the inside curve of the banana, being careful not to cut all the way through. This creates a pocket for the fillings.
- Stuff the Bananas:
- Gently pull the peel apart slightly to open the cut. Fill the pocket with your choice of chocolate chips, mini marshmallows, and any other toppings you desire.
- Wrap the Bananas:
- Place each stuffed banana on a square of aluminum foil. Wrap it tightly, leaving a little space at the top to allow for steam to escape.
- Cook Over Campfire:
- Place the wrapped bananas in the coals of a campfire or on a grill over medium heat. Cook for about 8-10 minutes, or until the bananas are soft and the fillings are melted.
- Check for Doneness:
- Carefully remove the banana boats from the heat using tongs. Allow them to cool slightly before unwrapping, as they will be hot and steamy.
- Serve:
- Unwrap the foil and enjoy your gooey, delicious banana boats directly from the peel or scoop out into a bowl. You can add crushed graham crackers or additional toppings if desired.
Tips
- Flavor Variations: Feel free to experiment with different combinations of toppings based on your preferences.
- Cooking Method: If you have access to an oven, you can also bake these at 400°F for about 10-15 minutes.
- Safety First: Be cautious when unwrapping the foil as steam can escape and cause burns.
Enjoy your delightful Campfire Banana Boats as a sweet treat around the fire!
3. Campfire Apple Crisp, a delicious and easy dessert perfect for enjoying around the campfire.
Ingredients
For the Apple Filling
- 6-9 apples, peeled, cored, and sliced (a mix of tart apples like Granny Smith and sweet apples like Honeycrisp works well)
- 3 tablespoons lemon juice
- ¼ cup brown sugar
- 2 teaspoons cinnamon
- 1 tablespoon cornstarch (optional, for thickening)
For the Crumb Topping
- 1 cup all-purpose flour
- 1 cup brown sugar
- 1 cup quick oats
- ½ teaspoon cinnamon
- ½ teaspoon nutmeg (optional)
- ¾ cup butter, melted
Equipment
- Heavy-duty aluminum foil (12×12 inch squares)
- Campfire or grill
- Mixing bowls
- Spoon for mixing
Instructions
- Prepare the Apples:
- In a large bowl, combine the sliced apples with lemon juice, brown sugar, cinnamon, and cornstarch (if using). Toss until the apples are evenly coated.
- Make the Crumb Topping:
- In another bowl, mix the flour, brown sugar, quick oats, cinnamon, and nutmeg. Pour in the melted butter and stir until the mixture resembles coarse crumbs.
- Assemble the Foil Packets:
- Tear off several sheets of aluminum foil. Place a portion of the apple mixture in the center of each sheet.
- Generously sprinkle the crumb topping over the apples.
- Seal the Packets:
- Fold up the edges of the foil to create a sealed packet, leaving some space for steam to circulate inside.
- Cook Over Campfire:
- Place the foil packets on a grate over the campfire or a preheated grill. Cook for about 15-20 minutes, or until the apples are tender and the topping is golden brown. If using a campfire, keep them away from direct flames to prevent burning.
- Check for Doneness:
- Carefully open one packet to check if the apples are soft and the topping is bubbly. If not done, reseal and continue cooking for a few more minutes.
- Serve:
- Once cooked, let them cool slightly before carefully opening the packets (watch out for steam). Serve warm with optional toppings like vanilla ice cream or caramel sauce.
Tips
- You can prepare the apple filling and crumb topping ahead of time to make assembly quicker at the campsite.
- Feel free to customize by adding nuts or dried fruits to the topping for extra flavor and texture.
- This dessert is not only great for camping but can also be made in your backyard over a fire pit!
Enjoy your delightful Campfire Apple Crisp!
These meals not only simplify the cooking process while camping but also ensure that everyone in the family can enjoy delicious food without extensive preparation.
THANK YOU FOR VISITING THE SITE
