This document explores the diverse Traeger Grills Low Carb Recipe meal options available to showcase the versatility of the Traeger Grill in preparing a variety of delicious meals. From breakfast to dinner and across multiple protein categories, this guide highlights the organization and content of the low-carb recipes section, making it easier for enthusiasts to enjoy flavorful, low-carb cooking.
💎Introduction to Low Carb Cooking with Traeger
Overview of Low Carb Cooking on a Traeger
Low-carb grilling with a Traeger emphasizes the grill’s ability to prepare meat, seafood, and low-starch vegetables while infusing them with rich wood-fired flavors. This section introduces the concept of low-carb cooking, showcasing how the Traeger grill can be a valuable tool in creating healthy and satisfying meals.
Low Carb Recipes by Meal Time
❇️Low Carb Breakfast Recipes
Start your day with quick and delicious breakfast options low in carbs. Here are two standout recipes:
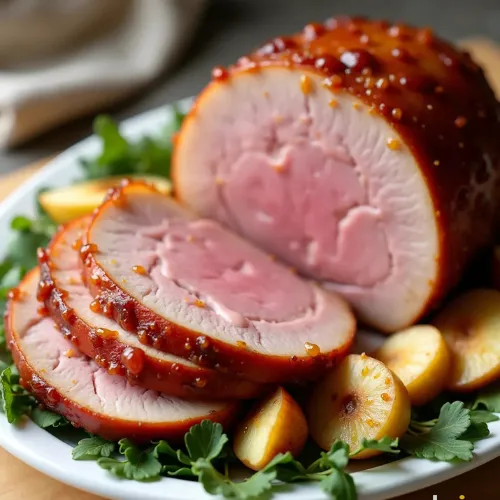
1. Apple & Bourbon Glazed Ham
Ingredients
- For the Ham:
- 1 fully cooked bone-in ham (about 8-10 pounds)
- 1 cup apple juice
- For the Glaze:
- 1 cup brown sugar
- 1/2 cup bourbon
- 1/4 cup Dijon mustard
- 1/4 cup apple cider vinegar
- 1 teaspoon ground cinnamon
- 1/2 teaspoon ground cloves
- 1/2 teaspoon black pepper
- 2 cups diced apples (preferably Granny Smith or Honeycrisp)
Instructions
Step 1: Prepare the Ham
- Preheat your oven to 325°F (163°C).
- Place the ham in a roasting pan, cut side down. Pour the apple juice over the ham.
- Cover the ham loosely with aluminum foil.
Step 2: Bake the Ham
- Bake the ham in the preheated oven for about 15 minutes per pound, or until heated through (internal temperature should reach 140°F (60°C)).
- Remove the foil during the last 30 minutes of baking.
Step 3: Make the Glaze
- In a saucepan over medium heat, combine the brown sugar, bourbon, Dijon mustard, apple cider vinegar, ground cinnamon, ground cloves, and black pepper.
- Stir until the sugar is dissolved and the mixture is well combined.
- Add the diced apples and cook for about 5-7 minutes, until they are slightly softened.
Step 4: Glaze the Ham
- Brush the glaze generously over the ham during the last 30 minutes of baking.
- Continue to bake uncovered, basting with more glaze every 10 minutes.
Step 5: Serve
- Once done, remove the ham from the oven and let it rest for about 15 minutes before slicing.
- Serve with additional glaze on the side.
2. Applewood Smoked Bacon

Ingredients
- Pork Belly:
- 5 pounds pork belly (skinless)
- Curing Mixture:
- 1/4 cup kosher salt
- 1/4 cup brown sugar
- 1 tablespoon black pepper
- 1 tablespoon smoked paprika (optional for added flavor)
- 1 teaspoon pink curing salt (Prague Powder #1) – optional but recommended for color and preservation
- For Smoking:
- Applewood chips (soaked in water for at least 30 minutes)
Instructions
Step 1: Prepare the Cure
- In a bowl, mix together the kosher salt, brown sugar, black pepper, smoked paprika (if using), and pink curing salt.
Step 2: Cure the Pork Belly
- Rub the curing mixture all over the pork belly, ensuring it is well-coated.
- Place the pork belly in a large resealable plastic bag or a non-reactive container.
- Refrigerate for 7 to 10 days, turning the bag or pork belly every couple of days to redistribute the cure.
Step 3: Rinse and Dry
- After curing, remove the pork belly from the bag and rinse it thoroughly under cold water to remove excess cure.
- Pat it dry with paper towels.
- Place it on a wire rack over a baking sheet and let it air-dry in the refrigerator for about 12 hours. This helps form a pellicle, which is essential for smoking.
Step 4: Smoke the Bacon
- Preheat your smoker to 175°F (80°C).
- Add soaked applewood chips to the smoker box or directly onto the coals if using a charcoal smoker.
- Place the pork belly in the smoker and smoke until it reaches an internal temperature of 150°F (65°C), which usually takes about 2 to 3 hours.
Step 5: Cool and Slice
- Once smoked, remove the bacon from the smoker and let it cool completely.
- Wrap it in plastic wrap or foil and refrigerate until firm, about 2 hours.
- Slice into strips using a sharp knife.
Step 6: Cook and Enjoy
- Cook slices of your homemade applewood smoked bacon in a skillet over medium heat until crispy.
- Enjoy it in breakfast dishes, sandwiches, or as a flavorful addition to salads.
❇️Low Carb Lunch Recipes
For lunch, enjoy homemade smoked sausage and classic barbecued chicken recipes that can be customized to fit your dietary needs:
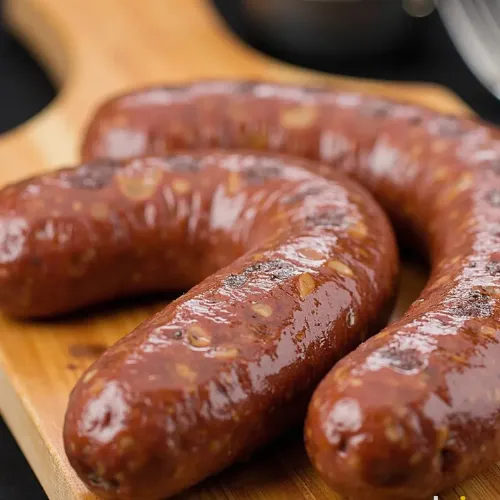
1. Traeger Smoked Sausage
Ingredients
- Sausage:
- 5 pounds of your choice of sausage (fresh Italian, bratwurst, or smoked sausage)
- Seasoning (optional):
- 2 tablespoons garlic powder
- 2 tablespoons onion powder
- 1 tablespoon paprika
- 1 tablespoon black pepper
- 1 tablespoon salt
- 1 teaspoon cayenne pepper (optional for heat)
- For Smoking:
- Wood pellets (hickory, apple, or your preferred flavor)
Instructions
Step 1: Prepare the Sausage
- If using fresh sausage links, you can season them with the optional seasoning mix for added flavor. Combine garlic powder, onion powder, paprika, black pepper, salt, and cayenne pepper in a bowl and rub it over the sausage.
Step 2: Preheat the Traeger
- Preheat your Traeger grill to 225°F (107°C). This low temperature will allow the sausages to absorb the smoke flavor.
Step 3: Smoke the Sausage
- Place the sausages directly on the grill grates.
- Close the lid and smoke for about 2 to 3 hours, or until they reach an internal temperature of 160°F (71°C). Use a meat thermometer to check for doneness.
Step 4: Sear (Optional)
- For a nice crust, increase the Traeger temperature to 400°F (204°C) during the last 10-15 minutes of cooking.
- Sear the sausages briefly on each side until they are nicely browned.
Step 5: Rest and Serve
- Once done, remove the sausages from the grill and let them rest for about 5 minutes.
- Serve hot with your favorite sides, buns, or toppings.
2. Traeger BBQ Chicken Breasts

Ingredients
- Chicken:
- 4 boneless, skinless chicken breasts (about 6 ounces each)
- Marinade/Seasoning:
- 1/4 cup olive oil
- 1/4 cup apple cider vinegar
- 2 tablespoons Dijon mustard
- 2 tablespoons honey
- 2 teaspoons garlic powder
- 1 teaspoon onion powder
- 1 teaspoon smoked paprika
- 1 teaspoon salt
- 1/2 teaspoon black pepper
- BBQ Sauce:
- Your favorite barbecue sauce (about 1 cup, for basting)
- For Smoking:
- Wood pellets (hickory, mesquite, or your preferred flavor)
Instructions
Step 1: Marinate the Chicken
- In a bowl, whisk together the olive oil, apple cider vinegar, Dijon mustard, honey, garlic powder, onion powder, smoked paprika, salt, and black pepper.
- Place the chicken breasts in a resealable plastic bag or shallow dish and pour the marinade over them.
- Seal the bag or cover the dish and refrigerate for at least 1 hour, or up to overnight for more flavor.
Step 2: Preheat the Traeger
- Preheat your Traeger grill to 350°F (177°C).
Step 3: Smoke the Chicken
- Remove the chicken from the marinade and let any excess drip off.
- Place the chicken breasts directly on the grill grates.
- Close the lid and cook for about 20-30 minutes, or until the internal temperature reaches 165°F (74°C).
Step 4: Baste with BBQ Sauce
- During the last 5-10 minutes of cooking, brush your favorite barbecue sauce over the chicken breasts.
- Close the lid and allow the sauce to caramelize slightly.
Step 5: Rest and Serve
- Once cooked, remove the chicken from the grill and let it rest for about 5 minutes.
- Serve with additional BBQ sauce on the side and enjoy your flavorful Traeger BBQ Chicken Breasts!
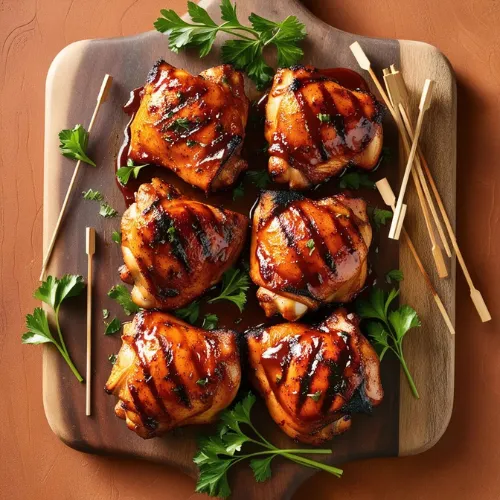
3. Competition BBQ Chicken Thighs
Ingredients
- Chicken Thighs:
- 8 bone-in, skin-on chicken thighs
- Brine (optional but recommended):
- 4 cups water
- 1/4 cup kosher salt
- 1/4 cup brown sugar
- 2 tablespoons apple cider vinegar
- 1 tablespoon garlic powder
- 1 tablespoon onion powder
- Rub:
- 1/4 cup paprika
- 2 tablespoons brown sugar
- 2 tablespoons garlic powder
- 2 tablespoons onion powder
- 1 tablespoon black pepper
- 1 tablespoon salt
- 1 teaspoon cayenne pepper (adjust for heat preference)
- BBQ Sauce:
- Your favorite barbecue sauce (about 1 cup, for basting)
- For Smoking:
- Wood pellets or chunks (hickory, cherry, or your preferred flavor)
Instructions
Step 1: Brine the Chicken (Optional)
- In a large bowl, combine water, kosher salt, brown sugar, apple cider vinegar, garlic powder, and onion powder. Stir until dissolved.
- Add the chicken thighs to the brine, ensuring they are fully submerged. Cover and refrigerate for at least 2 hours or up to overnight.
Step 2: Prepare the Rub
- In a small bowl, mix all the rubbed ingredients: paprika, brown sugar, garlic powder, onion powder, black pepper, salt, and cayenne pepper.
- Remove the chicken thighs from the brine (if brined) and pat them dry with paper towels.
Step 3: Apply the Rub
- Generously coat each chicken thigh with the rub, ensuring even coverage on both sides.
- Let the thighs sit at room temperature for about 30 minutes to allow the rub to adhere.
Step 4: Preheat the Grill/Smoker
- Preheat your grill or smoker to 275°F (135°C).
Step 5: Smoke the Chicken Thighs
- Place the chicken thighs, skin-side up, on the grill grates.
- Close the lid and smoke for about 1.5 to 2 hours, or until they reach an internal temperature of 175°F (80°C).
Step 6: Baste with BBQ Sauce
- During the last 30 minutes of cooking, brush your favorite barbecue sauce over the chicken thighs.
- For added flavor and a nice glaze, you can repeat basting every 10 minutes.
Step 7: Rest and Serve
- Once cooked, remove the chicken thighs from the grill and let them rest for about 10 minutes.
- Serve hot with additional BBQ sauce on the side.
❇️Low Carb Snack Recipes
Replace carb-heavy snacks with these tasty alternatives:
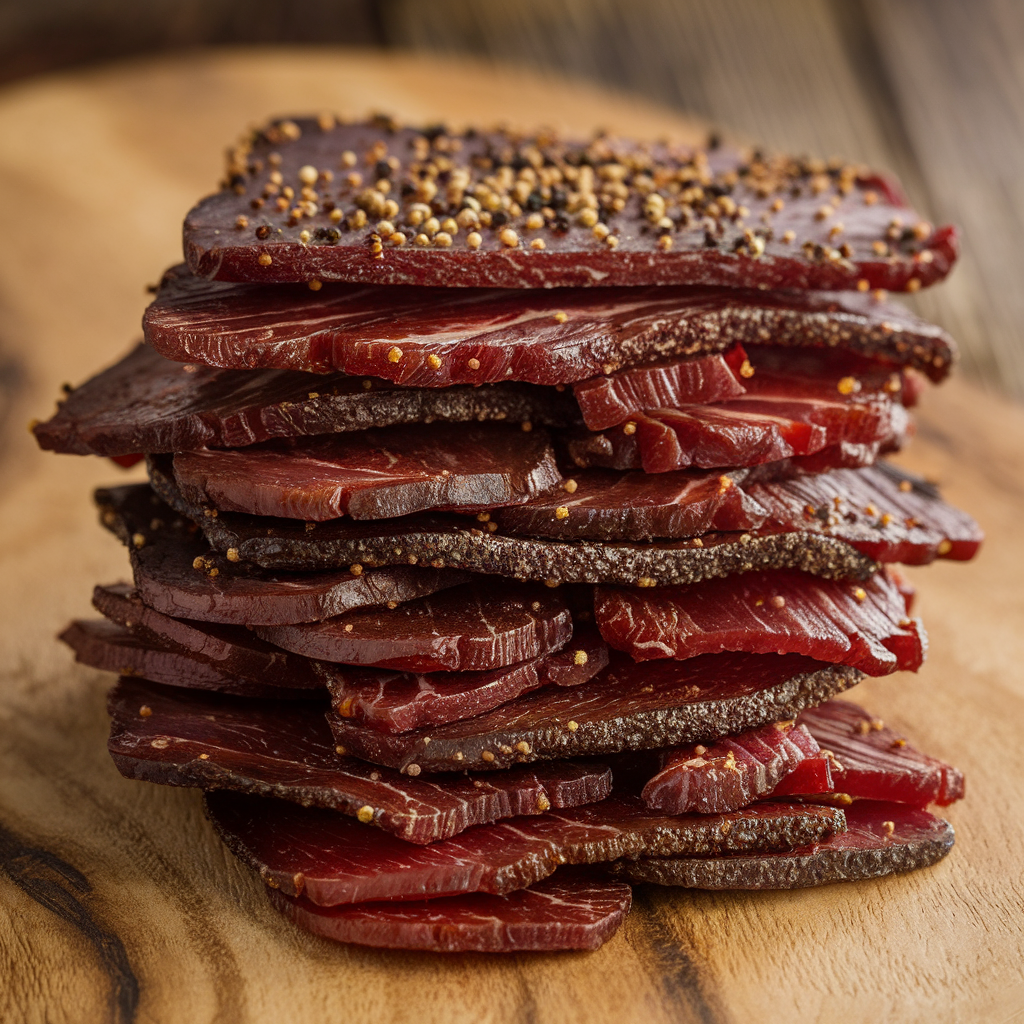
1. Smoked Paleo Beef Jerky
Ingredients
- Beef:
- 2 pounds lean beef (such as flank steak, sirloin, or round)
- Marinade:
- 1/4 cup coconut aminos (or soy sauce if not strictly paleo)
- 2 tablespoons apple cider vinegar
- 1 tablespoon Worcestershire sauce (check for paleo-friendly options)
- 1 tablespoon honey or maple syrup
- 1 teaspoon garlic powder
- 1 teaspoon onion powder
- 1 teaspoon smoked paprika
- 1/2 teaspoon black pepper
- 1/2 teaspoon red pepper flakes (optional for heat)
Instructions
Step 1: Prepare the Beef
- Freeze the beef for 1-2 hours until it is firm but not completely frozen. This makes it easier to slice.
- Slice the beef against the grain into thin strips, about 1/4 inch thick.
Step 2: Make the Marinade
- In a bowl, whisk together coconut aminos, apple cider vinegar, Worcestershire sauce, honey or maple syrup, garlic powder, onion powder, smoked paprika, black pepper, and red pepper flakes.
Step 3: Marinate the Beef
- Place the sliced beef in a resealable plastic bag or a shallow dish.
- Pour the marinade over the beef, ensuring all pieces are well-coated.
- Seal the bag or cover the dish and refrigerate for at least 4 hours, preferably overnight, for maximum flavor.
Step 4: Preheat the Smoker
- Preheat your smoker to 160°F (71°C). Use wood chips like hickory, mesquite, or applewood for added flavor.
Step 5: Smoke the Beef Jerky
- Remove the beef from the marinade and pat dry with paper towels to remove excess moisture.
- Arrange the beef strips in a single layer on the smoker racks, ensuring they do not overlap.
- Smoke for about 4 to 6 hours, or until the jerky is dry and firm but still slightly pliable.
Step 6: Cool and Store
- Once done, remove the jerky from the smoker and let it cool completely at room temperature.
- Store in an airtight container or vacuum-sealed bags in a cool, dry place. Properly dried jerky can last several weeks.
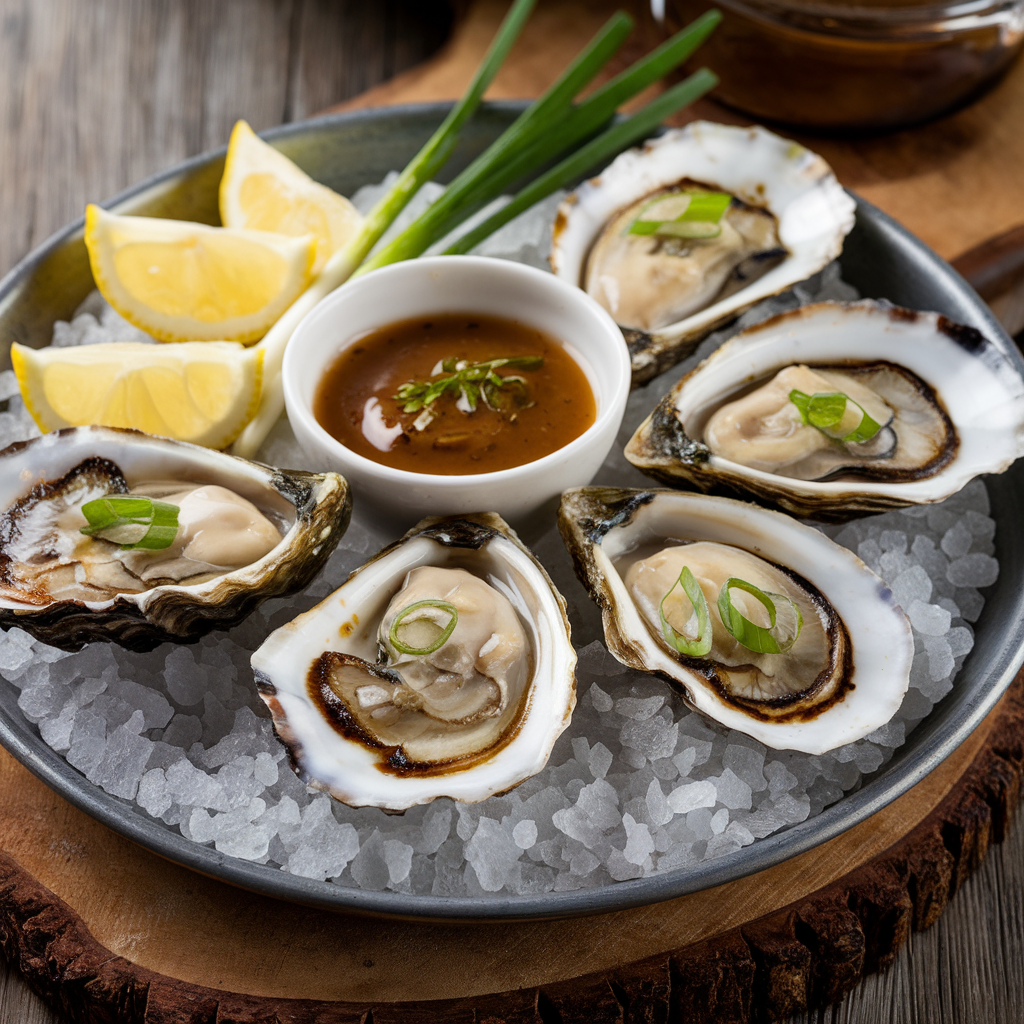
2. Grilled Oysters with Mignonette
Ingredients
For the Oysters:
- 12 fresh oysters, shucked
- Rock salt (for serving, optional)
For the Mignonette:
- 1 cup red wine vinegar
- 2–3 finely chopped shallots
- 1/2 teaspoon raw sugar
- 1/4 cup chopped fresh parsley
- Fresh cracked black pepper (to taste)
Instructions
Step 1: Prepare the Mignonette
- In a small bowl, combine the red wine vinegar, chopped shallots, raw sugar, and chopped parsley.
- Add plenty of freshly cracked black pepper to taste.
- Mix well and let it sit for at least 30 minutes to allow the flavors to meld.
Step 2: Prepare the Oysters
- Preheat your grill to medium-high heat.
- Shuck the oysters, keeping them in their bottom shells. Discard the top shells.
- If desired, place a layer of rock salt on a baking sheet to help hold the oysters upright during grilling.
Step 3: Grill the Oysters
- Place the shucked oysters on the grill directly or on the baking sheet with rock salt.
- Grill for about 3-5 minutes or until they start to bubble and are heated through.
Step 4: Serve
- Remove the oysters from the grill and spoon a little of the mignonette onto each oyster.
- Serve immediately while hot, optionally garnished with additional parsley or lemon wedges.
3. Grilled Zucchini Squash Spears

Ingredients
- Zucchini:
- 4 medium zucchinis
- Olive Oil Mixture:
- 2 tablespoons extra-virgin olive oil
- 1 tablespoon fresh lemon juice
- 3 cloves garlic, minced
- Kosher salt and black pepper to taste
- Optional: 1 teaspoon Italian seasoning or dried herbs (such as parsley or basil)
- Garnish:
- Freshly grated Parmesan cheese (optional)
- Chopped fresh basil or parsley (for serving)
Instructions
Step 1: Prepare the Zucchini
- Trim the ends of the zucchinis and cut them in half lengthwise.
- Then, cut each half into spears (about 1 inch wide).
Step 2: Make the Olive Oil Mixture
- In a small bowl, whisk together the olive oil, lemon juice, minced garlic, salt, pepper, and optional dried herbs.
Step 3: Marinate the Zucchini
- Place the zucchini spears in a large bowl or resealable plastic bag.
- Pour the olive oil mixture over the zucchini and toss to coat evenly.
- Let the zucchini marinate for about 15-30 minutes while you preheat the grill.
Step 4: Preheat the Grill
- Preheat your grill to medium-high heat (about 400°F to 450°F).
Step 5: Grill the Zucchini
- Remove the zucchini from the marinade and place them directly on the grill grates, cutting the side down.
- Grill for about 3-4 minutes, then flip and grill for another 3-4 minutes until tender and grill marks appear.
Step 6: Serve
- Once grilled, transfer the zucchini to a serving platter.
- If desired, sprinkle with freshly grated Parmesan cheese and garnish with chopped basil or parsley.
- Serve immediately while hot.
❇️Low Carb Dinner Recipes
Satisfy your dinner cravings with these hearty low-carb options:
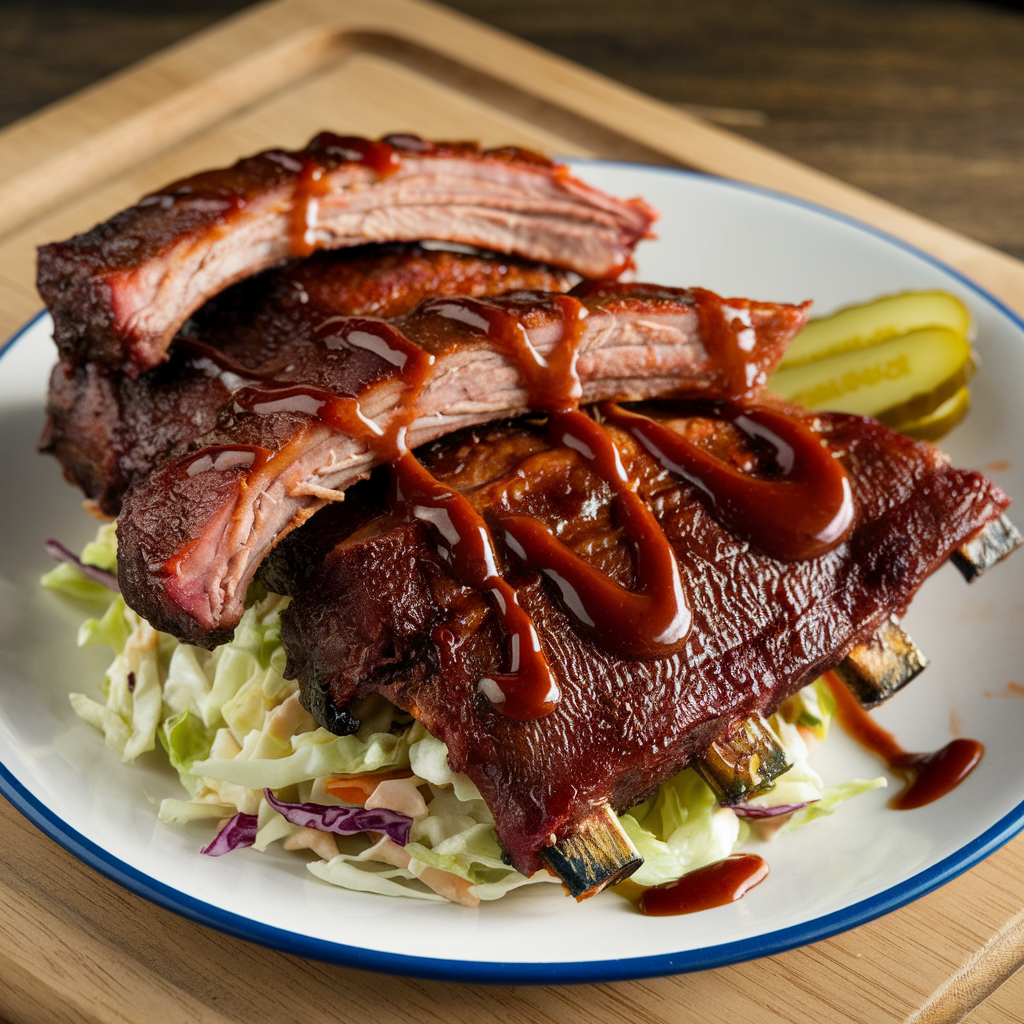
1. Smoked Baby Back Ribs
Ingredients
- Baby Back Ribs:
- 2 racks of baby back ribs (about 4-5 pounds total)
- Rub:
- 2 tablespoons brown sugar
- 1 tablespoon smoked paprika
- 1 tablespoon chili powder
- 1 teaspoon garlic powder
- 1 teaspoon onion powder
- 1 teaspoon salt
- 1 teaspoon black pepper
- 1/2 teaspoon cayenne pepper (optional for heat)
- For Wrapping:
- 5 tablespoons butter
- 1/4 cup brown sugar
- 1/4 cup honey
- BBQ Sauce:
- Your favorite BBQ sauce (about 1 cup for basting)
Instructions
Step 1: Prepare the Ribs
- Remove the Membrane: Use a paper towel to grip the membrane on the bone side of the ribs and peel it off.
- Apply the Rub: Combine all the rub ingredients in a bowl and generously coat both sides of the ribs. Let them sit at room temperature for about 30 minutes to absorb the flavors.
Step 2: Preheat the Smoker
- Preheat your smoker to 225°F (107°C). If using a pellet smoker, set it to smoke mode.
Step 3: Smoke the Ribs (2-2-1 Method)
- Initial Smoking: Place the ribs directly on the smoker grate, bone side down, and smoke for 2 hours.
- Wrap the Ribs: After smoking for 2 hours, lay out a large piece of heavy-duty aluminum foil. Place the ribs’ meat side down on the foil. Add pats of butter, brown sugar, and honey on top of the ribs. Wrap them tightly in foil.
- Continue Smoking: Return the wrapped ribs to the smoker and cook for an additional 2 hours.
Step 4: Finish the Ribs
- After the second cooking phase, carefully unwrap the ribs (watch out for hot steam). Place them back on the smoker, bone side down.
- Brush your favorite BBQ sauce over the top of each rack.
- Smoke for an additional 30 minutes to 1 hour, allowing the sauce to set and become sticky.
Step 5: Serve
- Once done, remove the ribs from the smoker and let them rest for about 10 minutes before slicing.
- Cut between the bones and serve with additional BBQ sauce on the side.
2. Dry Brine Traeger Turkey
Ingredients
For the Dry Brine:
- 4 tablespoons BBQ seasoning dry rub
- 3 tablespoons kosher salt
- 2 tablespoons brown sugar
For Injection and Mop Sauce:
- 7 tablespoons of BBQ seasoning dry rub
- 1 cup apple cider vinegar
- 1 cup butter (melted)
- 1 cup olive oil
- ½ cup honey or maple syrup
- 3 tablespoons Worcestershire sauce
- 1 tablespoon Tabasco sauce (optional)
- ½ teaspoon kosher salt (or 1 teaspoon table salt)
Optional Aromatics:
- 1 onion, quartered
- 2 lemons, quartered
- Fresh herbs (such as rosemary, thyme, and sage)
Instructions
Step 1: Prepare the Turkey
- Thaw the Turkey: If it is frozen, allow it to thaw in the refrigerator for several days before cooking.
- Pat Dry: Remove the turkey from its packaging and pat it dry with paper towels. Remove the giblets and neck from the cavity.
Step 2: Apply the Dry Brine
- Combine Ingredients: In a small bowl, mix the BBQ seasoning dry rub, kosher salt, and brown sugar.
- Brine Turkey: Sprinkle the dry brine mixture inside the turkey’s cavity, under the skin of the breast and legs, and all over the outside of the turkey. Make sure to cover all surfaces evenly.
- Tuck and Tie: Bend the wings back and tuck them under the breast. Use butcher’s twine to tie the legs together to help it cook evenly.
- Refrigerate: Place the turkey uncovered on a rimmed baking sheet or in a large casserole dish in the refrigerator for 48 to 72 hours.
Step 3: Prepare for Smoking
- Make the Injection Mixture: Whisk together the ingredients for the injection and mop sauce in a bowl.
- Inject Turkey: Using a meat injector, inject some of the mixture into various parts of the turkey (breasts, thighs) to enhance flavor and moisture.
Step 4: Preheat Your Traeger
- Preheat your Traeger grill to 225°F (107°C) on a smoke setting.
Step 5: Smoke the Turkey
- Place the turkey directly on the grill grate, breast side up.
- Smoke for about 3 hours or until it reaches an internal temperature of about 160°F (71°C) in the breast.
- During cooking, you can baste with additional mop sauce every hour for added flavor.
Step 6: Finish Cooking
- After smoking, increase the grill temperature to 350°F (177°C).
- Continue cooking until the internal temperature reaches 165°F (74°C) in the breast and 180°F (82°C) in the thighs.
- Depending on your turkey size, this may take an additional 1 to 2 hours.
Step 7: Rest and Serve
- Once done, remove the turkey from the grill and let it rest for about 20-30 minutes before carving.
- Serve with your favorite sides and enjoy your deliciously smoked turkey!
3. Smoked Brisket
Ingredients
For the Brisket:
- 1 whole packer brisket (10-15 pounds)
For the Dry Rub:
- 1/4 cup kosher salt
- 1/4 cup black pepper
- 2 tablespoons garlic powder (optional)
- 2 tablespoons onion powder (optional)
- 2 tablespoons smoked paprika (optional)
For Wrapping:
- 1 cup beef broth or apple juice (for moisture)
Instructions
Step 1: Prepare the Brisket
- Trim the Brisket: Start by trimming excess fat from the brisket, leaving about a 1/4-inch layer on top. This helps render flavor without being overly greasy.
- Apply the Dry Rub: In a bowl, mix kosher salt, black pepper, and any optional spices you choose. Generously rub this mixture all over the brisket, ensuring it’s evenly coated. Let it rest at room temperature for about 30 minutes to 1 hour.
Step 2: Preheat Your Smoker
- Preheat your smoker to 225°F (107°C). Use wood pellets or chunks like hickory, oak, or mesquite for added flavor.
Step 3: Smoke the Brisket
- Initial Smoking: Place the brisket in the smoker fat side up with the point facing the heat source. Smoke for about 8 hours or until the internal temperature reaches 165°F (74°C).
- Wrap the Brisket: Once it reaches 165°F, remove the brisket from the smoker and wrap it tightly in butcher paper or aluminum foil. Add a splash of beef broth or apple juice inside the wrap for moisture.
- Continue Smoking: Return the wrapped brisket to the smoker and continue cooking until it reaches an internal temperature of 203°F (95°C), which may take an additional 3-4 hours.
Step 4: Rest and Serve
- Once done, remove the brisket from the smoker and let it rest for at least 30 minutes to allow juices to redistribute.
- After resting, unwrap and slice against the grain into thin slices.
- Serve with your favorite barbecue sauce and sides.
❇️Low Carb Recipes by Protein and Theme
Easy Low Carb Recipes
This section focuses on simple recipes that require minimal ingredients:
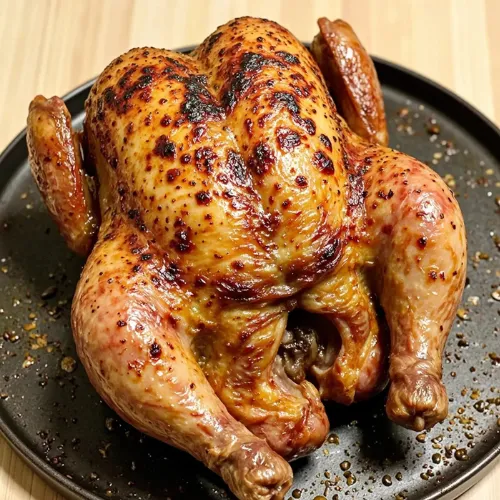
1. Roasted Beer Can Chicken

Ingredients
- Whole Chicken: 4-5 pounds
- Beer: 12 oz (any type you prefer)
- Seasoning:
- 4 tablespoons all-purpose seasoning or your choice of spice rub (e.g., garlic powder, paprika, salt, pepper)
- Olive Oil: For rubbing on the chicken
Equipment Needed
- Oven or grill
- Roasting pan or cast iron skillet
- Meat thermometer
Instructions
- Preheat the Oven:
- Preheat your oven to 425°F (220°C). If using a grill, prepare it for indirect cooking with one side on medium-high heat and the other on low.
- Prepare the Chicken:
- Remove giblets from the chicken and rinse it under cold water. Pat dry with paper towels.
- Rub olive oil all over the chicken, including inside the cavity.
- Generously apply your chosen seasoning all over the chicken.
- Prepare the Beer Can:
- Open a can of beer and pour out about one-third of it into a roasting pan or skillet. This will prevent overflow during cooking.
- Place the opened beer can upright in the center of the pan.
- Position the Chicken:
- Carefully slide the chicken onto the beer can so that it stands upright. Ensure that the can fits snugly inside the cavity of the chicken.
- Roasting:
- Place the roasting pan in the preheated oven or on the grill.
- Roast for about 1 hour and 15 minutes to 1 hour and 30 minutes, or until the internal temperature reaches 165°F (75°C) in the thickest part of the thigh.
- If using a grill, check occasionally to ensure even cooking and avoid burning.
- Resting:
- Once cooked, carefully remove the chicken from the oven or grill. Let it rest for about 10 minutes before carefully lifting it off the beer can (use tongs for safety).
- Serving:
- Carve and serve your delicious beer can chicken with your favorite sides.
Tips
- Flavor Variations: Feel free to experiment with different types of beer and seasoning blends to create unique flavors.
- Safety Note: Be cautious when removing the chicken from the can as both will be very hot.
2. Three Ingredient Pot Roast
Ingredients
- 2 pounds boneless beef chuck roast
- 10.5 ounces canned cream of mushroom soup
- 1 cup beef broth (or 1 tablespoon concentrated beef base mixed with 1 cup water)
Instructions
- Prepare the Slow Cooker:
- Place the chuck roast in the bottom of a 5-quart or larger slow cooker.
- Add the Ingredients:
- Pour the canned cream of mushroom soup over the roast.
- Add the beef broth on top of the soup.
- Cooking:
- Cover the slow cooker and cook on LOW for 8 hours. This low and slow cooking method ensures that the meat becomes tender and flavorful.
- Serving:
- Once cooked, remove the roast and let it rest for a few minutes before slicing.
- Serve with the gravy created from the soup and broth mixture.
Tips
- Optional Vegetables: You can add chopped potatoes, carrots, or onions to the slow cooker at the beginning to make it a complete meal.
- Browning the Roast: For added flavor, consider browning the roast in a skillet before placing it in the slow cooker, although this step is optional.
- Leftovers: The pot roast makes great leftovers for sandwiches or can be reheated for another meal.
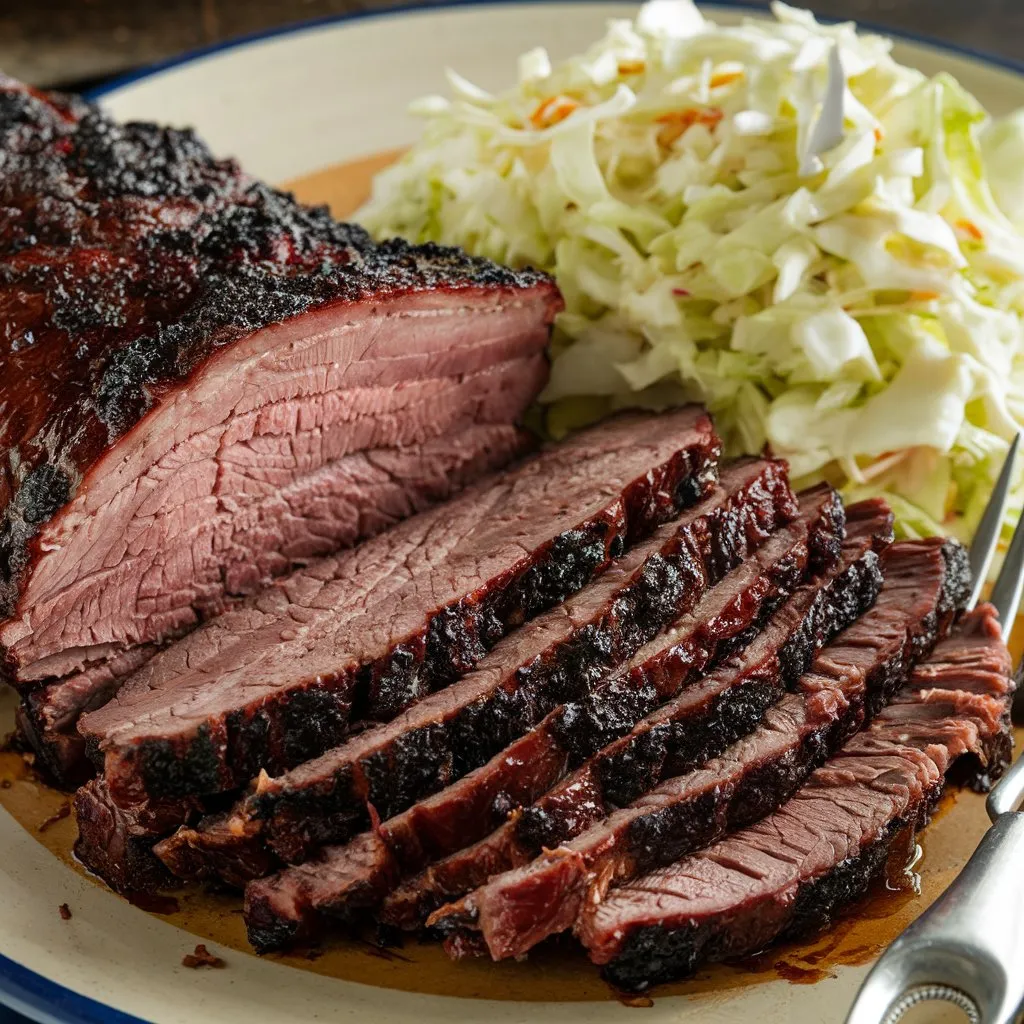
3. K.I.S.S. Texas BBQ Style Brisket
Ingredients
- 1 whole packer brisket: 12-15 pounds
- Kosher salt: 2.5 tablespoons
- Coarse black pepper: 2.5 tablespoons
Instructions
- Trim the Brisket:
- Lay the brisket fat side down on a cutting board. Trim excess fat, leaving about 1/4 inch of fat cap for flavor and moisture during cooking.
- Season the Brisket:
- Mix the kosher salt and black pepper in a bowl. Generously rub this mixture all over the brisket, ensuring an even coating on all sides.
- Prepare the Smoker:
- Preheat your smoker to a steady temperature of 250°F (121°C). Use wood like post oak or pecan for authentic Texas flavor.
- Smoke the Brisket:
- Place the brisket in the smoker fat side up. Smoke for about 6-8 hours until the internal temperature reaches around 165°F (74°C). Avoid opening the smoker during the first two hours to allow for maximum smoke absorption.
- Wrap the Brisket:
- Once it reaches 165°F, wrap the brisket tightly in butcher paper or aluminum foil to retain moisture and continue cooking. Return it to the smoker and cook until it reaches an internal temperature of 203°F (95°C), which may take an additional 3-4 hours.
- Rest the Brisket:
- After cooking, remove the brisket from the smoker and let it rest in a cooler (without ice) for at least 1-2 hours. This allows juices to redistribute throughout the meat.
- Slice and Serve:
- Slice against the grain into 1/4-inch thick slices. Serve with your favorite BBQ sides like coleslaw, pickles, or baked beans.
Tips
- Temperature Monitoring: Use a reliable meat thermometer to ensure accurate internal temperature readings.
- Optional Enhancements: For added flavor, consider injecting the brisket with a beef broth mixture before seasoning.
- Serving Suggestions: Pair with traditional sides such as cornbread or potato salad for a complete meal.
❇️Low Carb Chicken Recipes
Explore chicken recipes inspired by global cuisines:
1. Spatchcocked Chile-Lime-Rubbed Chicken

Ingredients
- 1 whole chicken (3.5 to 4 pounds)
- 3 tablespoons chile powder
- 2 tablespoons extra-virgin olive oil
- 2 teaspoons lime zest
- 3 tablespoons lime juice
- 1 tablespoon minced garlic
- 1 teaspoon ground coriander
- 1 teaspoon ground cumin
- 1 teaspoon dried oregano
- 1.5 teaspoons kosher salt
- 1 teaspoon freshly ground black pepper
- Pinch of ground cinnamon
- Fresh cilantro (for garnish)
- Lime wedges (for serving)
- Salsa (optional, for serving)
Instructions
- Prepare the Chicken:
- Start by spatchcocking the chicken. Place the chicken breast-side down on a cutting board. Using kitchen shears, cut along both sides of the backbone and remove it. Flip the chicken over and press down firmly on the breastbone to flatten it.
- Make the Chile-Lime Rub:
- In a small bowl, combine the chile powder, olive oil, lime zest, lime juice, minced garlic, coriander, cumin, oregano, salt, pepper, and cinnamon. Mix well to form a paste.
- Season the Chicken:
- Rub the chile-lime mixture all over the spatchcocked chicken, ensuring that it is evenly coated on both sides.
- Preheat the Grill or Oven:
- If using a grill, preheat it to medium-high heat. If using an oven, preheat it to 425°F (220°C).
- Cook the Chicken:
- For grilling: Place the chicken skin-side up on the grill and cook for about 30-40 minutes or until the internal temperature reaches 165°F (74°C).
- For baking: Place the chicken on a baking sheet lined with parchment paper and roast in the preheated oven for about 45 minutes to 1 hour, or until fully cooked.
- Rest and Serve:
- Once cooked, remove the chicken from the heat and let it rest for about 10 minutes before slicing. This allows juices to be redistributed for maximum flavor.
- Garnish with fresh cilantro and serve with lime wedges and salsa if desired.
Tips
- Marination Time: For deeper flavor, consider marinating the chicken in the rub for a few hours or overnight in the refrigerator before cooking.
- Serving Suggestions: This dish pairs wonderfully with rice, grilled vegetables, or a fresh salad.
2. Whole Smoked Chicken
Ingredients
- 1 whole chicken (4-5 pounds)
- 2 tablespoons olive oil
For the Dry Rub:
- 2 tablespoons kosher salt
- 1 tablespoon black pepper
- 2 teaspoons garlic powder
- 2 teaspoons smoked paprika
- 1 tablespoon brown sugar
- Optional: 1/8 teaspoon cayenne pepper for heat
Instructions
- Prepare the Chicken:
- Remove the giblets from the chicken and rinse it under cold water. Pat it dry thoroughly with paper towels.
- Apply the Dry Rub:
- In a small bowl, combine all the dry rub ingredients. Rub olive oil all over the chicken, then generously apply the dry rub, making sure to work some under the skin for enhanced flavor. Let the chicken marinate for at least 30 minutes or ideally overnight in the refrigerator.
- Preheat the Smoker:
- Preheat your smoker to 250°F (121°C). If you prefer a higher temperature for quicker cooking, you can set it to 350°F (175°C).
- Smoke the Chicken:
- Place the chicken breast side up in the smoker. If cooking at 250°F, expect it to take about 2 to 3 hours, or until the internal temperature reaches 160°F (71°C) in the thickest part of the breast. If cooking at 350°F, it will take approximately 60 to 80 minutes.
- Rest Before Serving:
- Once cooked, remove the chicken from the smoker and let it rest for about 15-20 minutes, tented with foil. This allows juices to redistribute and ensures moist meat.
- Carve and Serve:
- After resting, carve the chicken and serve it with your favorite sides.
Tips
- Wood Choice: Use fruit woods like apple or cherry for a sweeter smoke flavor or hickory for a stronger taste.
- Basting: For added richness, consider basting with melted butter during the last half of smoking.
- Temperature Monitoring: Always use a meat thermometer to ensure accurate cooking temperatures.
3. Tandoori Chicken Wings

Ingredients
- 2 pounds chicken wings (approximately 16 wings)
- ½ cup plain yogurt (or Greek yogurt)
- 2 tablespoons lemon juice
- 1 tablespoon minced ginger (or ginger paste)
- 1 tablespoon minced garlic (or garlic paste)
- 1 tablespoon mustard oil (optional, can substitute with any cooking oil)
- 1 teaspoon Kashmiri red chili powder (for color and mild heat)
- 1 teaspoon garam masala
- 1 teaspoon turmeric powder
- 1 tablespoon coriander powder
- 1 tablespoon paprika
- 1 teaspoon chaat masala (optional, for extra flavor)
- Salt to taste
- Fresh cilantro (for garnish)
- Lime wedges (for serving)
Instructions
Marinate the Chicken Wings
- In a large mixing bowl, combine the yogurt, lemon juice, minced ginger, minced garlic, mustard oil, and all the spices (Kashmiri red chili powder, garam masala, turmeric, coriander powder, paprika, and salt).
- Add the chicken wings to the bowl and mix well to ensure they are fully coated in the marinade.
- Cover the bowl with plastic wrap and refrigerate for at least 1 hour or up to 24 hours for a deeper flavor.
Cooking Methods
Oven Method:
- Preheat your oven to 400°F (200°C).
- Line a baking sheet with aluminum foil and place a wire rack on top. This allows air circulation around the wings for even cooking.
- Arrange the marinated wings on the rack in a single layer.
- Bake for about 25-30 minutes or until the wings are cooked through and crispy. For extra crispiness, broil on high for an additional 2-3 minutes at the end.
Air Fryer Method:
- Preheat your air fryer to 400°F (200°C).
- Place the marinated chicken wings in a single layer in the air fryer basket. Depending on the size of your air fryer, you may need to cook in batches.
- Air fry for about 15 minutes. After 10 minutes, shake the basket to ensure even cooking.
- Increase the temperature to 425°F (220°C) and cook for an additional 5 minutes or until crispy.
Serve
- Once cooked, remove the wings from the oven or air fryer and let them rest for a few minutes.
- Garnish with chopped cilantro and serve hot with lime wedges and your choice of dipping sauce, like mint chutney or yogurt sauce.
Tips
- For a spicier version, increase the amount of Kashmiri red chili powder or add fresh green chilies to the marinade.
- Allowing the wings to marinate longer enhances their flavor significantly.
❇️Low Carb Vegetarian Recipes
Grill hearty vegetables that absorb wood smoke flavor:
1. Roasted Broccoli with Parmesan
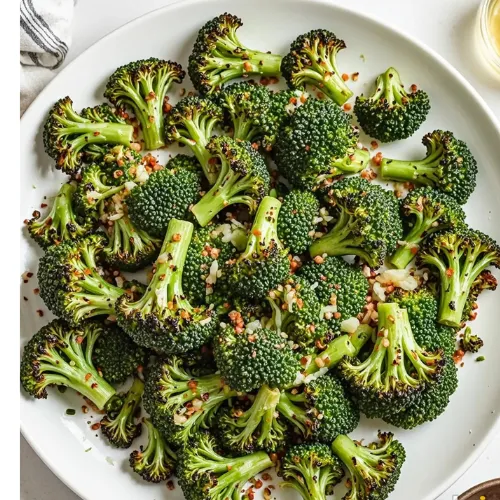
Roasted broccoli with Parmesan is a delicious and easy side dish that elevates the flavor of this nutritious vegetable. Here’s a simple recipe to prepare it.
Ingredients
- Broccoli: 1 large head (about 24 ounces), cut into florets
- Olive Oil: 3 tablespoons
- Garlic: 4 cloves, minced (or 2 teaspoons garlic powder)
- Parmesan Cheese: ¼ cup freshly grated
- Lemon Juice: from 1 lemon (optional)
- Salt and Pepper: to taste
- Breadcrumbs: optional, for added crunch (¼ cup Italian-style)
Instructions
- Preheat the Oven: Set your oven to 425°F (220°C). Lightly oil a baking sheet or line it with parchment paper for easier cleanup.
- Prepare the Broccoli: In a large bowl or zip-close bag, combine the broccoli florets with olive oil, garlic, salt, and pepper. Toss until the broccoli is evenly coated.
- Spread on Baking Sheet: Arrange the broccoli in a single layer on the prepared baking sheet. If using breadcrumbs, sprinkle them over the broccoli at this stage.
- Roast the Broccoli: Bake in the preheated oven for about 10-15 minutes, or until the edges are crispy and the florets are tender. Stir halfway through for an even roasting.
- Add Finishing Touches: Remove from the oven and immediately sprinkle with freshly grated Parmesan cheese and a squeeze of lemon juice if desired. Return to the oven for an additional 2-3 minutes to melt the cheese slightly.
- Serve: Enjoy hot as a side dish to your favorite main course!
Tips
- For an extra flavor boost, consider adding red pepper flakes or using fresh herbs.
- Ensure that the broccoli is dry before roasting to achieve crispiness; moisture can lead to steaming.
- This recipe can be easily adjusted for larger quantities by using multiple baking sheets.
This roasted broccoli recipe is not only quick to prepare but also offers a delightful combination of flavors that can convert even the most reluctant broccoli eaters into fans! Enjoy your meal!
2. Heirloom Roasted Carrots
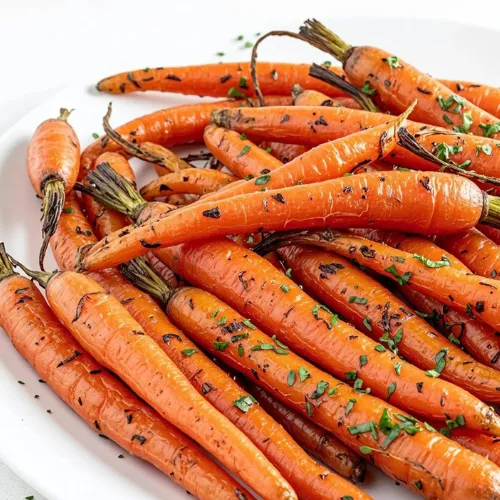
Heirloom roasted carrots are a vibrant and flavorful side dish showcasing these unique vegetables’ natural sweetness. Below is a simple recipe that highlights their beauty and taste.
Ingredients
- Heirloom Carrots: 2-3 bunches (approximately 14-16 carrots)
- Olive Oil: 2 ½ tablespoons
- Salt and Pepper: to taste
Glaze (optional)
- Butter: ¼ cup
- Honey: 4 tablespoons
- Nutmeg: ⅛ teaspoon
Instructions
- Preheat the Oven: Set your oven to 425°F (220°C).
- Prepare the Carrots:
- Trim the tops of the heirloom carrots, leaving about 1 centimeter of greens.
- Do not peel the carrots; instead, scrub them clean using a kitchen sponge.
- For thicker carrots (over 1 inch in diameter), cut them in half lengthwise.
- Season the Carrots:
- Place the carrots on a baking sheet and drizzle with olive oil, then season with salt and pepper. Toss to coat it evenly.
- Roast the Carrots:
- Roast in the preheated oven for about 18 minutes, flipping halfway through to ensure even cooking.
- Prepare the Glaze (if using):
- While the carrots are roasting, melt the butter in a small saucepan over medium-low heat.
- Once melted, add honey and nutmeg, whisking continuously for about 2-3 minutes until well combined.
- Finish Roasting:
- Drizzle the glaze over the roasted carrots and return them to the oven for an additional 2 minutes to allow the glaze to set.
- Serve: Transfer the glazed carrots to a serving platter and enjoy them warm as a delightful side dish.
Tips
- For added flavor, consider incorporating fresh herbs like thyme or rosemary during roasting.
- If you prefer a deeper caramelization, broil the carrots for another minute or two after roasting.
- These roasted heirloom carrots pair well with various main dishes, making them perfect for holiday gatherings or everyday meals.
This recipe not only enhances the natural sweetness of heirloom carrots but also makes for an eye-catching addition to any table! Enjoy your cooking
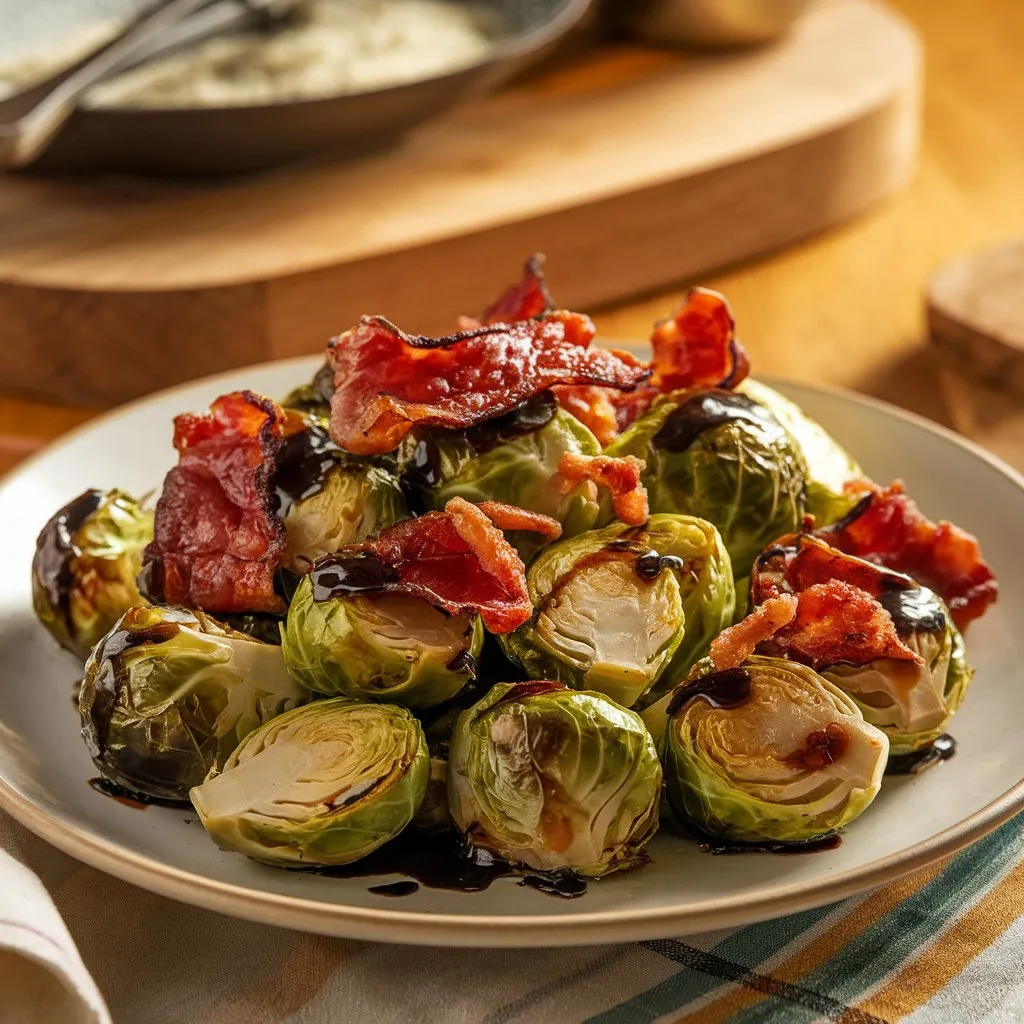
3. Balsamic Brussels Sprouts with Bacon
Balsamic Brussels sprouts with bacon is a flavorful and satisfying side dish that combines the earthy taste of Brussels sprouts with the savory crunch of bacon and the tangy sweetness of balsamic vinegar. Here’s how to make it.
Ingredients
- Brussels Sprouts: 1 ½ pounds, trimmed and halved
- Bacon: 8 ounces, diced
- Olive Oil: 2 tablespoons
- Salt and Pepper: to taste
- Balsamic Vinegar: ⅓ cup (or balsamic glaze for drizzling)
- Onion: ½ yellow onion, diced (optional)
- Garlic: 4 cloves, minced (optional)
Instructions
- Preheat the Oven: Set your oven to 425°F (220°C).
- Prepare the Brussels Sprouts:
- Trim the ends of the Brussels sprouts and cut them in half.
- Place them in a large bowl and toss them with olive oil, salt, and pepper.
- Cook the Bacon:
- In a skillet over medium heat, add the diced bacon and cook until crispy.
- Once cooked, use a slotted spoon to transfer the bacon to a paper towel-lined plate to drain excess grease. Reserve about one tablespoon of bacon grease in the pan.
- Roast the Brussels Sprouts:
- Spread the prepared Brussels sprouts on a baking sheet in a single layer.
- Roast for 25-30 minutes, stirring halfway through, until they are golden brown and crispy on the edges.
- Combine Ingredients:
- While the Brussels sprouts are roasting, you can sauté diced onions in the reserved bacon grease for about 2-3 minutes until translucent (optional).
- Once the Brussels sprouts are done, remove them from the oven and combine them with the crispy bacon and sautéed onions (if using).
- Add Balsamic Vinegar:
- Drizzle balsamic vinegar over the mixture while it’s still warm. Toss everything together to ensure an even coating.
- Serve: Transfer to a serving platter and enjoy warm!
Tips
- For an extra layer of flavor, consider adding minced garlic during the last few minutes of roasting.
- If you prefer a sweeter finish, use balsamic glaze instead of regular balsamic vinegar.
- This dish pairs beautifully with roasted meats or can be served as part of a vegetarian meal.
This recipe is perfect for holiday gatherings or as a delicious weeknight side dish that will impress your family and friends! Enjoy your cooking!
❇️Low Carb Beef Recipes
Enjoy classic low and slow beef recipes:
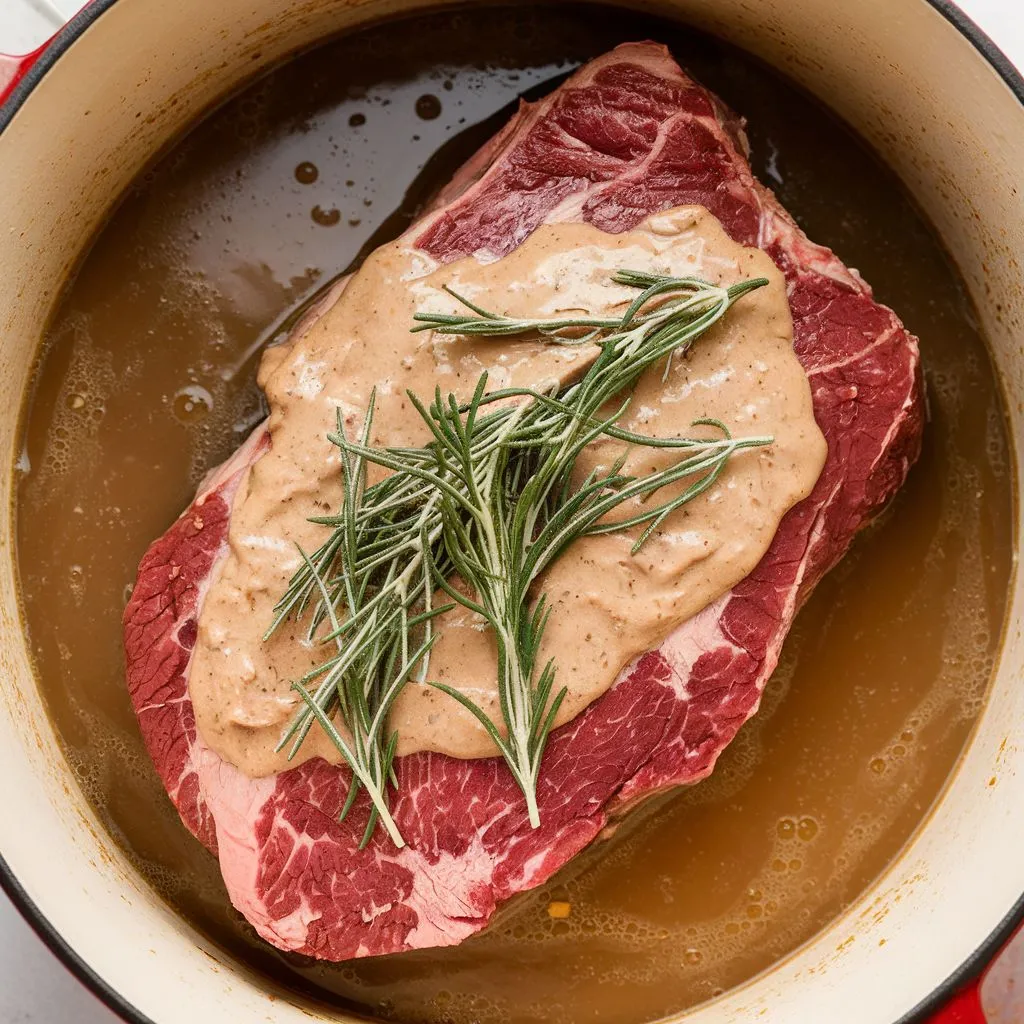
1. Chef’s Brisket
Chef’s brisket is a popular dish that showcases the rich, smoky flavors of slow-cooked beef brisket. It is often seasoned with a variety of spices and cooked for several hours to achieve tenderness and depth of flavor. Below is a detailed recipe that you can follow to make a delicious brisket at home.
Ingredients
- Brisket: 1 (5-6 pounds) first-cut brisket
- For the Rub:
- 2 tablespoons brown sugar
- 2 tablespoons smoked paprika
- 2 teaspoons dry mustard
- 2 teaspoons garlic powder
- 2 teaspoons onion powder
- 2 teaspoons salt
- ½ teaspoon cumin
- ½ teaspoon dried basil
- ½ teaspoon dried thyme
- ¼ teaspoon cayenne pepper
- For the Sauce:
- 1 tablespoon vegetable or canola oil
- 1 cup chopped onion
- ¼ cup chopped celery
- ¼ cup chopped green bell pepper
- 2 tablespoons minced garlic
- 3 tablespoons white wine vinegar
- 3 tablespoons Worcestershire sauce
- ½ cup ketchup
- 3 cups beef broth
- 2 bay leaves
Instructions
- Prepare the Brisket:
- Trim excess fat from the brisket, leaving about a quarter-inch layer for flavor.
- Mix all rub ingredients in a bowl and apply generously over the brisket. Wrap in plastic wrap and refrigerate for at least 8 hours, preferably overnight.
- Preheat Oven:
- Preheat your oven to 300°F (150°C).
- Sear the Brisket:
- In a large roasting pan, heat oil over medium heat. Sear the brisket on both sides until browned, about 4-5 minutes per side.
- Make the Sauce:
- In the same pan, add onions, celery, bell pepper, and garlic. Sauté until softened, about 3 minutes.
- Stir in white wine vinegar, Worcestershire sauce, ketchup, beef broth, and bay leaves. Bring to a simmer.
- Roast the Brisket:
- Place the seared brisket back into the pan with half of the sauce poured over it.
- Cover tightly with foil or a lid and bake for about 3 hours.
- Final Cooking:
- After three hours, turn the brisket over and pour the remaining sauce over it.
- Recover and continue cooking for another 2 hours, or until fork-tender.
- Rest and Serve:
- Remove from oven and let it rest for about 20-30 minutes before slicing against the grain.
- Serve with the remaining sauce drizzled over slices.
Tips for Perfect Brisket
- Marination: For deeper flavor, marinate your brisket for up to 24 hours before cooking.
- Low and Slow Cooking: The key to tender brisket is cooking it low and slow; avoid high temperatures.
- Serving Suggestions: Pair with sides like coleslaw, roasted vegetables, or mashed potatoes for a complete meal.
This recipe will yield a flavorful, tender brisket that is perfect for gatherings or family dinners! Enjoy your cooking
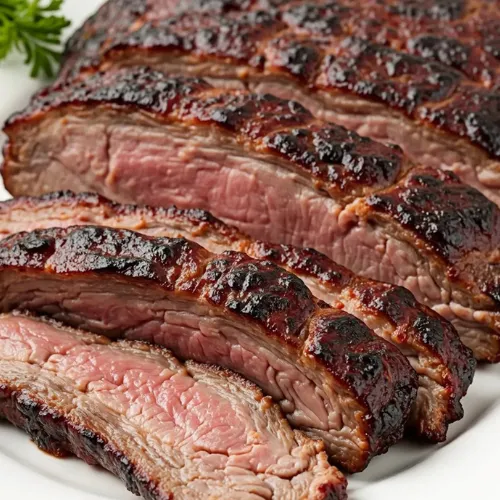
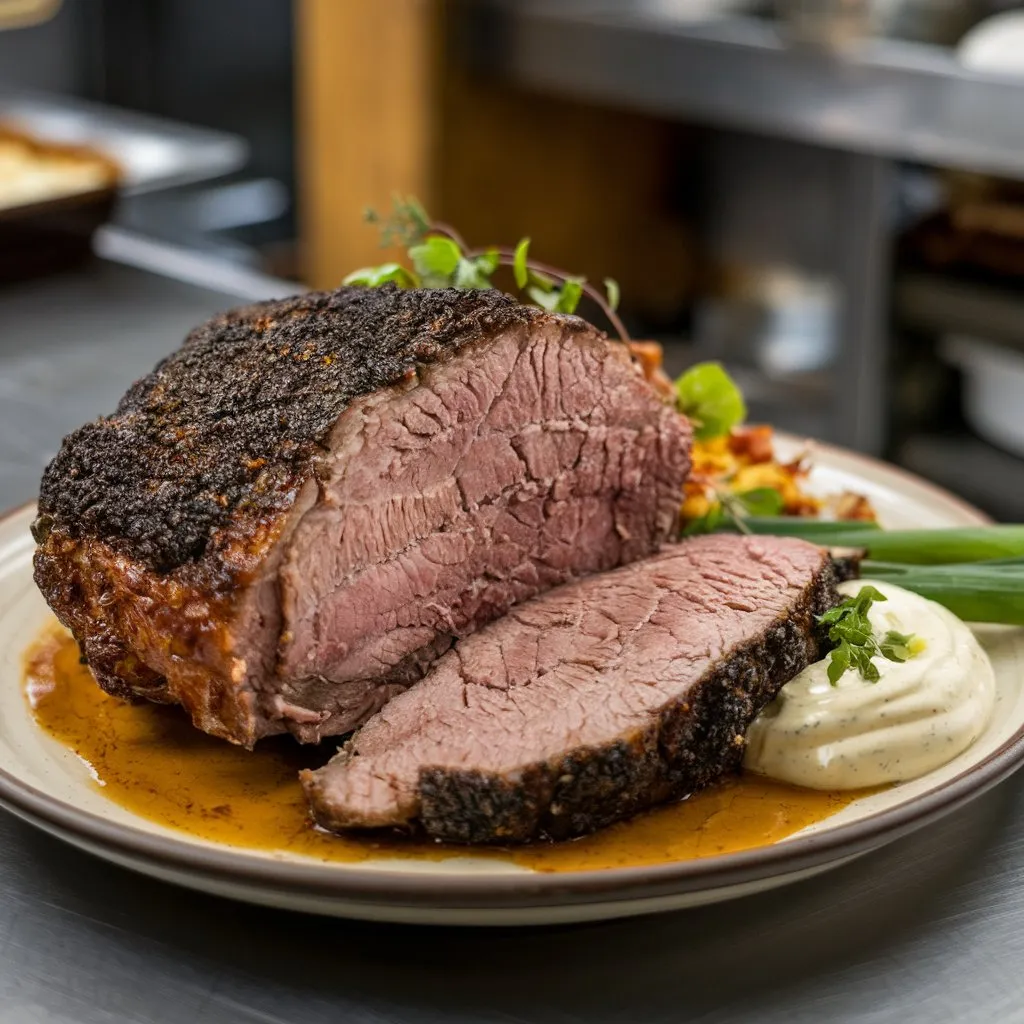
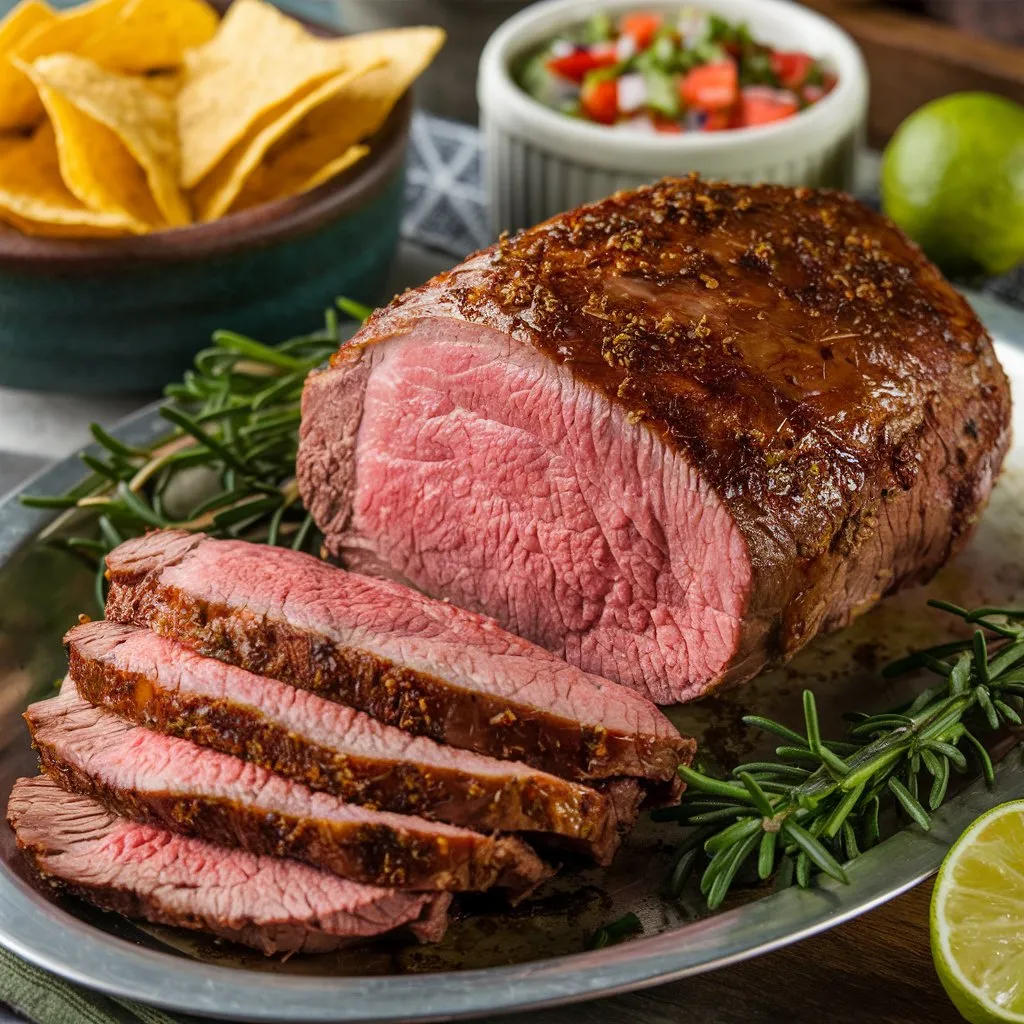
2. Smoked Tri-Tip
Smoked tri-tip is a delicious cut of beef that is known for its rich flavor and tenderness when cooked properly. Here’s a comprehensive recipe to make perfectly smoked tri-tip.
Ingredients
- Tri-Tip Roast: 3-5 pounds, trimmed
- For the Dry Rub:
- 2 tablespoons light brown sugar
- 2 tablespoons kosher salt
- 2 teaspoons black pepper
- 1 tablespoon garlic powder
- 1 tablespoon onion powder
- ½ tablespoon smoked paprika
- ¼ teaspoon cayenne pepper (optional for heat)
Instructions
- Prepare the Tri-Tip:
- Rinse the tri-tip under cold water and pat it dry with paper towels.
- Trim any excess fat or silver skin from the meat.
- Make the Dry Rub:
- In a bowl, combine brown sugar, salt, black pepper, garlic powder, onion powder, smoked paprika, and cayenne pepper.
- Rub this mixture generously over the entire surface of the tri-tip, pressing it into the meat to ensure it adheres well.
- Marinate:
- Wrap the seasoned tri-tip in plastic wrap and refrigerate for at least 12 hours, preferably up to 24 hours to enhance flavor.
- Preheat the Smoker:
- Set your smoker to 225°F (107°C). Use wood chips like hickory, mesquite, or pecan for added flavor.
- Smoke the Tri-Tip:
- Place the seasoned tri-tip directly on the smoker rack, fat side up.
- Insert a meat thermometer into the thickest part of the roast.
- Smoke until the internal temperature reaches between 130°F (54°C) and 135°F (57°C) for medium rare; this typically takes about 1.5 to 2 hours.
- Sear the Tri-Tip (optional but recommended):
- Once smoked, remove the tri-tip from the smoker and preheat a cast-iron skillet over high heat.
- Add about 2 tablespoons of butter to the skillet.
- Sear each side of the tri-tip for about 30 seconds to 1 minute, allowing it to develop a nice crust.
- Rest and Slice:
- Transfer the seared tri-tip to a cutting board and loosely cover it with aluminum foil.
- Let it rest for about 15-20 minutes before slicing against the grain to ensure tenderness.
- Serve:
- Slice into thin pieces and serve with your favorite sides or sauces.
Tips for Perfect Smoked Tri-Tip
- Use a reliable meat thermometer to ensure accurate cooking temperatures.
- Allowing the meat to rest is crucial as it helps redistribute juices throughout.
- Experiment with different wood types for smoking to find your preferred flavor profile.
This smoked tri-tip recipe will yield a flavorful and tender result that is sure to impress at any gathering! Enjoy your cooking
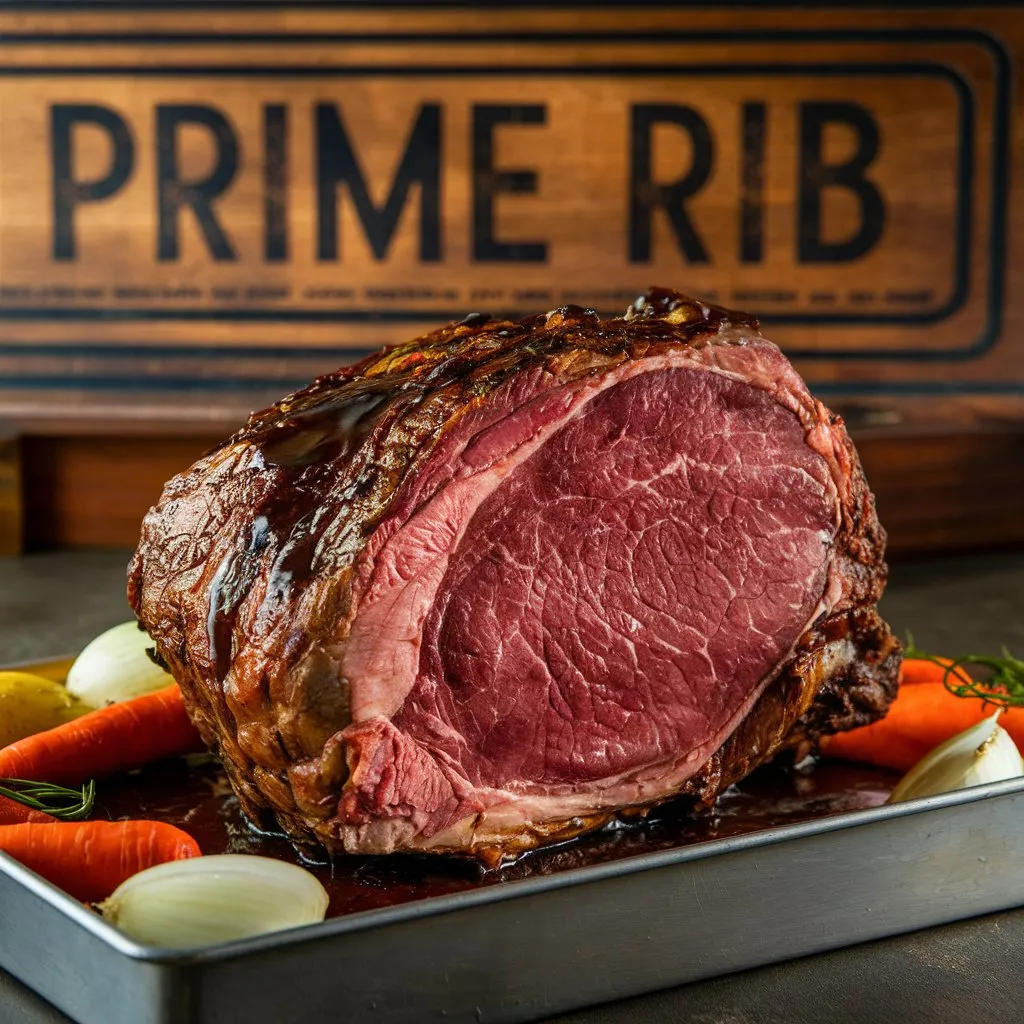
3. Smoked and Roasted Prime Rib
Smoked and roasted prime rib is a luxurious dish that combines the rich flavors of slow smoking with the crispy, caramelized exterior from roasting. Here’s a detailed recipe to achieve a perfectly smoked and roasted prime rib.
Ingredients
- Prime Rib Roast: 5-10 pounds (bone-in or boneless)
- Olive Oil: ¼ cup
- Kosher Salt: 2 tablespoons (adjust to taste)
- Black Pepper: 2 tablespoons (freshly cracked)
For the Garlic Herb Butter (optional):
- Butter: 1 cup (softened)
- Garlic: 8 cloves (minced)
- Fresh Rosemary: 2 sprigs (minced)
- Fresh Thyme: 2 sprigs (minced)
- Salt and Pepper: to taste
Instructions
- Prepare the Prime Rib:
- Rinse the prime rib under cold water and pat it dry with paper towels.
- Trim any excess fat, leaving about a quarter-inch layer for flavor.
- Make the Garlic Herb Butter (if using):
- In a bowl, mix softened butter with minced garlic, rosemary, thyme, salt, and pepper until well combined.
- Season the Roast:
- Rub the entire surface of the prime rib with olive oil.
- Generously season with kosher salt and black pepper. If using garlic herb butter, slather it over the roast as well.
- Preheat the Smoker:
- Set your smoker to 225°F (107°C). Use wood chips like hickory or oak for optimal flavor.
- Smoke the Prime Rib:
- Place the seasoned prime rib directly on the smoker grates.
- Smoke until the internal temperature reaches about 120°F (49°C) for rare or 125°F (52°C) for medium rare. This typically takes about 3-4 hours, depending on the size of your roast.
- Rest the Meat:
- Once smoked, remove the prime rib from the smoker and tent it loosely with aluminum foil. Let it rest for about 20-30 minutes to allow the juices to redistribute.
- Increase Oven Temperature for Roasting:
- Preheat your oven to 500°F (260°C).
- Roast the Prime Rib:
- Place the rested prime rib in a roasting pan and roast in the preheated oven for about 10-15 minutes, or until a nice crust forms and the internal temperature reaches your desired doneness (130°F for medium-rare).
- Final Resting Period:
- Remove from oven and let it rest again for another 15-20 minutes before slicing.
- Serve:
- Slice against the grain and serve with your favorite sides, such as mashed potatoes or roasted vegetables.
Tips
- Use a meat thermometer to ensure accurate cooking temperatures.
- Allowing the meat to rest is crucial for juicy slices.
- For added flavor, consider making an au jus or serving it with horseradish sauce.
This smoked and roasted prime rib recipe will create an impressive centerpiece for any occasion, delivering rich flavors and tender meat that will delight your guests! Enjoy your cooking!
❇️Low Carb Pork Recipes
Delight in flavorful pork recipes suitable for low-carb diets:
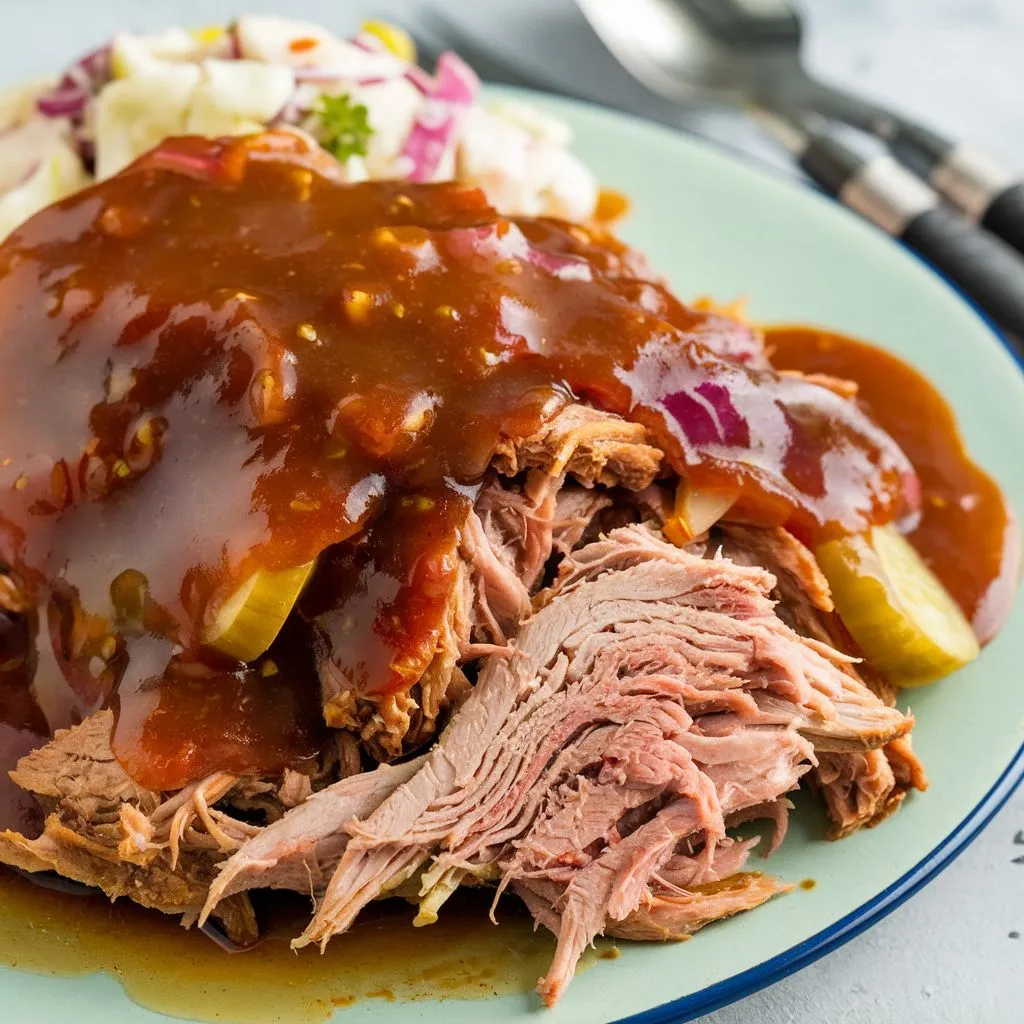
1. BBQ Pulled Pork with Paleo Vinegar Sauce
This BBQ pulled pork recipe is perfect for those following a Paleo diet, featuring a tangy vinegar sauce that complements the rich flavors of the pork. Here’s how to make it.
Ingredients
For the Pulled Pork:
- Pork Shoulder (Boston Butt): 4-5 pounds
- Olive Oil: 2 tablespoons
- Salt: 1 tablespoon
- Black Pepper: 1 tablespoon
- Garlic Powder: 2 teaspoons
- Onion Powder: 2 teaspoons
- Paprika: 2 teaspoons
- Cayenne Pepper: ½ teaspoon (optional for heat)
For the Paleo Vinegar Sauce:
- Apple Cider Vinegar: 1 cup
- Tomato Sauce: 1 cup (ensure it’s sugar-free)
- Maple Syrup or Date Syrup: ¼ cup (for sweetness)
- Mustard: 2 tablespoons (Dijon or yellow)
- Garlic Powder: 1 teaspoon
- Onion Powder: 1 teaspoon
- Salt to taste
- Black Pepper: to taste
- Chili Powder: 1 teaspoon (optional for smokiness)
Instructions
- Prepare the Pork Shoulder:
- Rub the pork shoulder with olive oil and season generously with salt, black pepper, garlic powder, onion powder, paprika, and cayenne pepper.
- Let it marinate for at least an hour or overnight in the refrigerator for enhanced flavor.
- Cook the Pork:
- Preheat your oven to 300°F (150°C) or prepare your slow cooker.
- If using the oven, place the seasoned pork in a roasting pan and cover it tightly with foil. Roast for about 4-5 hours or until the meat is tender and easily pulled apart with a fork.
- If using a slow cooker, place the pork in the slow cooker and cook on low for about 8 hours or until tender.
- Make the Paleo Vinegar Sauce:
- In a medium saucepan, combine apple cider vinegar, tomato sauce, maple syrup or date syrup, mustard, garlic powder, onion powder, salt, black pepper, and chili powder.
- Bring to a simmer over medium heat and let it cook for about 10 minutes, stirring occasionally. Adjust seasoning to taste.
- Shred the Pork:
- Once cooked, remove the pork from the oven or slow cooker and let it rest for about 15 minutes.
- Using two forks, shred the pork into bite-sized pieces.
- Combine with Sauce:
- Mix the shredded pork with the Paleo vinegar sauce until well coated. You can add more sauce according to your preference.
- Serve:
- Serve the pulled pork warm on its own or in lettuce wraps for a low-carb option. It pairs well with coleslaw or grilled vegetables.
Tips
- For added flavor, consider smoking the pork shoulder before roasting it if you have a smoker available.
- This pulled pork can be made ahead of time and stored in the refrigerator for up to three days or frozen for longer storage.
- Adjust the sweetness of the sauce by adding more or less maple/date syrup based on your taste preferences.
This BBQ pulled pork with Paleo vinegar sauce is not only delicious but also aligns perfectly with a Paleo lifestyle! Enjoy your meal
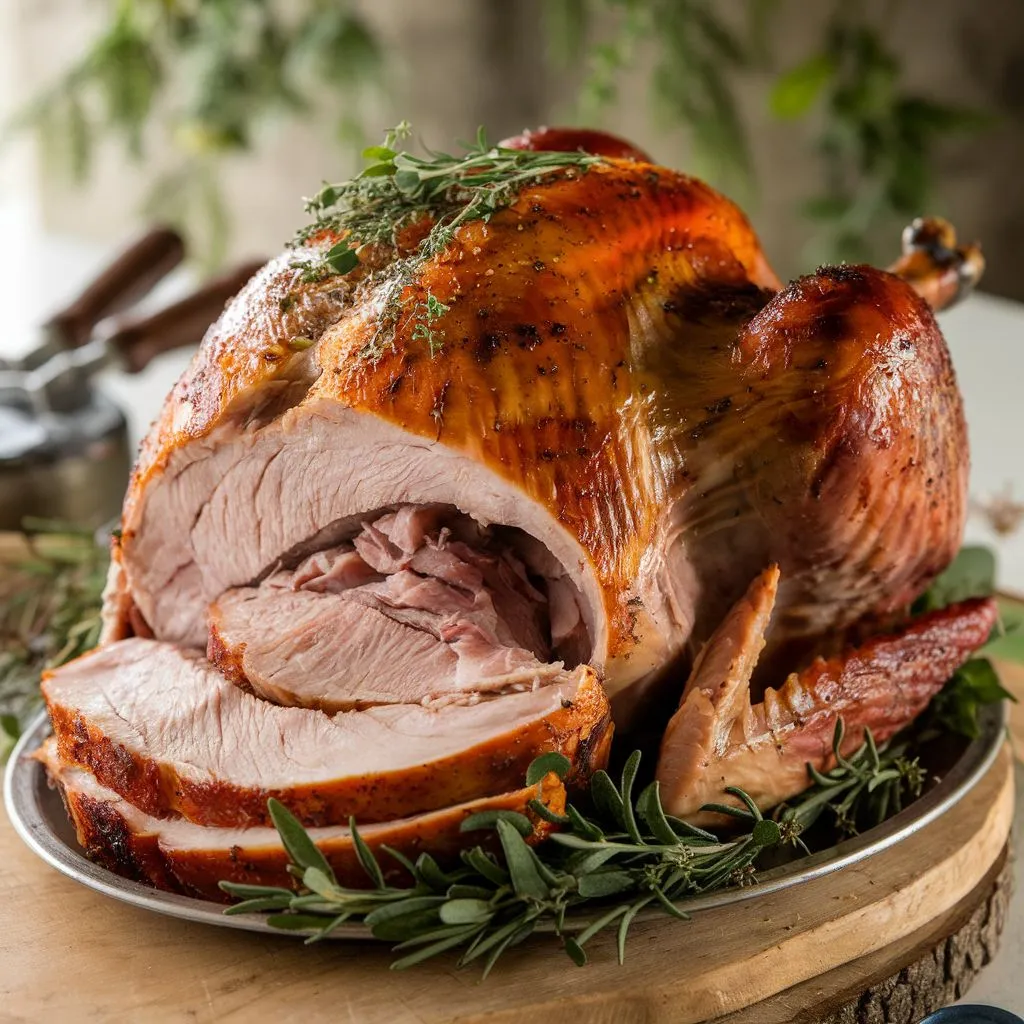
2. Smoked Classic Porchetta
Smoked classic porchetta is a flavorful Italian dish featuring a rolled pork roast, typically made with pork belly and pork loin and seasoned with herbs and spices. This recipe will guide you through the process of creating a delicious smoked porchetta that is perfect for any gathering.

Ingredients
For the Porchetta:
- Pork Belly: 5-6 pounds, skin-on
- Pork Loin: 2-3 pounds, boneless
- Kosher Salt: to taste
- Black Pepper: to taste
- Olive Oil: for rubbing
For the Herb Paste:
- Garlic: 4-8 cloves, minced (to taste)
- Fresh Rosemary: 2 tablespoons, chopped
- Fresh Sage: 2 tablespoons, chopped
- Dried Fennel Seeds: 2 tablespoons
- Red Pepper Flakes: 1 teaspoon (optional for heat)
- Zest of 1 Lemon
Instructions
- Prepare the Pork Belly and Loin:
- Score the skin of the pork belly in a crosshatch pattern to help it crisp up during cooking.
- Trim any excess fat from the pork loin and set it aside.
- Make the Herb Paste:
- In a bowl, combine minced garlic, rosemary, sage, fennel seeds, red pepper flakes, and lemon zest. Add olive oil gradually until you form a paste.
- Assemble the Porchetta:
- Lay the pork belly, skin-side down, on a clean surface. Season the flesh side with salt and pepper.
- Spread half of the herb paste over the pork belly.
- Place the pork loin in the center of the belly and rub it with the remaining herb paste.
- Carefully roll the pork belly around the loin to form a cylindrical shape. Tie tightly with butcher’s twine at 1-inch intervals.
- Season the Outside:
- Generously season the outside of the rolled porchetta with salt and black pepper.
- Refrigerate Overnight:
- Place the wrapped porchetta on a rimmed baking sheet and refrigerate it uncovered overnight to allow it to air-dry.
- Preheat Your Smoker:
- Set your smoker to 225°F (107°C) or 250°F (121°C), depending on your preference. Use wood chips like apple or hickory for added flavor.
- Smoke the Porchetta:
- Place the porchetta directly on the smoker grates, seam-side down.
- Smoke for approximately 3-4 hours, or until the internal temperature reaches about 145°F (63°C) to 150°F (66°C).
- Crisp the Skin (Optional):
- For extra crispy skin, increase your smoker temperature to about 500°F (260°C) during the last few minutes of cooking or transfer to a preheated oven at that temperature for about 10 minutes.
- Rest and Serve:
- Remove from smoker and let it rest for at least 30 minutes, tented with foil.
- Slice into thick pieces and serve warm.
Tips
- Ensure that your smoker maintains a consistent temperature for even cooking.
- Use a meat thermometer to check for doneness accurately.
- Leftovers can be used in sandwiches or served cold as part of a charcuterie board.
This classic smoked porchetta recipe will yield an impressive dish that is bursting with flavor and perfect for special occasions! Enjoy your culinary creation
3. Roasted Pork Tenderloin with Garlic and Herbs
Roasted pork tenderloin is a lean and flavorful cut of meat that pairs wonderfully with garlic and fresh herbs. This recipe will guide you through creating a delicious, herb-infused roasted pork tenderloin that is perfect for any occasion.

Ingredients
- Pork Tenderloin: 1-2 pounds (trimmed)
- Olive Oil: 2 tablespoons
- Garlic: 4-6 cloves, minced
- Fresh Rosemary: 1 tablespoon, chopped
- Fresh Thyme: 1 tablespoon, chopped
- Salt: 1 teaspoon (to taste)
- Black Pepper: ½ teaspoon (freshly ground)
- Lemon Zest: from 1 lemon (optional for brightness)
Instructions
- Preheat the Oven:
- Preheat your oven to 400°F (200°C).
- Prepare the Pork Tenderloin:
- Pat the pork tenderloin dry with paper towels to remove excess moisture. This helps achieve a nice sear.
- Trim any excess fat or silver skin from the tenderloin.
- Make the Herb Mixture:
- In a small bowl, combine minced garlic, chopped rosemary, chopped thyme, salt, black pepper, and lemon zest (if using).
- Add olive oil to the mixture and stir until well combined.
- Season the Pork:
- Rub the herb mixture all over the pork tenderloin, ensuring it is evenly coated.
- Sear the Pork (optional but recommended):
- Heat a large oven-safe skillet over medium-high heat and add a little olive oil.
- Once hot, add the pork tenderloin and sear on all sides until golden brown (about 2-3 minutes per side).
- Roast in the Oven:
- Transfer the skillet with the pork to the preheated oven.
- Roast for about 20-25 minutes, or until an instant-read thermometer inserted into the thickest part of the tenderloin registers at least 145°F (63°C).
- Rest the Meat:
- Remove the pork from the oven and tent it loosely with aluminum foil. Let it rest for about 5-10 minutes to allow juices to redistribute.
- Slice and Serve:
- Slice the pork tenderloin into medallions and serve warm. It pairs beautifully with roasted vegetables or a fresh salad.
Tips
- For added flavor, consider marinating the pork in the herb mixture for a few hours or overnight before cooking.
- Always use a meat thermometer to ensure perfect doneness without overcooking.
- Leftovers can be stored in an airtight container in the refrigerator for up to three days.
This roasted pork tenderloin with garlic and herbs is not only simple to prepare but also delivers a gourmet taste that will impress your family and friends! Enjoy your meal
❇️Low Carb Fish Recipes
Seafood is quick to cook and perfect for low-carb meals:
1. Garlic Salmon
Garlic salmon is a simple yet flavorful dish that highlights the natural richness of salmon, enhanced by the aromatic qualities of garlic. Here’s a versatile recipe that you can easily prepare for a weeknight dinner or a special occasion.

Ingredients
- Salmon Fillets: 4 (about 6 oz each)
- Olive Oil: 2 tablespoons
- Garlic: 4-6 cloves, minced
- Fresh Lemon Juice: from 1 lemon
- Butter: 2 tablespoons (optional for richness)
- Salt to taste
- Black Pepper: to taste
- Fresh Parsley: for garnish (optional)
Instructions
- Prepare the Salmon:
- Pat the salmon fillets dry with paper towels.
- Season both sides with salt and black pepper.
- Make the Garlic Mixture:
- In a small bowl, combine minced garlic, olive oil, and lemon juice. If using butter, melt it and mix it in as well.
- Cook the Salmon:
- Heat a large skillet over medium-high heat. Add a little olive oil if desired.
- Once hot, place the salmon fillets, skin-side down, in the skillet.
- Cook for about 3-4 minutes until the skin is crispy and golden brown.
- Add Garlic Mixture:
- Carefully flip the salmon fillets over.
- Pour the garlic mixture over the salmon and cook for an additional 3-4 minutes, basting frequently with the sauce until the salmon is cooked through and flakes easily with a fork.
- Serve:
- Remove from heat and garnish with fresh parsley if desired.
- Serve immediately with your choice of sides, such as steamed vegetables or rice.
Tips
- For added flavor, consider marinating the salmon in the garlic mixture for about 30 minutes before cooking.
- Adjust the amount of garlic based on your preference; more garlic will give a stronger flavor.
- If you prefer oven-baked salmon, preheat your oven to 375°F (190°C), place the seasoned salmon on a baking sheet, drizzle with the garlic mixture, and bake for about 15-20 minutes until cooked through.
This garlic salmon recipe is not only quick to prepare but also delivers a deliciously rich flavor that pairs well with many sides! Enjoy your meal
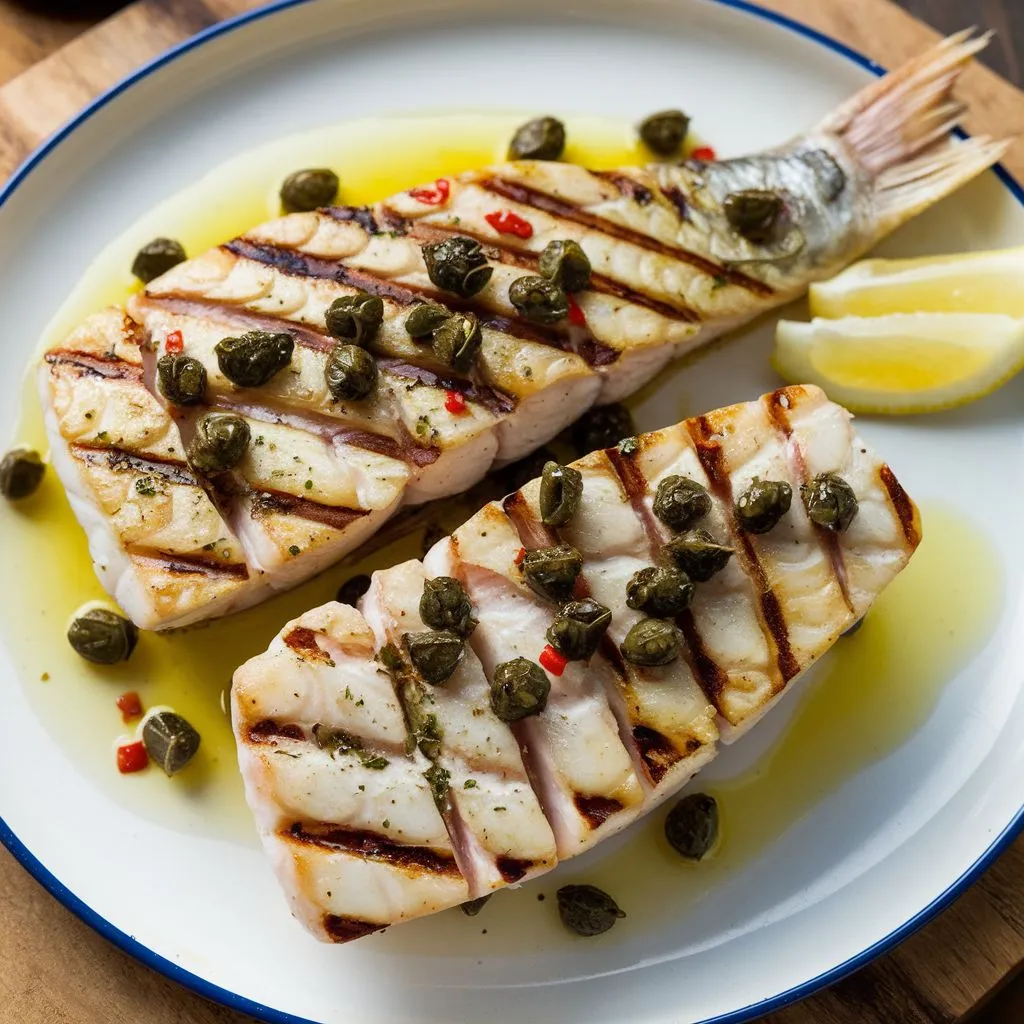
2. Swordfish with Sicilian Olive Oil Sauce
This recipe for swordfish with Sicilian olive oil sauce combines the rich flavors of fresh ingredients typical of Sicilian cuisine. The dish features succulent swordfish steaks topped with a vibrant sauce made from olive oil, garlic, olives, and capers. Here’s how to prepare it.
Ingredients
- Swordfish Steaks: 2 (about 6-8 ounces each)
- Olive Oil: ½ cup (divided)
- Garlic: 4 cloves, minced
- Cherry Tomatoes: 1 cup, halved (or 2 medium tomatoes, chopped)
- Pitted Olives: ½ cup (preferably Castelvetrano or Kalamata), sliced
- Capers: 2 tablespoons, drained
- Fresh Parsley: ¼ cup, chopped
- Lemon Juice: from 1 lemon
- Salt and Pepper: to taste
- Red Chili Flakes: optional, for heat
Instructions
- Prepare the Swordfish:
- Pat the swordfish steaks dry with paper towels and season both sides with salt and pepper.
- Heat Olive Oil:
- In a large skillet over medium heat, add 2 tablespoons of olive oil. Once hot, add the minced garlic and sauté for about 1 minute, until fragrant.
- Add Tomatoes and Olives:
- Stir in the cherry tomatoes and olives. Cook for about 3-4 minutes until the tomatoes start to soften.
- Incorporate Capers and Seasoning:
- Add the capers and optional red chili flakes (if using) to the skillet. Stir well to combine all ingredients and cook for another minute.
- Cook the Swordfish:
- Push the vegetable mixture to the sides of the skillet to create space in the center. Add another tablespoon of olive oil if needed.
- Place the swordfish steaks in the center of the skillet. Cook for about 3-4 minutes on one side until golden brown.
- Flip and Finish Cooking:
- Carefully flip the swordfish steaks over and cook for an additional 3-4 minutes, or until they are cooked through and easily flake with a fork.
- Add Lemon Juice and Parsley:
- Squeeze fresh lemon juice over the fish and sprinkle with chopped parsley before serving.
- Serve:
- Plate the swordfish steaks topped with the sautéed vegetables and drizzle with remaining olive oil if desired. Serve warm with crusty bread or over a bed of rice or pasta to soak up the delicious sauce.
Tips
- For added flavor, marinate the swordfish in olive oil, garlic, and lemon juice for about 30 minutes before cooking.
- Adjust cooking time based on the thickness of your swordfish steaks; they should reach an internal temperature of 145°F (63°C).
- This dish pairs well with a fresh green salad or steamed vegetables for a complete meal.
Enjoy this delightful Sicilian-inspired swordfish dish that brings together Mediterranean flavors in every bite
3. Bacon-Wrapped Scallops
Bacon-wrapped scallops are a delightful appetizer that combines the rich, savory flavor of bacon with the sweet, tender taste of scallops. This recipe will guide you through preparing this impressive dish that is perfect for special occasions or casual gatherings.

Ingredients
- Large Sea Scallops: 12-20 (depending on serving size)
- Bacon: 12-20 slices (thin-cut preferred)
- Olive Oil: 1-2 tablespoons (for cooking)
- Garlic: 2 cloves, minced (optional)
- Butter: 2 tablespoons (for basting)
- Salt and Pepper: to taste
- Fresh Parsley: for garnish (optional)
- Lemon Wedges: for serving
Instructions
- Prepare the Scallops:
- Rinse the scallops under cold water and pat them dry with paper towels.
- Remove the tough side muscle (abductor muscle) if present.
- Season with salt and pepper.
- Par-Cook the Bacon:
- In a skillet over medium heat, cook the bacon strips for about 5 minutes, until they start to render fat but are not fully crispy. This makes them pliable for wrapping.
- Remove the bacon from the skillet and place it on a paper towel-lined plate to drain.
- Wrap the Scallops:
- Wrap each scallop with a slice of par-cooked bacon and secure it with a toothpick. If using larger scallops, you may need to use a full slice of bacon.
- Cook the Scallops:
- Heat olive oil in a large skillet over medium-high heat.
- Place the wrapped scallops in the skillet, seam side down. Cook for about 3-4 minutes, then carefully flip and cook for another 3-4 minutes, or until the bacon is crispy and the scallops are opaque and cooked through.
- During the last minute of cooking, add butter and minced garlic to the pan, basting the scallops with the melted garlic butter for added flavor.
- Serve:
- Remove from heat and let rest for a minute.
- Serve warm, garnished with fresh parsley and lemon wedges on the side.
Tips
- For extra flavor, consider marinating the scallops in olive oil, garlic, and lemon juice for about 30 minutes before wrapping them in bacon.
- If you prefer a sweeter touch, you can brush a mixture of maple syrup or brown sugar over the bacon-wrapped scallops before cooking.
- These scallops can also be broiled in an oven at 425°F (220°C) for about 10-15 minutes if you prefer that method.
This bacon-wrapped scallops recipe is sure to impress your guests with its combination of flavors and textures! Enjoy your culinary creation
❇️Low Carb Soup Recipes
Warm up with hearty soups featuring low-carb ingredients:
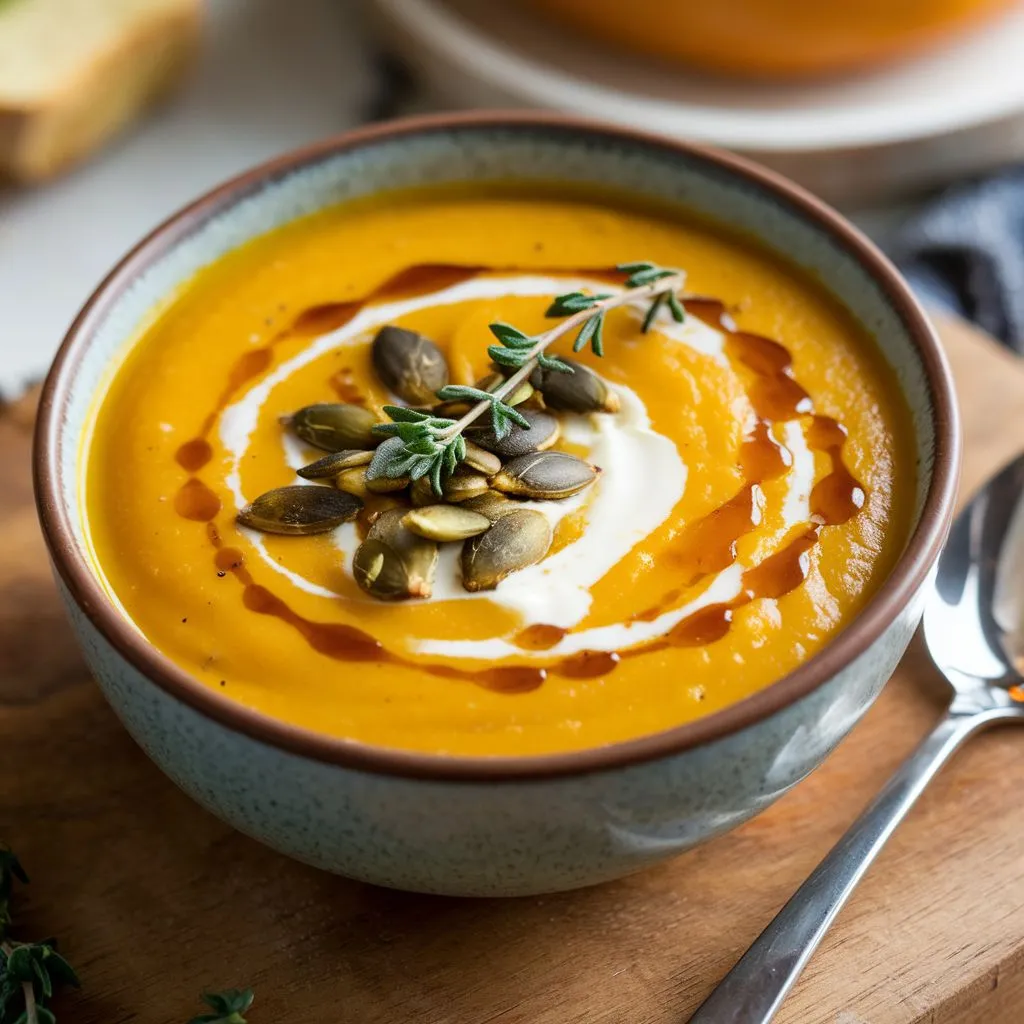
1. Roasted Butternut Squash Soup
Roasted butternut squash soup is a comforting and creamy dish that highlights the natural sweetness of the squash, enhanced by aromatic spices. Here’s a simple recipe to create this delicious soup.
Ingredients
- Butternut Squash: 1 (about 3-4 pounds)
- Olive Oil: 2 tablespoons
- Onion: 1 medium, chopped
- Garlic: 4 cloves, minced
- Vegetable Broth: 3-4 cups (adjust for desired consistency)
- Maple Syrup: 1 tablespoon (optional for sweetness)
- Salt: to taste
- Black Pepper: to taste
- Ground Nutmeg: ¼ teaspoon
- Ground Ginger: ¼ teaspoon (optional)
- Fresh Herbs: such as thyme or sage for garnish (optional)
Instructions
- Preheat the Oven:
- Preheat your oven to 425°F (220°C).
- Prepare the Butternut Squash:
- Cut the butternut squash in half lengthwise and scoop out the seeds.
- Drizzle the cut sides with olive oil and sprinkle with salt and pepper.
- Place the squash, cut side down on a baking sheet and roast for about 45-60 minutes, or until tender.
- Roast the Onion and Garlic:
- In the last 30 minutes of roasting, add a halved onion and a head of garlic (wrapped in foil) to the baking sheet. This will caramelize them and add depth to the soup.
- Blend the Soup:
- Once the squash is cool enough to handle, scoop out the flesh and transfer it to a blender.
- Squeeze out the roasted garlic cloves from their skins and add them to the blender along with the roasted onion.
- Pour in about 3 cups of vegetable broth, maple syrup, nutmeg, ginger, salt, and pepper. Blend until smooth. Adjust consistency by adding more broth if needed.
- Heat and Serve:
- Pour the blended soup into a pot and heat over medium heat until warmed through.
- Taste and adjust seasoning as necessary.
- Serve hot, garnished with fresh herbs if desired.
Tips
- For added creaminess, consider stirring in coconut milk or heavy cream after blending.
- This soup can be made ahead of time and tastes even better the next day as flavors meld.
- Top with roasted pumpkin seeds or croutons for added texture.
This roasted butternut squash soup is not only easy to make but also provides a warm and hearty meal that’s perfect for chilly days! Enjoy your cooking
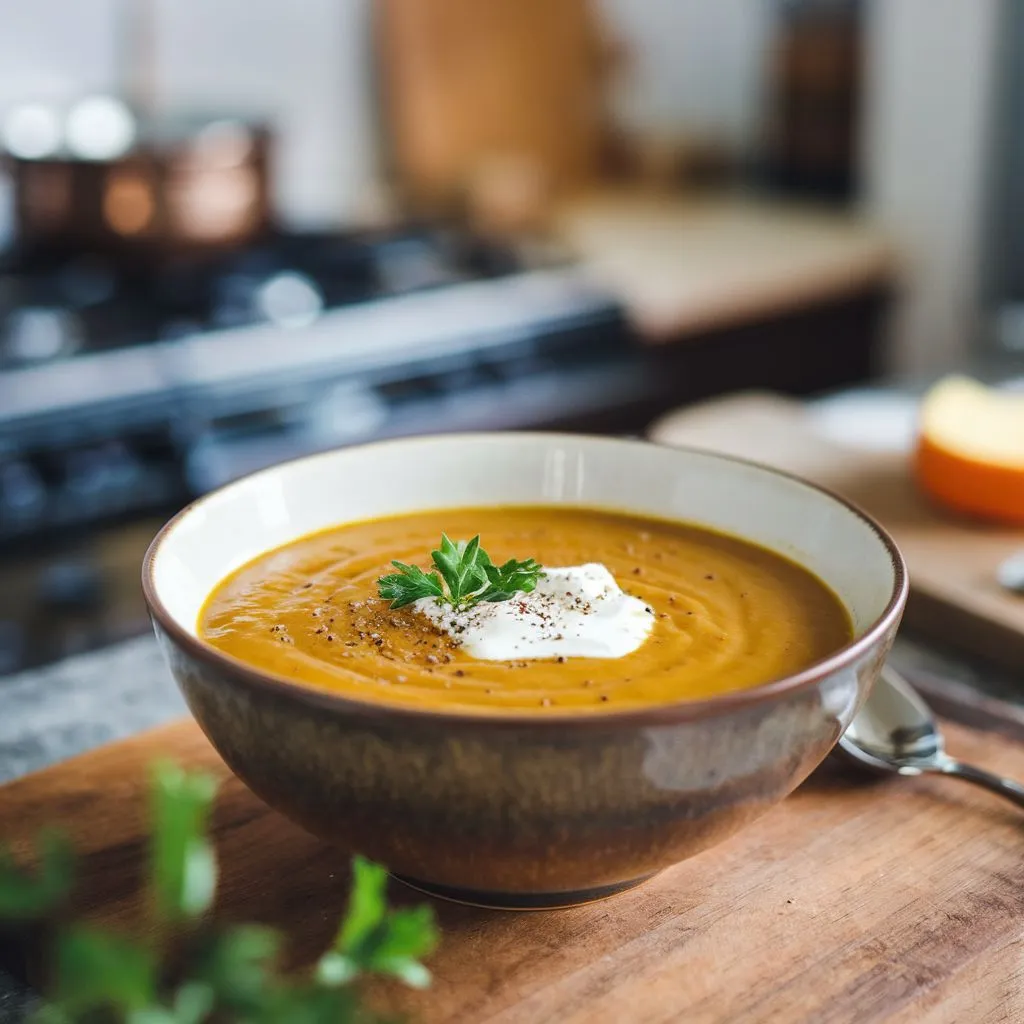
2. Smoked Pumpkin Soup
Smoked pumpkin soup is a comforting and flavorful dish that combines the natural sweetness of pumpkin with a delightful smoky flavor. This recipe incorporates smoked pumpkin, which can be achieved by smoking fresh pumpkins or using smoked ingredients for a similar effect. Here’s how to make it.
Ingredients
- Smoked Pumpkin Puree: 2.5 cups (from about 2 sugar pumpkins)
- Olive Oil: 1 tablespoon
- Onion: 1 medium, chopped
- Garlic: 4 cloves, minced
- Chicken or Vegetable Broth: 4 cups
- Heavy Cream: ½ cup (or coconut milk for a dairy-free option)
- Balsamic Vinegar: 1 teaspoon (for acidity)
- Fresh Herbs such as rosemary, sage, or thyme (1 teaspoon each, chopped)
- Salt and Pepper: to taste
- Smoked Paprika: 1 teaspoon (optional for additional smokiness)
- Cornstarch: 2 tablespoons mixed with ¼ cup water (for thickening, optional)
Instructions
- Prepare the Smoked Pumpkin:
- If using fresh pumpkins, cut them in half, remove the seeds, and smoke them at 250°F (121°C) for about 2 hours or until fork-tender. Once smoked, scoop out the flesh and set aside.
- Alternatively, you can use canned pumpkin puree if you prefer not to smoke your own.
- Sauté Aromatics:
- In a large pot, heat olive oil over medium heat. Add the chopped onion and sauté until translucent, about 5 minutes.
- Add minced garlic and cook for an additional minute until fragrant.
- Combine Ingredients:
- Stir in the smoked pumpkin puree and pour in the chicken or vegetable broth. Mix well.
- Add balsamic vinegar, herbs, smoked paprika (if using), salt, and pepper. Bring the mixture to a simmer.
- Blend the Soup:
- Using an immersion blender, blend the soup until smooth. If you don’t have an immersion blender, carefully transfer the soup to a countertop blender in batches and blend until smooth.
- If you prefer a thicker soup, mix cornstarch with water and stir it into the soup while it’s simmering. Allow it to cook for an additional 5-10 minutes until thickened.
- Finish with Cream:
- Stir in heavy cream or coconut milk for added creaminess. Adjust seasoning with salt and pepper as needed.
- Serve:
- Ladle the soup into bowls and garnish with fresh herbs or a drizzle of olive oil if desired.
Tips
- For added texture and flavor, consider topping the soup with roasted pumpkin seeds or crispy sage leaves.
- This soup can be made ahead of time and stored in the refrigerator for up to three days; it also freezes well.
- Adjust the level of smokiness by varying the amount of smoked paprika or using different types of smoked ingredients.
This smoked pumpkin soup is perfect for cozy autumn evenings and brings a unique twist to traditional pumpkin soup! Enjoy your cooking
3. Smoked Asparagus Soup
Smoked asparagus soup is a flavorful and creamy dish that highlights the unique taste of smoked asparagus. This recipe combines smoked asparagus with aromatic ingredients to create a comforting soup that is perfect for any occasion.

Ingredients
- Asparagus Spears: 1 pound, divided
- Olive Oil: 1 tablespoon
- Salt: to taste
- Pepper: to taste
- Butter: 1 tablespoon
- Yellow Onion: ½, diced small
- Garlic: 2 cloves, minced
- Chicken Stock: 1½ cups (or vegetable broth for a vegetarian option)
- Heavy Cream: 1½ cups (or coconut cream for a dairy-free option)
- Smoked Paprika (for serving
Instructions
- Prepare the Smoker:
- Preheat your smoker to 180°F (82°C). If available, use the Super Smoke setting for enhanced flavor.
- Smoke the Asparagus:
- Reserve 2 spears of fresh asparagus for garnish. Drizzle the remaining asparagus with olive oil and season with salt and pepper.
- Place the seasoned asparagus directly on the grill grate and smoke for about 20-30 minutes or until tender.
- Sauté Aromatics:
- In a saucepan over medium heat, melt the butter. Add the diced onion and sauté until translucent, about 2-3 minutes.
- Stir in the minced garlic and cook for an additional minute until fragrant.
- Combine Ingredients:
- Remove the smoked asparagus from the grill and cut it into 1-inch pieces. Add the smoked asparagus to the saucepan with the onions and garlic.
- Pour in the chicken stock and heavy cream, bringing the mixture to a simmer.
- Blend the Soup:
- Remove from heat and use an immersion blender to puree the soup until smooth. Alternatively, transfer it to a countertop blender in batches if necessary.
- Serve:
- Taste and adjust seasoning with salt and pepper as needed.
- Ladle the soup into bowls, garnishing with thinly shaved reserved asparagus spears, a sprinkle of smoked paprika, and additional salt and pepper if desired.
Tips
- For an extra depth of flavor, consider adding herbs such as thyme or dill during cooking.
- This soup can be stored in an airtight container in the refrigerator for up to three days or frozen for longer storage.
- Pair this soup with crusty bread or a light salad for a complete meal.
This smoked asparagus soup is not only delicious but also showcases the unique flavors of smoked vegetables, making it a standout dish! Enjoy your cooking
❇️Low Carb Shrimp Recipes
Quick and easy shrimp recipes ideal for low-carb dinners:
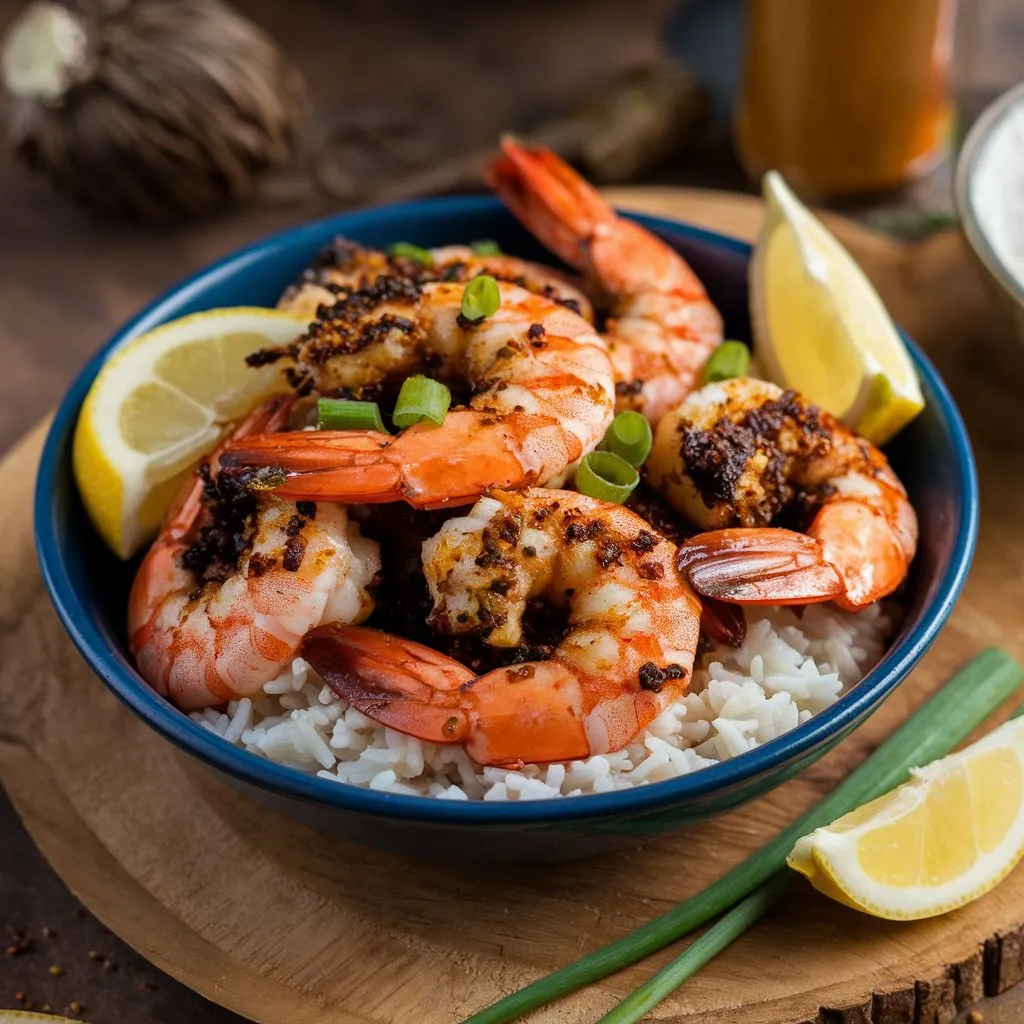
1. Cajun Smoked Shrimp
Cajun smoked shrimp is a flavorful dish that combines the bold spices of Cajun cuisine with the rich, smoky flavor imparted by the smoker. This recipe is easy to prepare and perfect for gatherings or as a delicious appetizer.
Ingredients
- Shrimp: 2 pounds of large or jumbo shrimp, peeled and deveined
- Olive Oil: ¼ cup
- Cajun Seasoning: 2 tablespoons (store-bought or homemade)
- Garlic: 4 cloves, minced
- Lemon Juice: from 1 lemon
- Salt to taste
- Black Pepper: to taste
- Fresh Parsley: for garnish (optional)
Instructions
- Marinate the Shrimp:
- In a large resealable bag or bowl, combine olive oil, Cajun seasoning, minced garlic, lemon juice, salt, and black pepper.
- Add the shrimp to the marinade and toss to coat. Seal the bag or cover the bowl and refrigerate for at least 4 hours, preferably overnight for maximum flavor.
- Prepare the Smoker:
- Preheat your smoker to between 225°F and 250°F (107°C and 121°C). Use wood chips like hickory or apple for a nice flavor profile.
- Smoke the Shrimp:
- Once the smoker is ready, place the marinated shrimp on a smoker-safe tray or skewer them if desired.
- Smoke the shrimp for about 30-45 minutes or until they turn opaque and reach an internal temperature of 145°F (63°C).
- Serve:
- Remove the shrimp from the smoker and transfer them to a serving platter.
- Garnish with fresh parsley and serve with lemon wedges on the side.
Tips
- For added flavor, consider using a homemade Cajun seasoning mix that includes smoked paprika, thyme, garlic powder, onion powder, and cayenne pepper.
- If you prefer grilled shrimp, you can cook them on skewers over direct heat for about 3-4 minutes per side.
- Serve your Cajun smoked shrimp with sides like grits, rice, or a fresh salad for a complete meal.
This Cajun smoked shrimp recipe is not only easy to make but also delivers a deliciously smoky and spicy flavor that will impress your guests! Enjoy your cooking
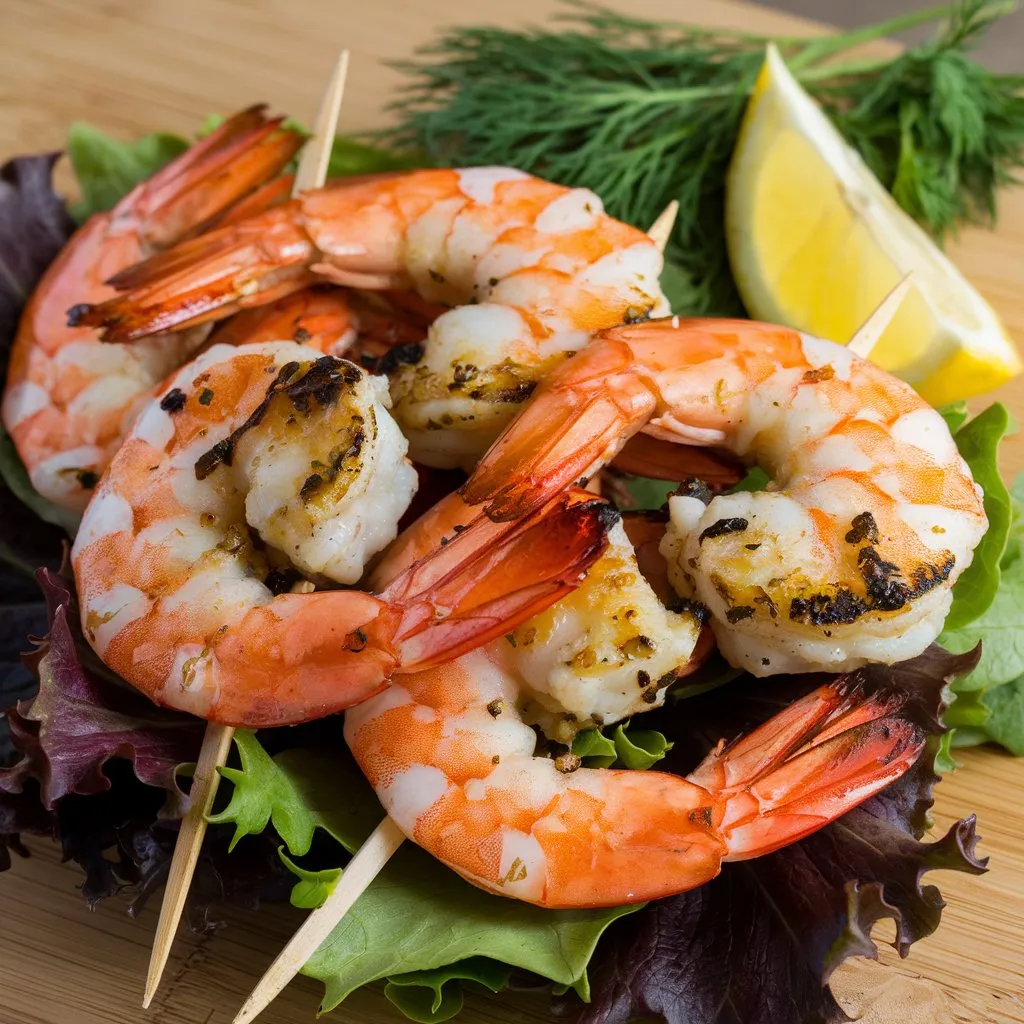
2. Grilled Shrimp Cocktail
Grilled shrimp cocktail is a delightful twist on the classic shrimp cocktail, featuring succulent shrimp grilled to perfection and served with a zesty cocktail sauce. This recipe is simple and quick, making it an excellent appetizer for any gathering.
Ingredients
For the Grilled Shrimp:
- Shrimp: 1 pound (extra jumbo, 16-20 per pound), peeled and deveined
- Olive Oil: ¼ cup
- Granulated Sugar: 1 teaspoon
- Chili Powder: 1 teaspoon
- Garlic Powder: 1 teaspoon
- Onion Powder: 1 teaspoon
- Kosher Salt: 1 teaspoon
- Black Pepper: ½ teaspoon
- Chopped Parsley: for garnish
- Lemon Wedges: for serving
For the Cocktail Sauce:
- Ketchup: 1 cup
- Prepared Horseradish: 1 tablespoon (adjust to taste)
- Lemon Juice: from 1 lemon
- Salt and Pepper: to taste
- Cayenne Pepper: a pinch (optional for heat)
Instructions
- Marinate the Shrimp:
- In a large bowl, combine olive oil, sugar, chili powder, garlic powder, onion powder, salt, and black pepper.
- Add the shrimp to the bowl and toss gently to coat. Cover and refrigerate for about 2-3 hours.
- Prepare the Grill:
- Preheat your grill to medium-high heat. Ensure the grill grates are clean and lightly oiled to prevent sticking.
- Grill the Shrimp:
- Once the grill is hot, place the marinated shrimp directly on the grates or thread them onto skewers for easier handling.
- Grill the shrimp for about 3-4 minutes per side or until they are opaque and have nice grill marks. Be careful not to overcook them.
- Make the Cocktail Sauce:
- In a small bowl, mix together ketchup, horseradish, lemon juice, salt, pepper, and cayenne pepper (if using). Adjust seasoning to taste.
- Serve:
- Transfer the grilled shrimp to a serving platter. Garnish with chopped parsley and serve with lemon wedges and the cocktail sauce on the side.
Tips
- For added flavor, consider soaking wooden skewers in water for about 30 minutes before grilling to prevent burning.
- You can customize the cocktail sauce by adding a dash of Worcestershire sauce or hot sauce for an extra kick.
- This dish pairs well with a fresh salad or crusty bread for a complete meal.
This grilled shrimp cocktail recipe is sure to impress your guests with its vibrant flavors and beautiful presentation! Enjoy your cooking
3. Spicy Shrimp Skewers
Spicy shrimp skewers are a quick and flavorful dish perfect for grilling. This recipe combines succulent shrimp with a zesty marinade, making them ideal for summer barbecues or as a delicious appetizer.

Ingredients
- Shrimp: 1 pound large shrimp, peeled and deveined
- Olive Oil: ¼ cup
- Lemon Juice: 2 tablespoons (freshly squeezed)
- Garlic: 4 cloves, minced
- Chili Powder: 1 teaspoon
- Paprika: 1 teaspoon
- Cayenne Pepper: ¼ teaspoon (adjust for heat preference)
- Salt: to taste
- Black Pepper: to taste
- Skewers: bamboo or metal (if using bamboo, soak in water for at least 30 minutes)
Instructions
- Prepare the Marinade:
- In a medium bowl, whisk together olive oil, lemon juice, minced garlic, chili powder, paprika, cayenne pepper, salt, and black pepper until well combined.
- Marinate the Shrimp:
- Add the peeled and deveined shrimp to the marinade. Toss to coat it evenly.
- Let the shrimp marinate in the refrigerator for about 15-30 minutes. Do not marinate for too long, as the acid from the lemon juice can start to cook the shrimp.
- Preheat the Grill:
- Preheat your grill to medium-high heat (about 350°F to 400°F).
- Assemble the Skewers:
- Thread the marinated shrimp onto the skewers, about 4-5 shrimp per skewer. Ensure they are spaced evenly.
- Grill the Shrimp:
- Place the skewers on the grill and cook for about 2-3 minutes per side, or until the shrimp are pink and opaque. Baste with any remaining marinade during grilling for added flavor.
- Serve:
- Remove from the grill and serve immediately with lemon wedges on the side for squeezing over the top.
Tips
- For added flavor, consider adding chopped fresh herbs like cilantro or parsley to the marinade.
- These skewers can also be served over a bed of rice or alongside a fresh salad.
- Adjust the spice level by adding more or less cayenne pepper or incorporating your favorite hot sauce into the marinade.
Enjoy these spicy shrimp skewers as a delightful addition to your next meal
❇️Featured Recipe: Balsamic Brussel Sprouts with Bacon
This section provides a detailed, step-by-step recipe for Balsamic brussels sprouts with Bacon, highlighting specific cooking techniques and serving suggestions to enhance your dining experience.
💎Additional Resources and Information
Other Smoking Articles
Explore links to articles on smoking techniques, including:
The 321-rib method
The 321 rib method is a popular technique for smoking ribs that ensures tender, flavorful results. This method involves three distinct stages of cooking:
- 3 Hours of Smoking: The ribs are placed in a smoker at a low temperature (typically around 225°F) to absorb smoke flavor. This stage is crucial for infusing the meat with a rich, smoky taste.
- 2 Hours Wrapped in Foil: After smoking, the ribs are wrapped tightly in foil, often with added moisture such as apple juice or beer. This step helps to steam the ribs, making them incredibly tender and juicy while retaining their flavors.
- 1 Hour of Finishing: Finally, the ribs are unwrapped and returned to the smoker or grill for an hour. During this time, they are typically basted with barbecue sauce, allowing for caramelization and a sticky glaze on the surface.
Key Points
- Temperature: The smoking phase is usually done at around 225°F.
- Moisture: Adding liquid during the wrapping phase is essential for tenderness.
- Final Sauce Application: The last hour is critical for developing a flavorful crust.
This method is especially favored for baby back ribs but can be adapted for spare ribs as well. The result is fall-off-the-bone tender ribs that are perfect for any barbecue gathering
Smoked bratwurst
Smoked bratwurst is a delicious and flavorful dish that is perfect for grilling or smoking. This recipe will guide you through the process of preparing and smoking bratwurst to achieve juicy, smoky sausages that are sure to impress.
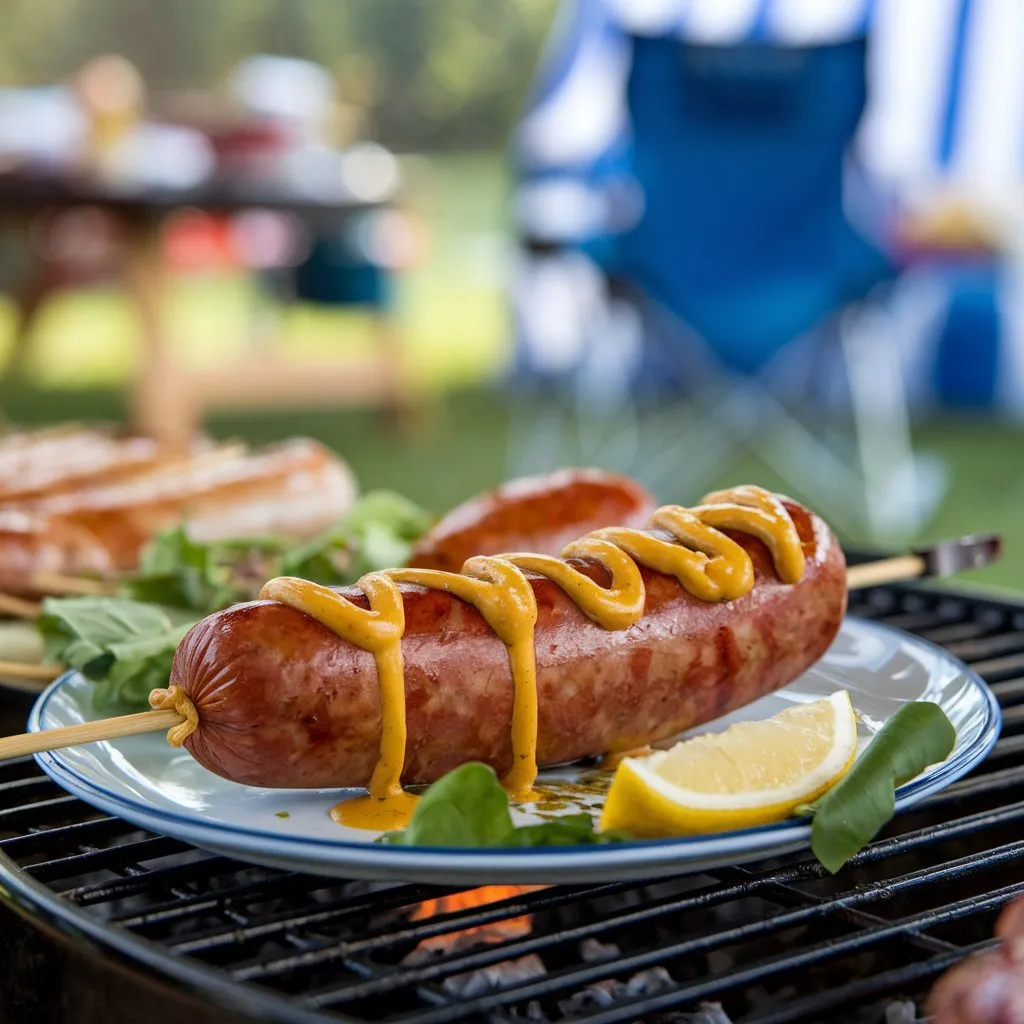
Ingredients
- Bratwurst Sausages: 12 uncooked bratwursts (made from pork or a blend of meats)
- Olive Oil: ¼ cup (optional, for brushing)
- Wood Chips or Pellets: Hickory, apple, or your choice for smoking
- Beer: 2 bottles (for braising, optional)
- Onion: 1 medium, sliced (for braising, optional)
- Hot Dog Buns: for serving
- Mustard: for serving
- Chopped Onion: for garnish (optional)
Instructions
- Prepare the Smoker:
- Preheat your smoker to 225°F (107°C). If using a pellet smoker, set it to the “High Smoke” or “Super Smoke” setting.
- Optional Beer Bath:
- In a large cast-iron skillet, add sliced onions and pour in the beer. Bring the mixture to a simmer over medium heat.
- Once simmering, place the bratwursts in the skillet so they are partially submerged in the beer. This step adds moisture and flavor.
- Smoke the Bratwurst:
- Transfer the skillet to the smoker and smoke the bratwurst for about 15 minutes, allowing it to absorb some smoke flavor.
- After 15 minutes, remove the bratwurst from the beer bath and place it directly on the smoker grates. Discard the beer bath if desired.
- Finish Smoking:
- Continue to smoke the bratwurst for an additional 30-45 minutes or until they reach an internal temperature of 160°F (71°C). Use a meat thermometer to check doneness.
- Optionally, brush the bratwurst with olive oil while smoking for added flavor.
- Serve:
- Once done, remove the bratwurst from the smoker and let them rest for a few minutes.
- Serve in hot dog buns with your choice of mustard, chopped onions, sauerkraut, or any other desired toppings.
Tips
- If you prefer a bit of char on your bratwurst, consider finishing them on a hot grill for a couple of minutes after smoking.
- You can experiment with different types of wood chips for varying flavors; hickory offers a robust smoke while applewood provides a milder sweetness.
- For added flavor, consider marinating the bratwurst in your favorite spices or sauces before smoking.
This smoked bratwurst recipe is perfect for summer cookouts, game days, or any occasion where delicious grilled food is welcome! Enjoy your cooking
The best wood pellets for smoking
When selecting the best wood pellets for smoking, it’s important to consider the flavor profiles they impart and how well they pair with different types of meat. Here’s a summary of some of the top wood pellet options based on various sources:
Best Wood Pellets for Smoking
- Hickory Pellets:
- Flavor: Strong and robust, often considered the classic BBQ wood.
- Best For: Pork, ribs, brisket, and chicken.
- Notes: Hickory is versatile and can be used on most meats, but its strong flavor might overpower lighter foods.
- Apple Pellets:
- Flavor: Mild and sweet with a fruity aroma.
- Best For: Poultry, pork, seafood, and vegetables.
- Notes: Apple pellets provide a subtle sweetness that enhances the natural flavors of lighter meats.
- Cherry Pellets:
- Flavor: Sweet and fruity with a slightly tart finish.
- Best For: Pork, chicken, and beef.
- Notes: Cherry wood adds a beautiful color to meats while providing a balanced smoke flavor.
- Pecan Pellets:
- Flavor: Nutty and slightly sweet.
- Best For: Beef, pork, chicken, and even baked goods.
- Notes: Pecan is great for blending with other woods like cherry or apple for added complexity.
- Mesquite Pellets:
- Flavor: Strong and earthy with a bold profile.
- Best For: Beef and game meats.
- Notes: Mesquite can be overpowering; it’s best used sparingly or in combination with milder woods.
- Oak Pellets:
- Flavor: Medium strength with a mild nutty flavor.
- Best For: Almost any meat, especially beef and pork.
- Notes: Oak is versatile and provides a steady burn with a good smoke flavor.
- Alder Pellets:
- Flavor: Mild and sweet, often used in traditional smoking.
- Best For: Fish (especially salmon), poultry, and vegetables.
- Notes: Alder is commonly used for smoking because of its light flavor that doesn’t overpower delicate meats.
Tips for Choosing Wood Pellets
- Quality Matters: Opt for 100% natural hardwood pellets without fillers or additives for the best flavor and performance.
- Experimentation: Try different blends to find what works best for your taste preferences. Many brands offer blends that combine various woods to create unique flavors.
- Pairing with Food: Consider the type of meat you are smoking when choosing your pellets. Stronger-flavored woods like hickory or mesquite work well with robust meats like beef, while lighter woods like apple or cherry are better suited for poultry and fish.
Recommended Brands
- Popular brands noted for high-quality pellets include Traeger, Bear Mountain BBQ, Lumberjack, and Jealous Devil. These brands typically offer a variety of flavors to suit different cooking styles.
By selecting the right wood pellets based on these guidelines, you can enhance your smoking experience and achieve delicious results in your barbecue endeavors
Other Grilled Recipes
Discover more Traeger recipes, including:
1. Pork chops
Juicy Skillet Pork Chops
This method guarantees tender and flavorful pork chops with minimal fuss.
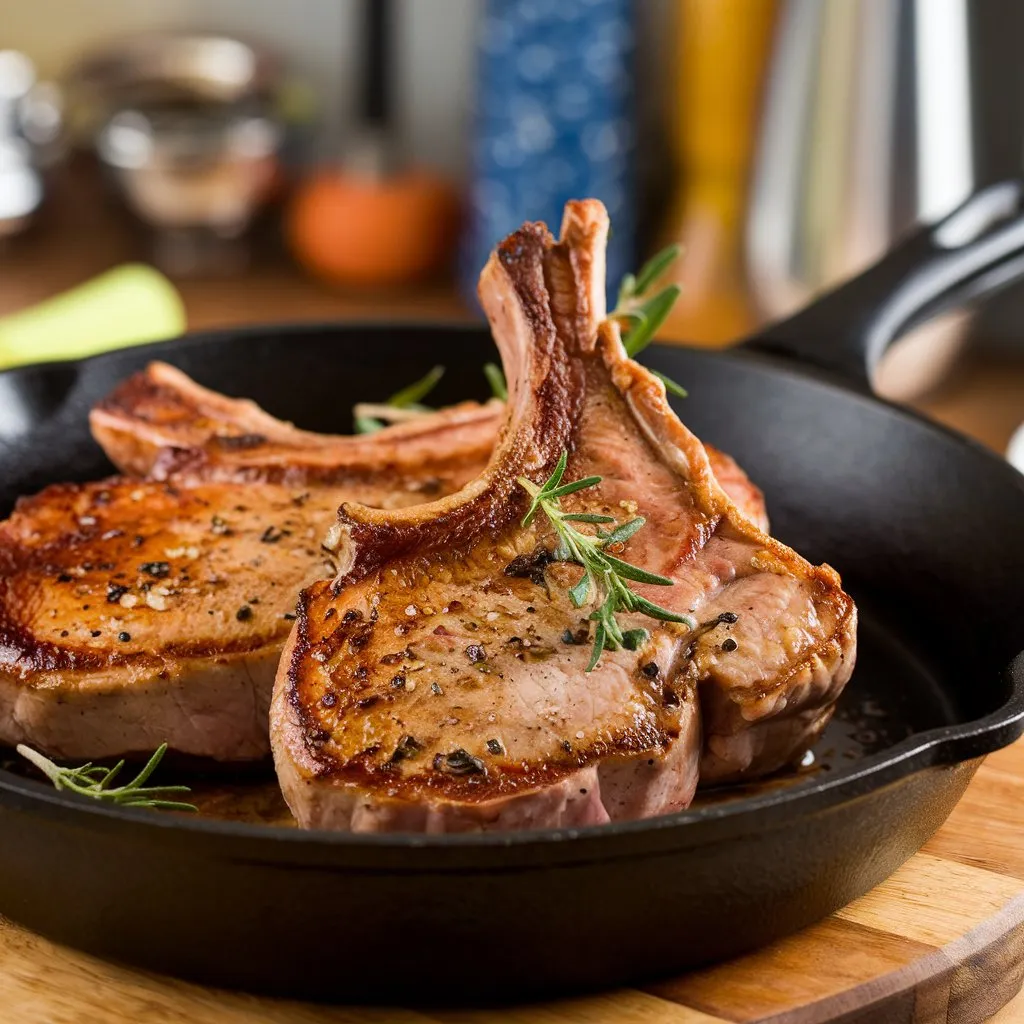
Ingredients:
- 4 pork chops (about 6 ounces each, 1 inch thick)
- Salt to taste
- 1 tablespoon all-purpose flour
- 1 teaspoon chili powder
- 1 teaspoon garlic powder
- 1 teaspoon onion powder
- ½ teaspoon smoked paprika
- ½ teaspoon ground black pepper
- 1 tablespoon avocado oil or vegetable oil
- 1 cup low-sodium chicken stock
- 1 tablespoon apple cider vinegar
- 2 teaspoons honey or brown sugar
- 1 tablespoon butter
- Fresh parsley, chopped (optional)
Instructions
- Season the pork chops with salt and let them rest for 30 minutes.
- Mix the flour and spices in a bowl, then rub the mixture on the pork chops.
- Heat oil in a skillet over medium-high heat and sear the pork chops for about 2-3 minutes on each side.
- Reduce heat, cover, and cook until the internal temperature reaches 145°F (63°C).
- Make a pan sauce with chicken stock, vinegar, and honey while the chops rest, then serve with the sauce drizzled over the top
2. Creamy Garlic Pork Chops
This recipe features a rich garlic cream sauce that complements the pork beautifully.

Ingredients:
- 4 boneless pork chops (0.75-1 inch thick)
- Salt and pepper to taste
- Olive oil and butter for cooking
- Whole garlic cloves (about a head)
- 1 tablespoon flour
- ½ cup chicken broth
- ¾ cup heavy cream
- Fresh parsley, chopped (optional)
Instructions
- Season the pork chops with salt and pepper.
- Sear the chops in a skillet with olive oil and butter until golden brown.
- Remove the chops and add garlic to the skillet; sauté until lightly browned.
- Stir in flour, then add broth and cream to create a sauce.
- Return the pork to the skillet to finish cooking in the sauce
3. Garlic Butter Baked Pork Chops
This simple oven-baked method results in flavorful, juicy chops.
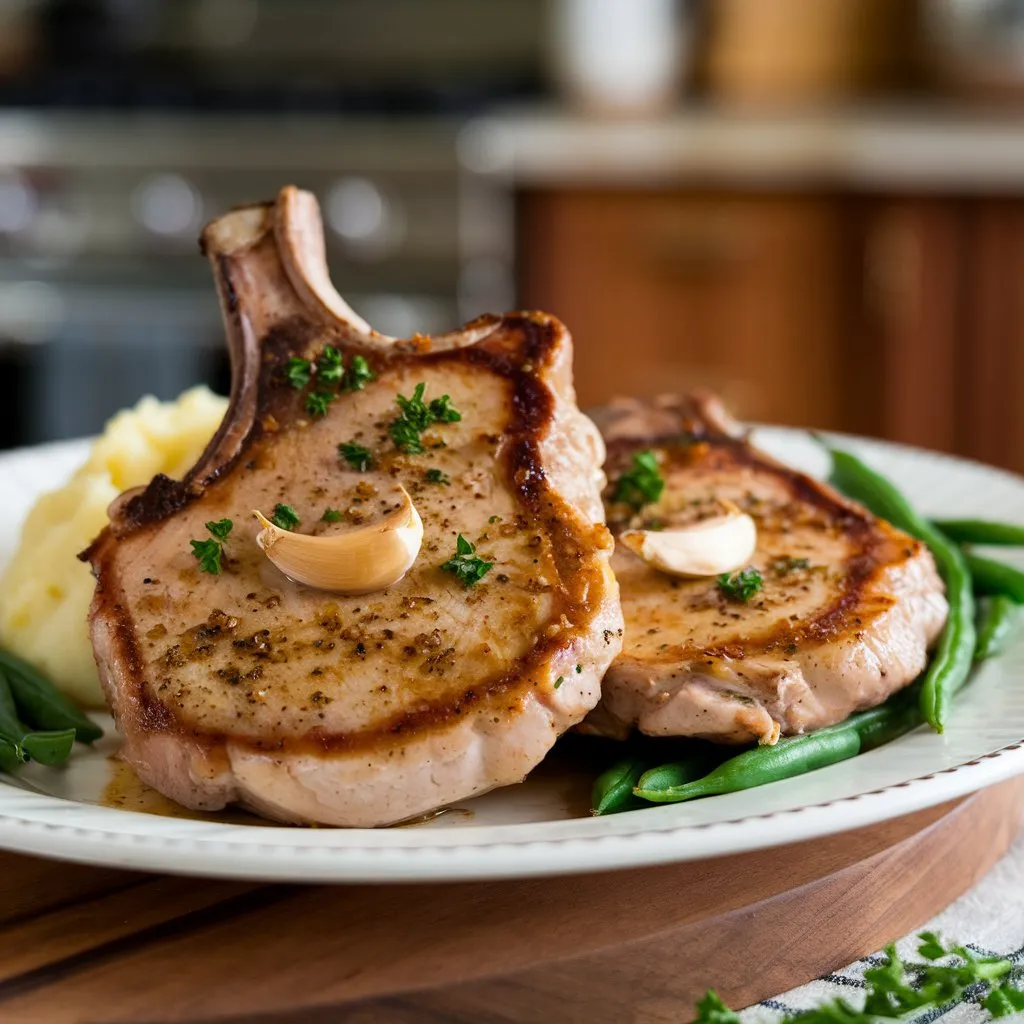
Ingredients:
- 2 medium-sized pork chops (bone-in or boneless)
- Salt and pepper to taste
- 4 tablespoons melted butter
- Fresh thyme and garlic
Instructions
- Preheat the oven to 425°F (220°C).
- Season the pork chops with salt and pepper.
- Sear in a hot skillet for about 2 minutes per side.
- Pour melted garlic butter over the chops and bake until they reach an internal temperature of 145°F (63°C)
2. Reverse seared tri-tip
The reverse sear method for cooking tri-tip is an excellent way to achieve a perfectly cooked, tender, and flavorful piece of meat. This technique involves slow-cooking the tri-tip at a low temperature before finishing it with a high-heat sear to create a delicious crust. Here’s how to do it:
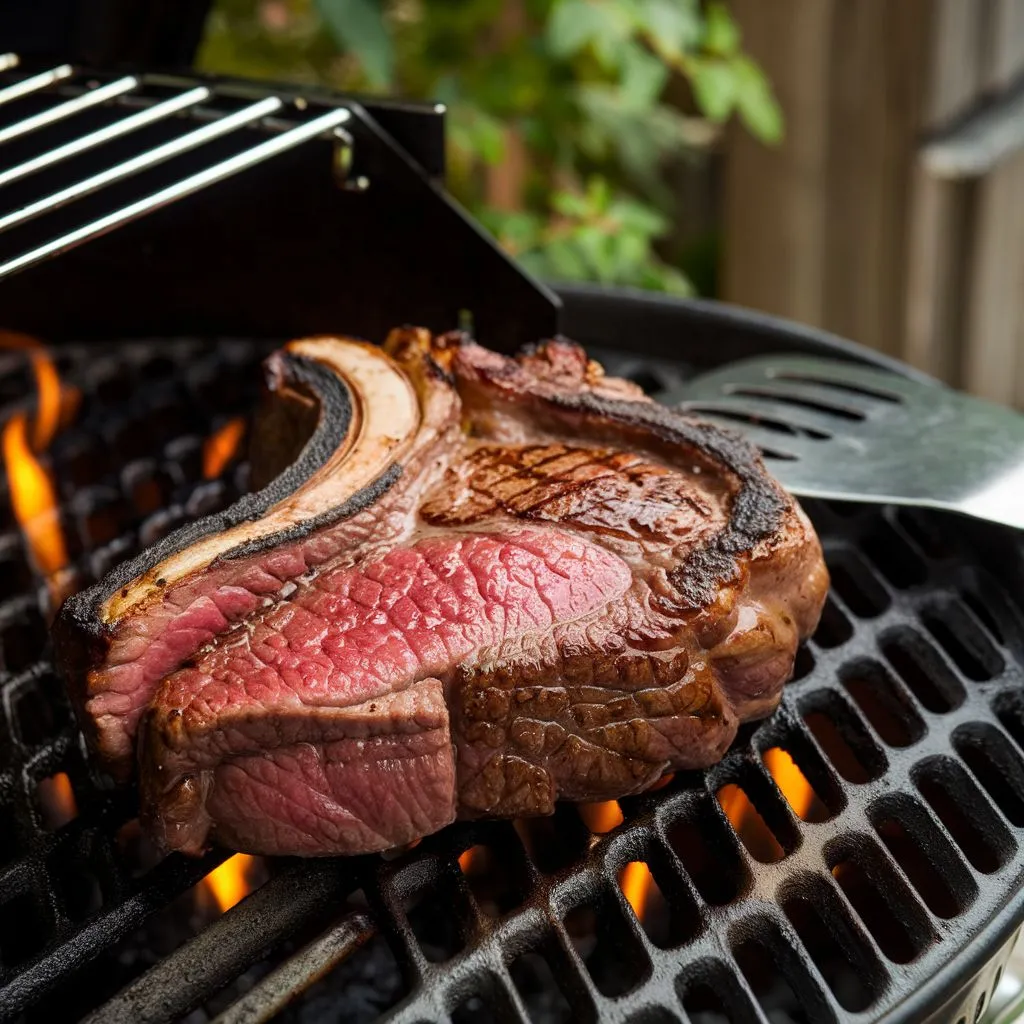
Ingredients
- Tri-Tip Roast: 2-3 pounds
- Olive Oil: for brushing
- Salt: to taste
- Black Pepper: to taste
- Garlic Powder: 1 teaspoon (optional)
- Dried Rosemary: 1 teaspoon (optional)
- Your Favorite Beef Rub (e.g., Montreal Steak Seasoning)
Instructions
- Prepare the Tri-Tip:
- Trim any excess fat or silver skin from the tri-tip.
- Rub the tri-tip with olive oil and season generously with salt, pepper, and any additional spices or rub you prefer. Let it sit at room temperature for about 30 minutes.
- Set Up Your Smoker or Grill:
- Preheat your smoker or grill to 225°F (107°C). If using a charcoal grill, set it up for indirect heat.
- Add wood chips (like hickory or oak) for smoking if desired.
- Smoke the Tri-Tip:
- Place the tri-tip on the grill grates away from direct heat. Close the lid and smoke until the internal temperature reaches approximately 115°F (46°C) for rare or 120°F (49°C) for medium-rare. This usually takes about 45 minutes to 1 hour, depending on the thickness of the meat.
- Rest the Meat:
- Once the desired temperature is reached, remove the tri-tip from the smoker and let it rest for about 10 minutes, tented with foil.
- Increase Heat for Searing:
- While the tri-tip rests, increase the temperature of your grill or smoker to at least 450°F (232°C). If using a cast iron skillet on a stovetop, heat it until very hot.
- Sear the Tri-Tip:
- Lightly brush both sides of the tri-tip with olive oil.
- Place it directly over high heat and sear for about 2-3 minutes per side or until a nice crust forms and the internal temperature reaches your desired doneness (around 130°F (54°C) for medium-rare).
- Final Resting Period:
- Remove the tri-tip from heat and let it rest again for about 10-15 minutes before slicing.
- Slice and Serve:
- Slice against the grain into thin slices and serve hot. This method ensures that each bite is tender and juicy.
Tips
- Use an instant-read thermometer to monitor internal temperature accurately.
- For added flavor, consider basting with garlic butter during the searing phase.
- Pair your tri-tip with sides like grilled vegetables, mashed potatoes, or a fresh salad.
This reverse-seared tri-tip recipe will yield a perfectly cooked roast with a smoky flavor and a delicious crust that is sure to impress your family and friends! Enjoy your cooking
3. Grilled lobster tail
Grilled lobster tails are a delicious and elegant dish that is surprisingly easy to prepare. Here’s a step-by-step guide to grilling lobster tails, ensuring they are juicy and flavorful.
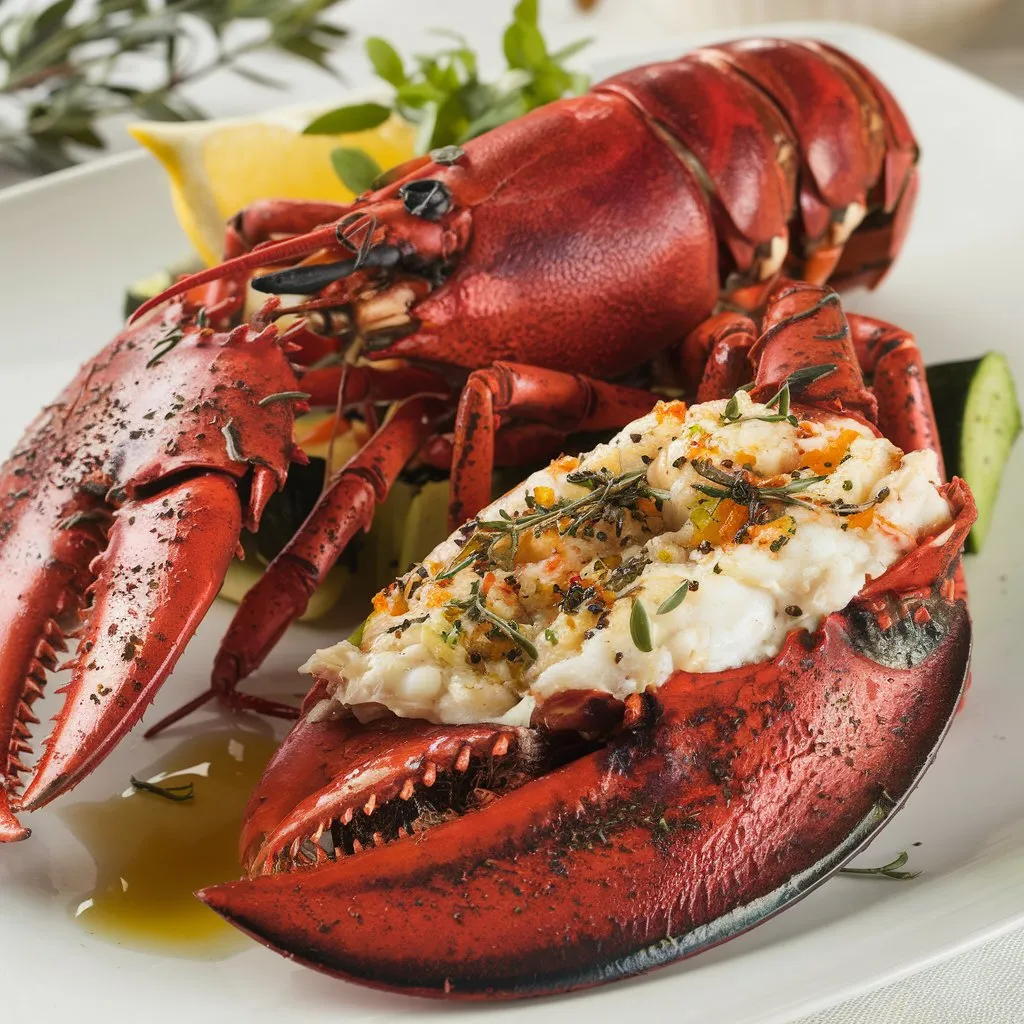
Ingredients
- Lobster Tails: 4 (about 6-8 ounces each)
- Olive Oil: 2 tablespoons
- Salt to taste
- Black Pepper: to taste
- Garlic Butter
- Unsalted Butter: ½ cup (1 stick), melted
- Garlic: 2 cloves, minced
- Fresh Parsley: 2 tablespoons, chopped (optional)
- Lemon Juice: from 1 lemon
Instructions
- Prepare the Lobster Tails:
- Using kitchen shears, cut down the top of each lobster tail shell, starting from the end opposite the tail fins and stopping just before the tail.
- Carefully pull the lobster meat out of the shell, keeping it attached at the base. Lay the meat on top of the shell.
- If desired, score the meat lightly with a knife to help it absorb flavors and cook evenly.
- Season the Lobster Tails:
- Brush the lobster meat with olive oil and season generously with salt and black pepper.
- Make Garlic Butter:
- In a small bowl, combine melted butter, minced garlic, chopped parsley, and lemon juice. Mix well.
- Preheat the Grill:
- Preheat your grill to medium-high heat (around 400°F / 204°C).
- Grill the Lobster Tails:
- Place the lobster tails on the grill with the flesh side down. Grill for about 5-6 minutes, or until grill marks appear and the flesh starts to turn opaque.
- Flip the tails over and brush with garlic butter. Grill for an additional 3-5 minutes or until the meat is fully cooked (opaque) and reaches an internal temperature of about 140°F (60°C).
- Serve:
- Remove from the grill and brush with more garlic butter if desired.
- Serve immediately with lemon wedges on the side for squeezing over the top.
Tips for Perfect Grilled Lobster Tails
- Don’t Overcook: Keep a close eye on cooking times; overcooked lobster can become tough and rubbery.
- Use Fresh Ingredients: Fresh lobster tails yield better flavor than frozen ones.
- Experiment with Flavors: Feel free to add spices or herbs to your garlic butter for extra flavor.
This grilled lobster tail recipe is perfect for special occasions or a luxurious treat at home. Enjoy your delicious seafood feast
THANK YOU for READING THE ARTICLE