Celebrate love with our handpicked Valentine’s Day dinner for two recipes. Enjoy simple, romantic, and special dishes designed to create a memorable night at home. Perfect for impressing your loved one!
1. Filet Mignon with Garlic Butter Recipe
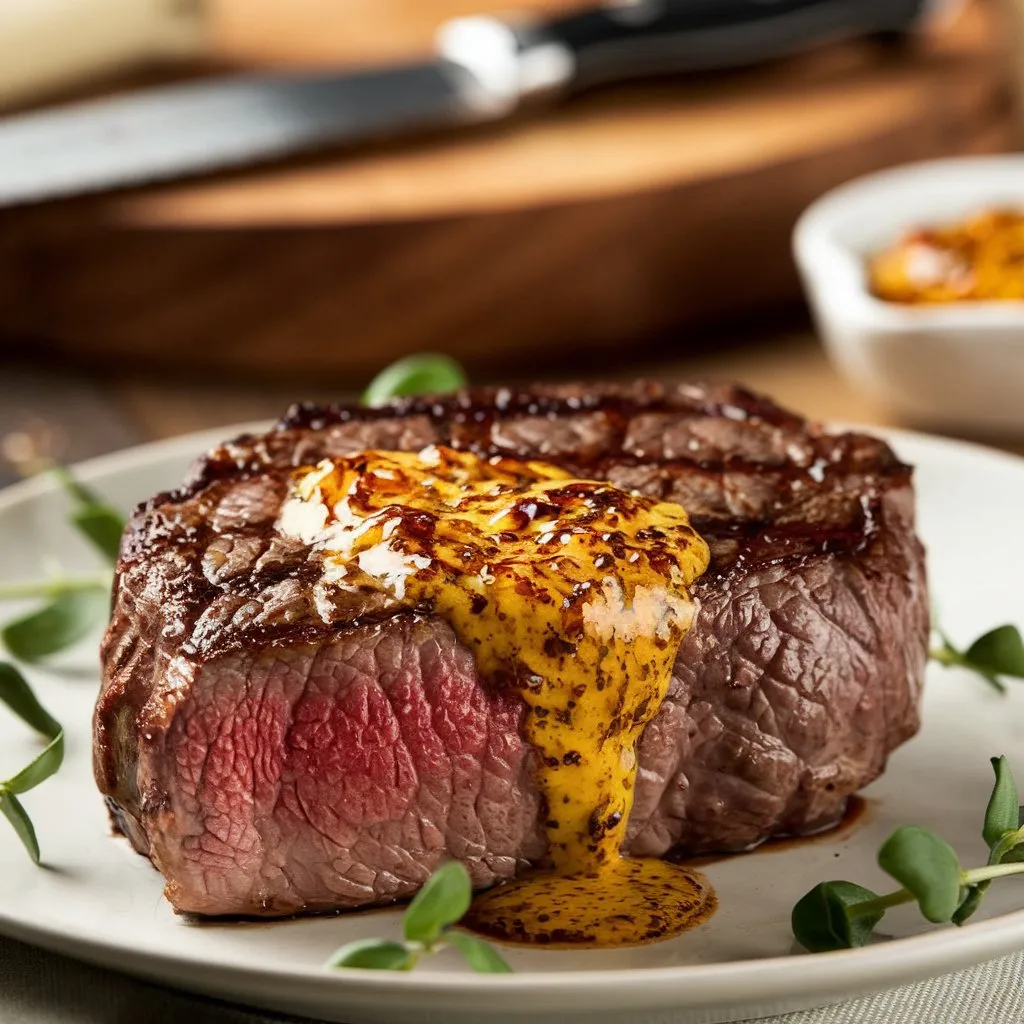
Here’s a classic Filet Mignon with Garlic Butter recipe that’s perfect for a special dinner or date night. Filet mignon is known for its tenderness, and when paired with a rich, flavorful garlic butter, it becomes an unforgettable dish. Let’s get cooking!
Ingredients
For the Filet Mignon:
- 2 filet mignon steaks (6–8 oz each, about 1.5 inches thick)
- 1 tbsp olive oil (or high smoke-point oil like avocado oil)
- 1 tsp kosher salt
- 1/2 tsp black pepper
- 1 tbsp unsalted butter (for searing)
For the Garlic Butter:
- 4 tbsp (1/2 stick) unsalted butter, softened
- 2 garlic cloves, minced
- 1 tbsp fresh parsley, finely chopped
- 1/2 tsp lemon zest (optional)
- 1/4 tsp salt
- 1/4 tsp black pepper
Instructions
Preparing the Garlic Butter:
- In a small bowl, combine the softened butter, minced garlic, chopped parsley, lemon zest (if using), salt, and pepper. Mix well.
- Transfer the garlic butter onto a sheet of plastic wrap, roll it into a log, and twist the ends to seal. Refrigerate until firm (about 15–20 minutes).
Cooking the Filet Mignon:
- Bring the steaks to room temperature:
- Remove the filet mignon from the refrigerator 30 minutes before cooking to allow it to come to room temperature. This ensures even cooking.
- Season the steaks:
- Pat the steaks dry with paper towels. Season both sides generously with salt and pepper.
- Preheat the skillet:
- Heat a cast-iron skillet or heavy-bottomed pan over medium-high heat. Add the olive oil and let it heat until shimmering.
- Sear the steaks:
- Place the filet mignon in the hot skillet and sear for 2–3 minutes on each side or until a golden-brown crust forms.
- Add 1 tbsp of butter to the skillet during the last minute of searing. Tilt the pan and spoon the melted butter over the steaks for extra flavor.
- Check the internal temperature:
- Use a meat thermometer to check the doneness:
- Rare: 120–125°F (49–52°C)
- Medium-rare: 130–135°F (54–57°C)
- Medium: 140–145°F (60–63°C)
- Remove the steaks from the skillet when they are 5°F below your desired temperature, as they will continue to cook while resting.
- Use a meat thermometer to check the doneness:
- Rest the steaks:
- Transfer the filet mignon to a plate and let them rest for 5–10 minutes. This allows the juices to be redistributed, ensuring a juicy steak.
Serving:
- Slice the chilled garlic butter into rounds.
- Place a round of garlic butter on top of each filet mignon while it’s still warm, allowing it to melt over the steak.
- Serve with your favorite sides, such as mashed potatoes, roasted vegetables, or a fresh salad.
Tips for Success
- Use a meat thermometer: This ensures your steak is cooked to the perfect doneness.
- Don’t overcrowd the pan: Cook one or two steaks at a time to ensure a good sear.
- Let the steaks rest: Resting is crucial for a juicy, tender steak.
- Customize the garlic butter: Add herbs like thyme or rosemary, or a dash of Worcestershire sauce for extra flavor.
Enjoy your perfectly cooked Filet Mignon with Garlic Butter! 🥩🧈
2. Lobster Tail with Lemon Butter Sauce Recipe
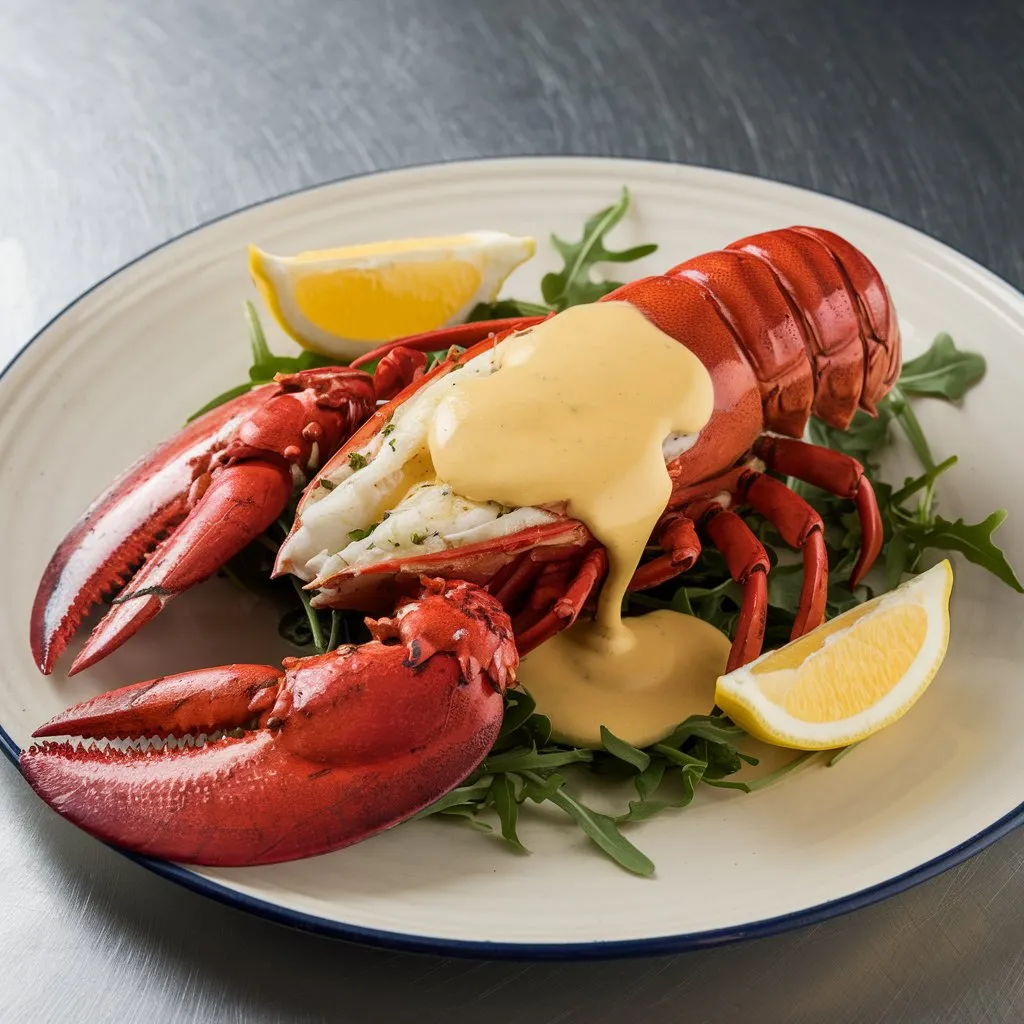
Here’s a luxurious Lobster Tail with Lemon Butter Sauce recipe that’s perfect for a special occasion or a fancy dinner at home. This dish is simple to prepare but delivers restaurant-quality results with tender, succulent lobster and a rich, tangy lemon butter sauce.
Ingredients
For the Lobster Tails:
- 2 lobster tails (6–8 oz each)
- 2 tbsp unsalted butter, melted
- 1 tbsp olive oil
- 1/2 tsp salt
- 1/4 tsp black pepper
- 1/2 tsp paprika (optional, for color)
- 1 lemon, cut into wedges (for serving)
For the Lemon Butter Sauce:
- 1/2 cup (115g) unsalted butter
- 2 garlic cloves, minced
- 1/4 cup (60ml) fresh lemon juice (about 1–2 lemons)
- 1 tsp lemon zest
- 1/4 tsp salt
- 1/4 tsp black pepper
- 2 tbsp chopped fresh parsley (optional, for garnish)
Instructions
Preparing the Lobster Tails:
- Preheat the oven to 425°F (220°C). Line a baking sheet with parchment paper or foil.
- Prepare the lobster tails:
- Using kitchen shears, cut through the top shell of each lobster tail lengthwise, stopping at the base of the tail. Be careful not to cut through the bottom shell.
- Gently pry open the shell and lift the lobster meat out, keeping it attached at the base. Place the meat on top of the shell.
- Pat the lobster tails dry with paper towels.
- Season the lobster:
- Brush the lobster meat with melted butter and olive oil. Sprinkle with salt, pepper, and paprika (if using).
- Bake the lobster tails:
- Place the lobster tails on the prepared baking sheet, meat side up. Bake for 12–15 minutes, or until the meat is opaque and cooked through. The internal temperature should reach 140°F (60°C).
Making the Lemon Butter Sauce:
- While the lobster is baking, melt the butter in a small saucepan over medium heat.
- Add the minced garlic and sauté for 1–2 minutes until fragrant.
- Stir in the lemon juice, lemon zest, salt, and pepper. Let the sauce simmer for 2–3 minutes, then remove from heat.
- Stir in the chopped parsley (if using).
Serving:
- Remove the lobster tails from the oven and let them rest for 2–3 minutes.
- Drizzle the lemon butter sauce over the lobster tails or serve it on the side for dipping.
- Garnish with additional parsley and serve with lemon wedges.
Tips for Success
- Buying lobster tails: Look for fresh or frozen lobster tails. If frozen, thaw them in the refrigerator overnight.
- Butterfly the tails carefully: Use sharp kitchen shears to avoid tearing the meat.
- Don’t overcook: Lobster tails can become tough if overcooked, so keep an eye on them in the oven.
- Grilling option: Instead of baking, you can grill the lobster tails over medium-high heat for 5–7 minutes, basting with butter.
Enjoy your elegant and flavorful Lobster Tail with Lemon Butter Sauce! 🦞🍋
3.Creamy Shrimp Scampi Pasta Recipe
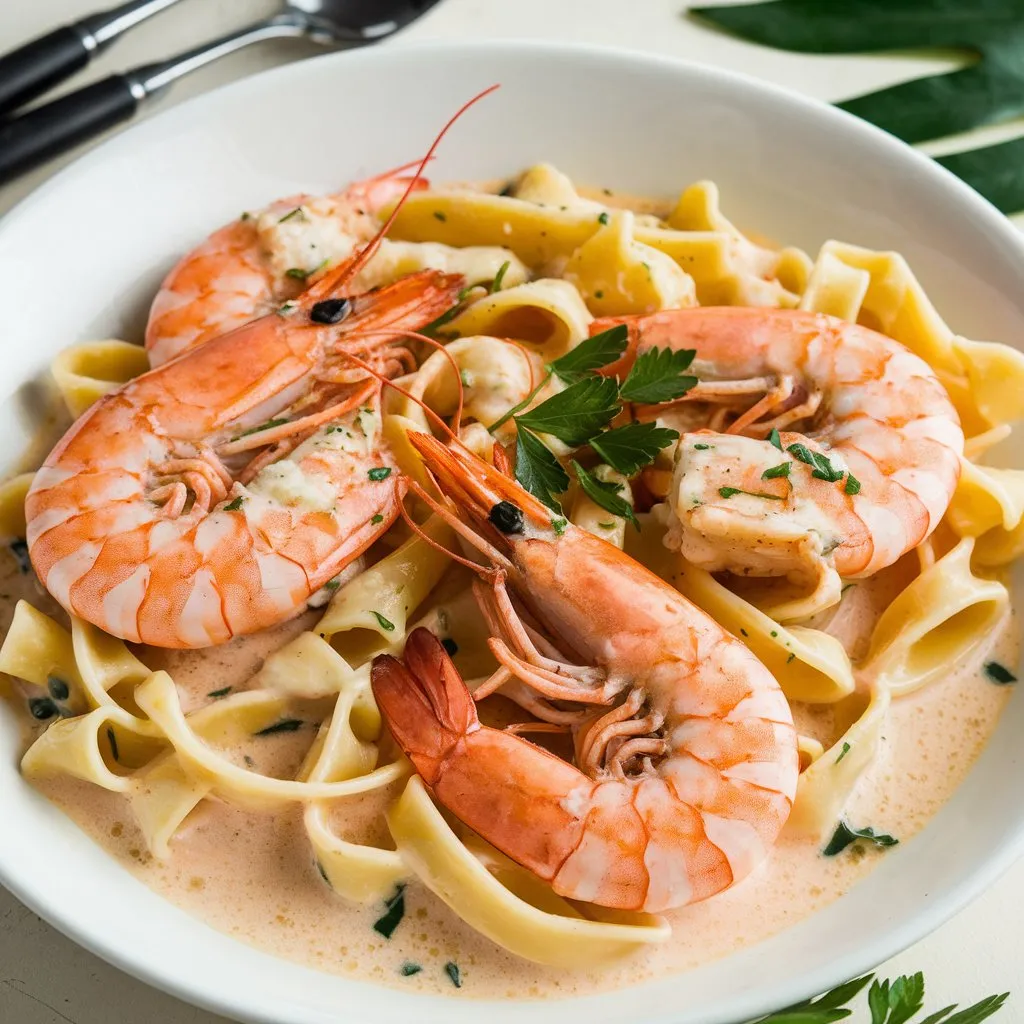
Here’s a delicious creamy shrimp scampi pasta recipe that combines succulent shrimp, garlic, butter, and a creamy sauce for a luxurious and satisfying meal. It’s quick to make and perfect for a weeknight dinner or a special occasion.
Ingredients :
- 12 oz (340g) linguine or spaghetti
- 1 lb (450g) large shrimp, peeled and deveined
- 3 tbsp unsalted butter
- 2 tbsp olive oil
- 4–5 garlic cloves, minced
- 1/2 cup (120ml) dry white wine (or substitute with chicken broth)
- 1 cup (240ml) heavy cream
- 1/2 cup (120ml) grated Parmesan cheese, plus extra for serving
- 1/4 tsp red pepper flakes (optional, for a bit of heat)
- Salt and black pepper, to taste
- 1/4 cup chopped fresh parsley (plus extra for garnish)
- 1 lemon (zest and juice)
- 1/2 cup reserved pasta water (if needed)
Instructions :
- Cook the pasta:
- Bring a large pot of salted water to a boil. Cook the pasta according to package instructions until al dente. Reserve 1/2 cup of pasta water, then drain the pasta and set aside.
- Prepare the shrimp:
- Pat the shrimp dry with paper towels and season lightly with salt and pepper.
- In a large skillet, heat 1 tbsp olive oil over medium-high heat. Add the shrimp and cook for 1–2 minutes per side, until pink and opaque. Remove the shrimp and set aside.
- Make the sauce:
- In the same skillet, melt the butter with the remaining 1 tbsp olive oil over medium heat. Add the minced garlic and red pepper flakes (if using), and sauté for 1–2 minutes until fragrant.
- Pour in the white wine (or chicken broth) and let it simmer for 2–3 minutes to reduce slightly.
- Stir in the heavy cream and bring to a gentle simmer. Let it cook for 2–3 minutes until slightly thickened.
- Combine everything:
- Add the cooked pasta, shrimp, and Parmesan cheese to the skillet. Toss everything together until well-coated in the sauce. If the sauce is too thick, add a splash of the reserved pasta water to loosen it.
- Stir in the lemon zest, lemon juice, and chopped parsley. Season with salt and pepper to taste.
- Serve:
- Divide the pasta among serving plates. Garnish with extra Parmesan cheese, parsley, and a sprinkle of red pepper flakes if desired.
- Serve immediately with a side of garlic bread or a fresh salad.
Tips for Success :
- Use fresh, high-quality shrimp for the best flavor.
- Don’t overcook the shrimp, as they can become rubbery.
- Adjust the creaminess by adding more or less pasta water as needed.
- For a lighter version, you can substitute half-and-half or milk for the heavy cream.
Enjoy your creamy, garlicky, and indulgent Shrimp Scampi Pasta! 🍤🍝
4. Chocolate Lava Cake Recipe
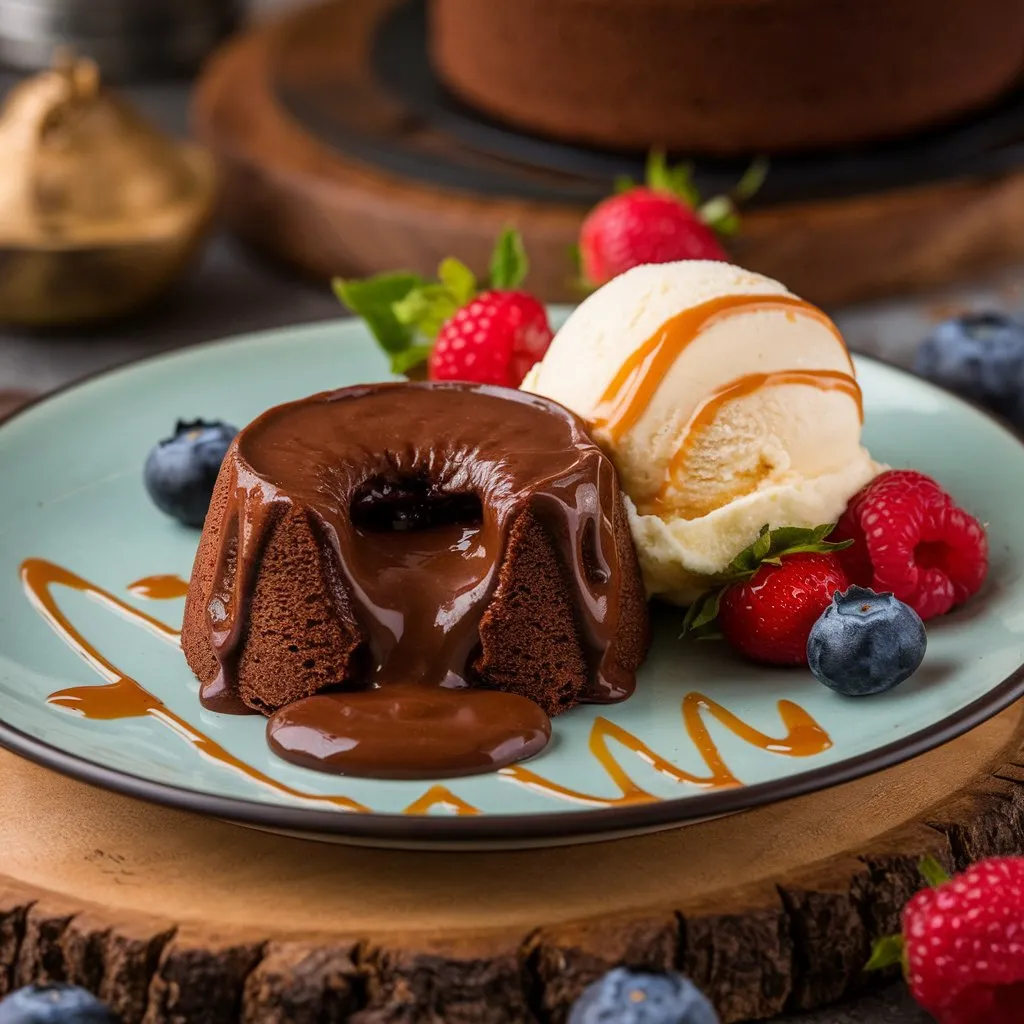
A classic chocolate lava cake recipe that’s rich, decadent, and perfect for wowing your guests. It has a gooey, molten chocolate center that oozes out when you cut into it. Let’s get started!
Ingredients
- 4 oz (115g) high-quality dark chocolate (at least 70% cocoa)
- 1/2 cup (115g) unsalted butter
- 1/2 cup (60g) powdered sugar
- 2 large eggs
- 2 large egg yolks
- 1/4 cup (30g) all-purpose flour
- 1/4 tsp salt
- 1 tsp vanilla extract (optional)
- Butter or cooking spray (for greasing ramekins)
- Cocoa powder or flour (for dusting ramekins)
Instructions
- Preheat the oven to 425°F (220°C). Grease 4 ramekins (6 oz size) with butter or cooking spray, then dust them with cocoa powder or flour. Tap out any excess.
- Melt the chocolate and butter:
- In a microwave-safe bowl or using a double boiler, melt the chocolate and butter together until smooth. Stir occasionally to ensure even melting. Let it cool slightly.
- Prepare the batter:
- In a separate bowl, whisk together the powdered sugar, eggs, egg yolks, and vanilla extract (if using) until light and fluffy.
- Gradually fold the melted chocolate mixture into the egg mixture.
- Sift in the flour and salt, then gently fold until just combined. Do not overmix.
- Fill the ramekins:
- Divide the batter evenly among the prepared ramekins, filling them about 3/4 full.
- Bake:
- Place the ramekins on a baking sheet and bake for 10–12 minutes. The edges should be set, but the center should still be soft and jiggly. Be careful not to overbake, or the lava center will solidify.
- Serve:
- Let the cakes cool for 1–2 minutes, then run a knife around the edges to loosen them.
- Invert each ramekin onto a plate, tap gently, and lift to release the cake.
- Serve immediately with a dusting of powdered sugar, fresh berries, vanilla ice cream, or whipped cream.
Tips for Success
- Use high-quality chocolate for the best flavor.
- Do not overbake—the center should be molten.
- If you don’t have ramekins, you can use a muffin tin, but adjust the baking time accordingly.
Enjoy your warm, gooey, and indulgent Chocolate Lava Cakes! 🍫🍰
5. Strawberry Spinach Salad with Balsamic Glaze Recipe
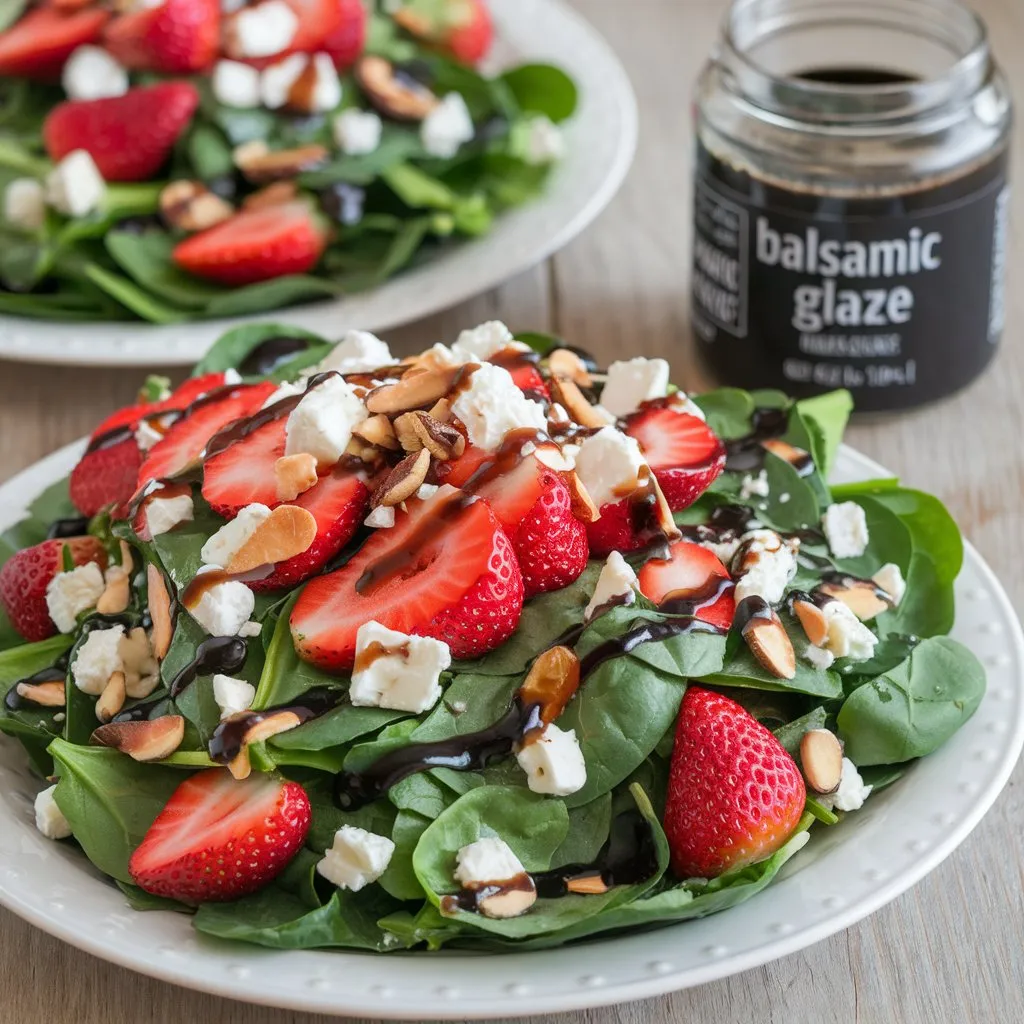
Here’s a delicious and refreshing Strawberry Spinach Salad with a Balsamic Glaze Recipe that’s perfect as a light lunch or a side dish for dinner.
Ingredients:
- For the Salad:
- 6 cups fresh baby spinach leaves, washed and dried
- 1 pint fresh strawberries, hulled and sliced
- 1/2 cup crumbled feta cheese (optional)
- 1/4 cup sliced almonds or pecans, lightly toasted
- 1/4 red onion, thinly sliced (optional)
- 1 avocado, diced (optional)
- For the Balsamic Glaze:
- 1 cup balsamic vinegar
- 2 tablespoons honey or maple syrup
- For the Dressing (Optional, if you want a lighter dressing instead of just glaze):
- 2 tablespoons extra-virgin olive oil
- 1 tablespoon lemon juice
- Salt and freshly ground black pepper, to taste
Instructions:
- Prepare the Balsamic Glaze:
- In a small saucepan, combine 1 cup of balsamic vinegar with 2 tablespoons of honey (or maple syrup).
- Bring the mixture to a boil over medium-high heat, then reduce the heat to a simmer.
- Allow it to reduce until it thickens slightly and coats the back of a spoon (this should take about 8-10 minutes). Be careful not to over-reduce; the glaze should remain pourable.
- Remove from heat and let it cool. The glaze will thicken further as it cools.
- Assemble the Salad:
- In a large salad bowl, combine the baby spinach, sliced strawberries, and red onion (if using). Add the diced avocado and crumbled feta cheese for extra creaminess and flavor.
- Gently toss in the toasted almonds or pecans for a crunchy texture.
- Dress the Salad:
- Option 1: Drizzle the prepared balsamic glaze directly over the salad. The sweet and tangy glaze will beautifully complement the fresh ingredients.
- Option 2: For a lighter dressing, drizzle 2 tablespoons of extra-virgin olive oil and 1 tablespoon of lemon juice over the salad. Season with salt and pepper to taste, then toss gently. Finish with a drizzle of the balsamic glaze on top.
- Serve Immediately:
- Once the salad is dressed, serve immediately to enjoy the crisp textures and vibrant flavors.
- This salad is best enjoyed fresh, though it can be refrigerated (without the dressing) and assembled just before serving.
Tips & Variations:
- Protein Boost: Add grilled chicken, shrimp, or tofu for a heartier meal.
- Cheese Options: Swap feta for goat cheese or blue cheese if you prefer a different flavor profile.
- Nut Alternatives: Use walnuts or pistachios if almonds or pecans aren’t available.
- Glaze Consistency: If your glaze becomes too thick, stir in a teaspoon of water until it reaches your desired consistency.
6. Champagne Risotto Recipe
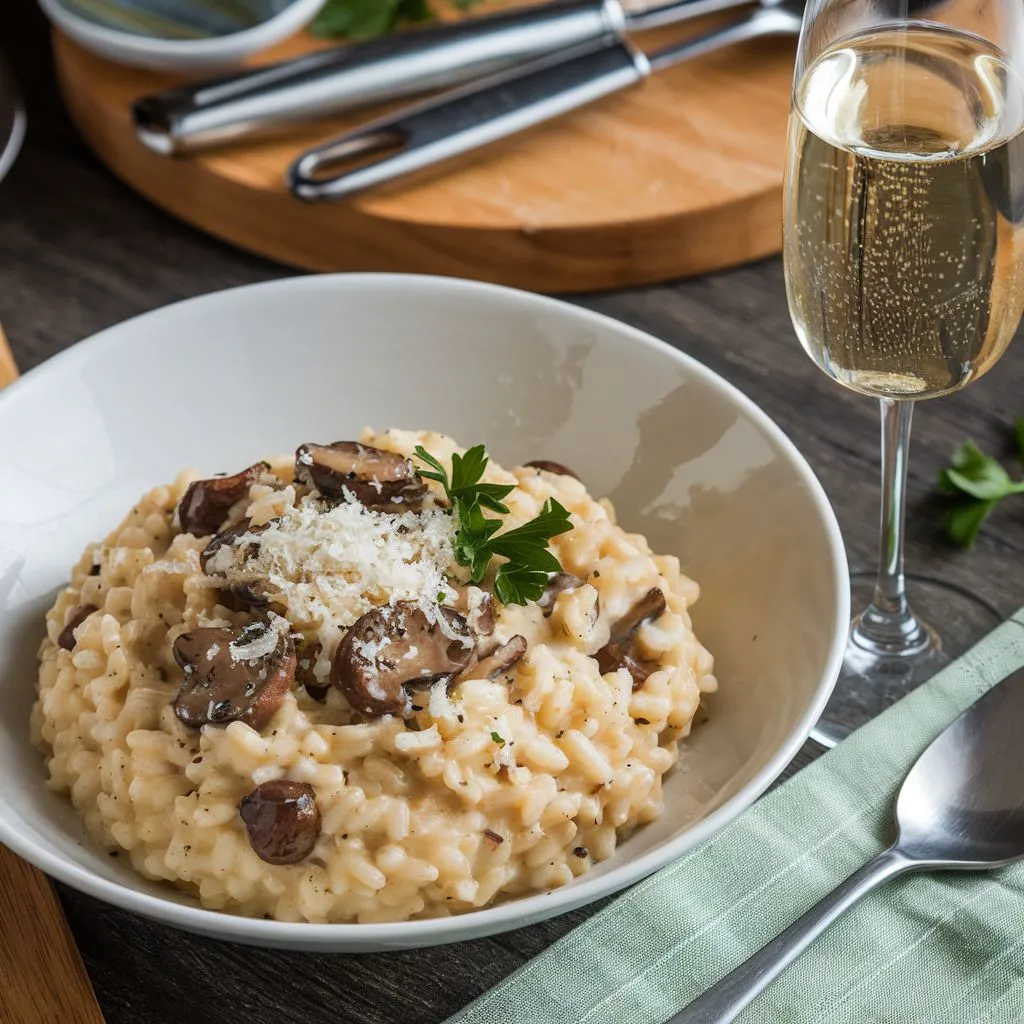
Below is a delicious and luxurious Champagne Risotto Recipe that’s perfect for impressing guests or enjoying a special night. This recipe infuses the creamy texture of traditional risotto with a sparkling twist of champagne, resulting in a dish that’s both elegant and comforting.
Ingredients:
- 1 1/2 cups Arborio rice
- 1 small onion, finely chopped
- 2 cloves garlic, minced
- 1 cup champagne or sparkling wine (choose a dry variety)
- 4 cups chicken or vegetable broth, kept warm
- 2 tablespoons unsalted butter (divided)
- 1/2 cup grated Parmesan cheese
- Salt and freshly ground black pepper, to taste
- Fresh herbs (such as parsley or chives) for garnish
- (Optional: A splash of heavy cream for extra richness)
Instructions:
- Prepare Your Broth:
In a saucepan, heat the chicken or vegetable broth over low heat. Keep it warm throughout the cooking process. - Sauté Aromatics:
In a large, deep skillet or a wide-bottomed pot, melt 1 tablespoon of butter over medium heat. Add the chopped onion and sauté until it becomes soft and translucent, about 3-4 minutes. Add the garlic and cook for another 1 minute until fragrant. - Toast the Rice:
Stir in the Arborio rice, ensuring that each grain is well coated with butter. Toast the rice for about 2 minutes, stirring frequently, until it starts to turn slightly translucent around the edges. - Deglaze with Champagne:
Pour in the champagne and allow it to simmer while stirring continuously. Let the rice absorb the champagne completely, which should take about 2-3 minutes. - Gradually Add Broth:
Begin adding the warm broth one ladle at a time. Stir constantly and wait until each ladle of broth is mostly absorbed before adding the next. Continue this process for about 18-20 minutes, or until the rice is creamy and just tender (it should still have a slight bite in the center). - Finish the Risotto:
Once the rice reaches your desired consistency, remove the pan from heat. Stir in the remaining tablespoon of butter and the grated Parmesan cheese. If you’re using heavy cream, add a splash now for extra creaminess. Season with salt and freshly ground black pepper to taste. - Serve and Garnish:
Spoon the risotto into warm bowls and garnish with freshly chopped herbs. Serve immediately while hot and enjoy the luxurious flavors!
Tips for Perfect Champagne Risotto:
- Consistency: The ideal risotto should be creamy and slightly fluid. It should spread out on a plate rather than hold a strict shape.
- Stirring: Constant stirring helps release the rice’s natural starch, creating the signature creamy texture of a good risotto.
- Champagne Choice: Use a dry champagne or sparkling wine to avoid an overly sweet flavor in your risotto.